Save Energy Costs with the VICKI LoRaWAN® Radiator Thermostat – Part 1
Last changes on 3rd January, 2025
- Addition of links to suitable adapters for mounting the VICKI
- Addition of section “Useful accessories for VICKI radiator thermostat”
The use of smart radiator thermostats is a simple way to optimize the heating of buildings and thus save up to over 30% heating energy*. This not only reduces costs, but also makes an important contribution to a healthier climate. In a small series of articles, we will show you how easy this can be to implement in practice using the example of the MClimate LoRaWAN radiator thermostat VICKI.
In this first part we will address the following points:
*Source: Case study, Institut für Technologie und Management im Baubetrieb (TMB), Karlsruher Institut für Technologie (KIT)
Advantages of a LoRaWAN® Radiator Thermostat
Before we get to the MClimate VICKY thermostat itself, we would like to briefly explain the advantages of a LoRaWAN® based radiator thermostat . In principle, it is always suitable for use when the heating in buildings is to be controlled efficiently via a LoRaWAN® network . The main advantages are:
- Remote monitoring/control through data transmission over long distances
- More reliable data transmission than technologies such as WLAN or Bluetooth due to very good building penetration and high interference immunity
- Very low energy requirement/consumption = low maintenance, long-lasting, cost-effective and ideally suited for measuring points/locations that are otherwise difficult to access
Simple and fast integration into existing LoRaWAN® networks/infrastructures
MClimate VICKI in Short Profile
The MClimate VICKI is, in short, a smart thermostatic radiator valve that can be used to remotely monitor and regulate the temperature and humidity in heated rooms.
The special thing: The thermostat works both with and without LoRaWAN® , so that uninterrupted operation is guaranteed even if the connection is interrupted. Even if you can find the complete description including the technical specifications in the manual or data sheet, some key data are summarized here for you:
Areas of application
The MClimate VICKY is particularly suitable for the following commercial and private indoor applications:
- Smart Building
- Smart school
- Smart office
- Smart home
Core Features and Specifications
- Monitoring of temperature (+/- 0.20 °C) and humidity (+/- 2 % RH)
- Manual and automatic temperature control via algorithm with external temperature measurement
- Automatic detection of open doors/windows
- Configuration/control of the target temperature via App or Downlinks
- Manual valve opening control
- 2-digit display to show temperature, low battery and more
- Parental controls
- Over the Air (OTAA) activation
- Powered by 2x AA 1.5 VDC lithium batteries
- Battery life of up to 10 years (depending on configuration and environmental conditions)
- Standard valve connection M30 x 1.5
- Available adapter types: RA, RAV, RAVL, ORAS, Oventrop (others on request)
- Open protocol without vendor lock-in for seamless integration into numerous third-party systems
Transmission Behavior
In the factory default configuration, the thermostat sends a data packet every 10 minutes when a LoRaWAN® connection exists. This contains, among other things, the following information:
- Stored target temperature
- Actual temperature
- Relative Humidity
- Radiator valve motor position
- Battery voltage
- Window open (yes/no)
- Sensor defective (yes/no)
- Parental control status (active/inactive)
You can find a complete list of all parameters in the data sheet or at https://mclimate.eu/pages/payload-helper.
We will show to what extent you can change this standard configuration in another article.
Installation and commissioning in the ZENNER Connect LoRaWAN® network
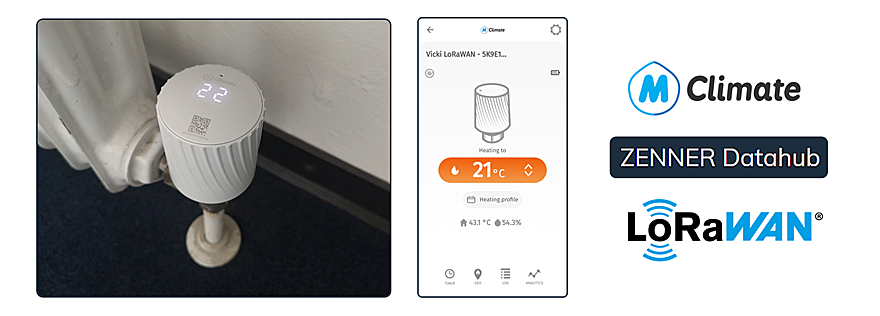
The commissioning of the thermostat is shown here using the example of the IoT platform ZENNER Datahub and the MClimate Home app .
Step 1: Integration of the VICKI into the LoRaWAN® network
Before the actual installation and commissioning, you must integrate the VICKI into the LoRaWAN® network . In this example, this is done by adding it to the ZENNER Datahub in our ZENNER Connect LoRaWAN® network . This requires the use of a ZENNER IoT GatewayPLUS . How you can add devices to the platform is described in the Quick Guide – ZENNER Datahub .
Step 2: Linking ZENNER Datahub with MClimate App
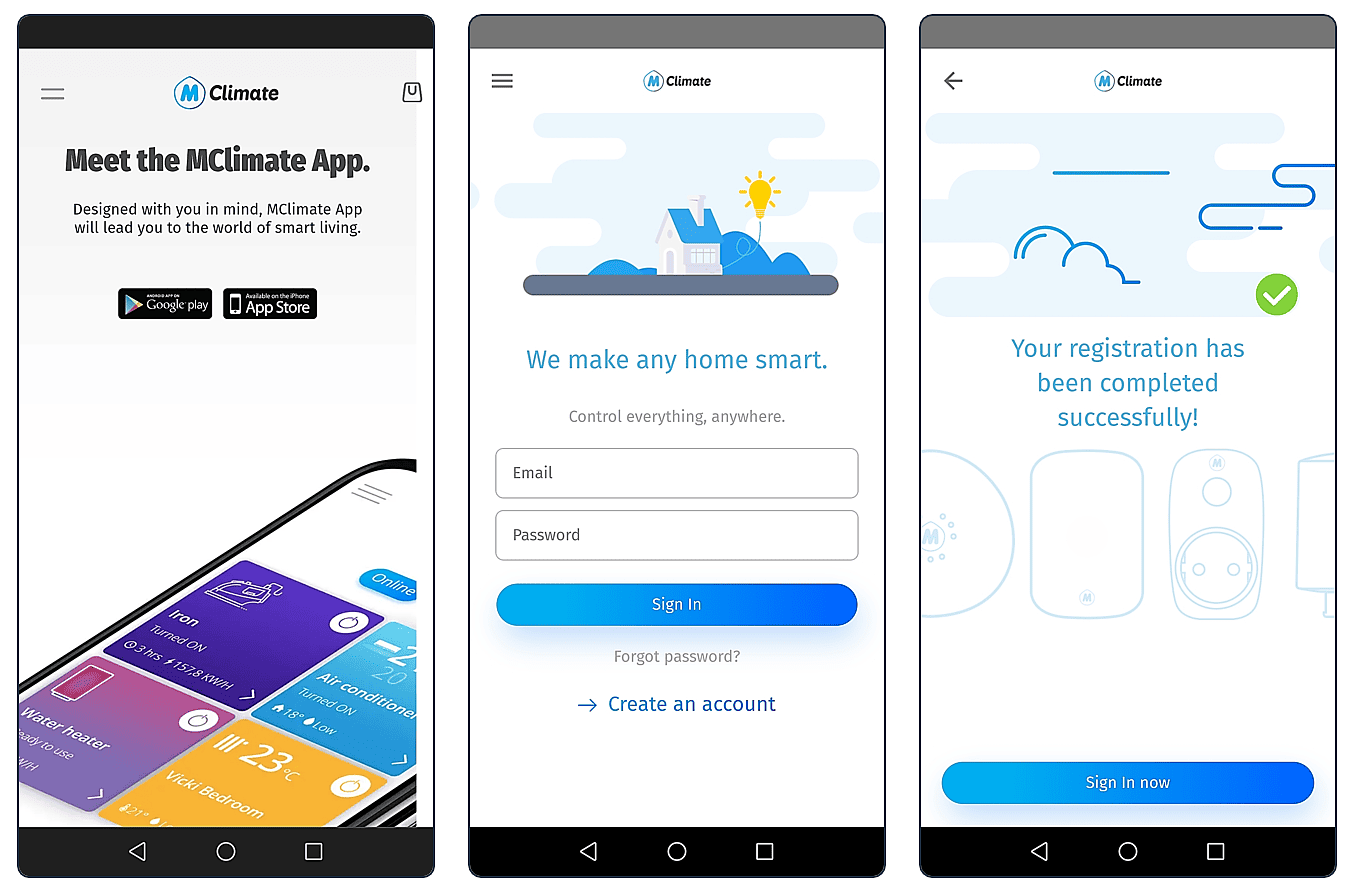
With the MClimate Home App you can, on the one hand, check whether you have installed your VICKI correctly and, on the other hand, it offers you a convenient way to monitor and control the thermostat. If you use an IoT platform such as the ZENNER Datahub as a basis, you must first link your ZENNER Datahub client with the MClimate app . To do this, simply proceed as follows:
- Install the MClimate Home App for Android or iOS on your smartphone or tablet and, if you don’t have one yet, create a new account.
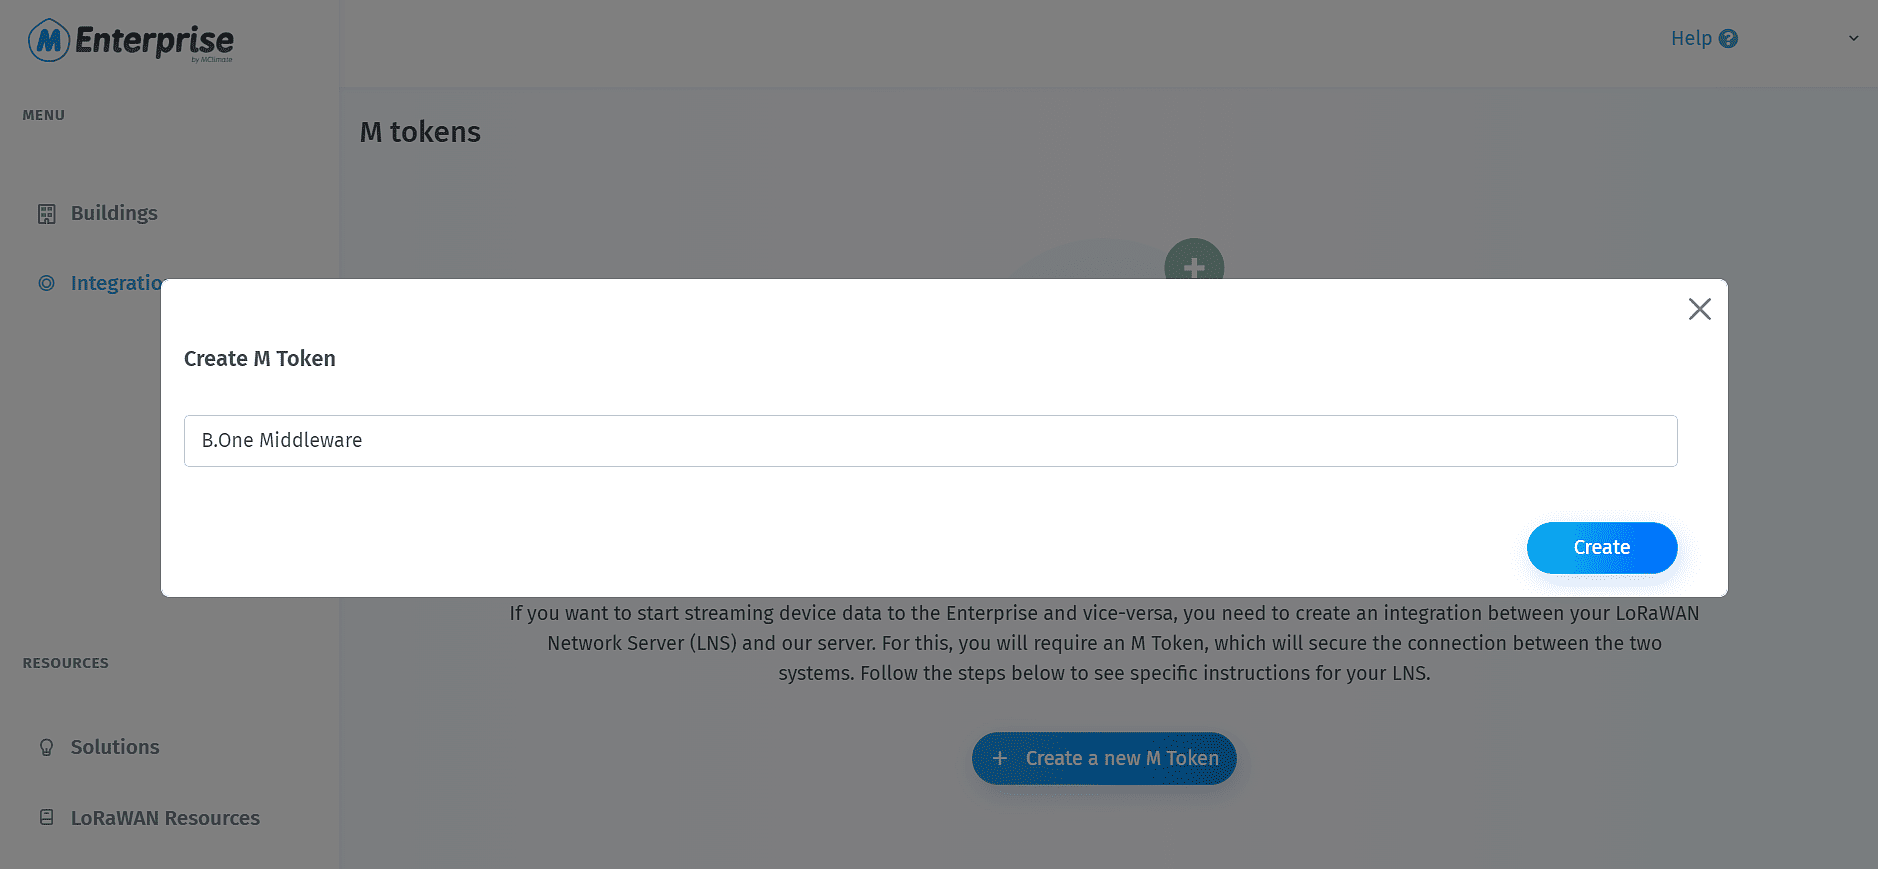
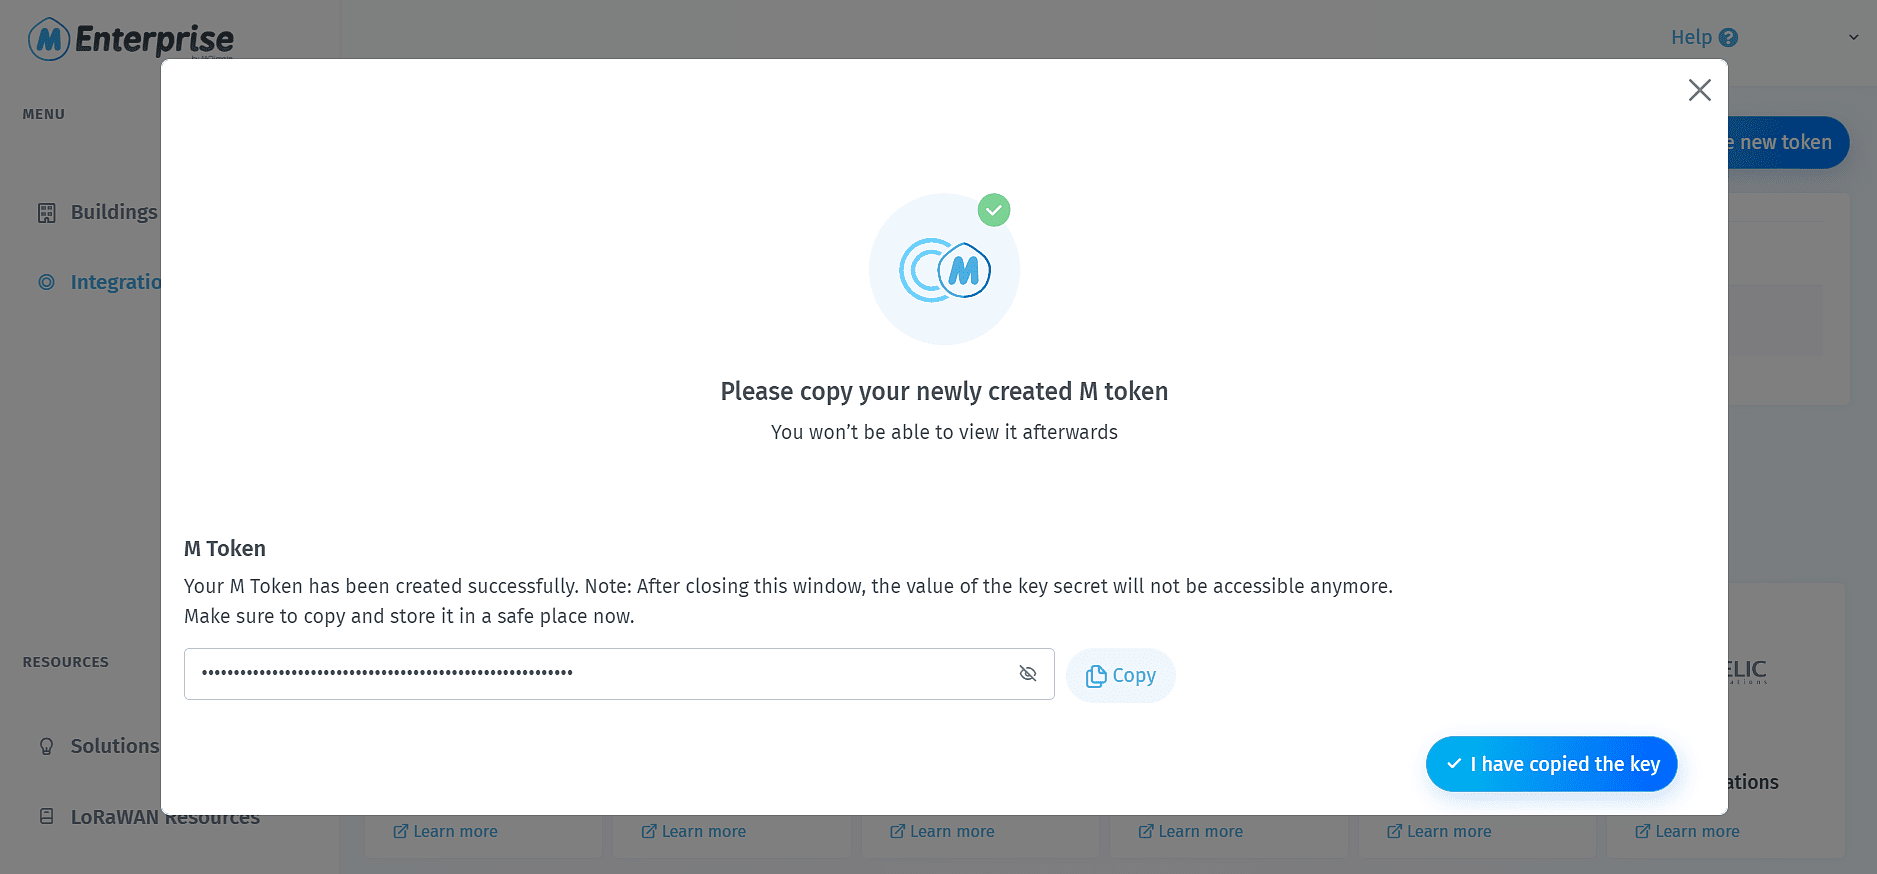
2. After logging in at https://enterprise.mclimate.eu/integrations with the access data you just created, create a so-called M-Token for sending uplinks from the ZENNER Datahub to the MClimate app , copy it to the clipboard and save it in a safe place.
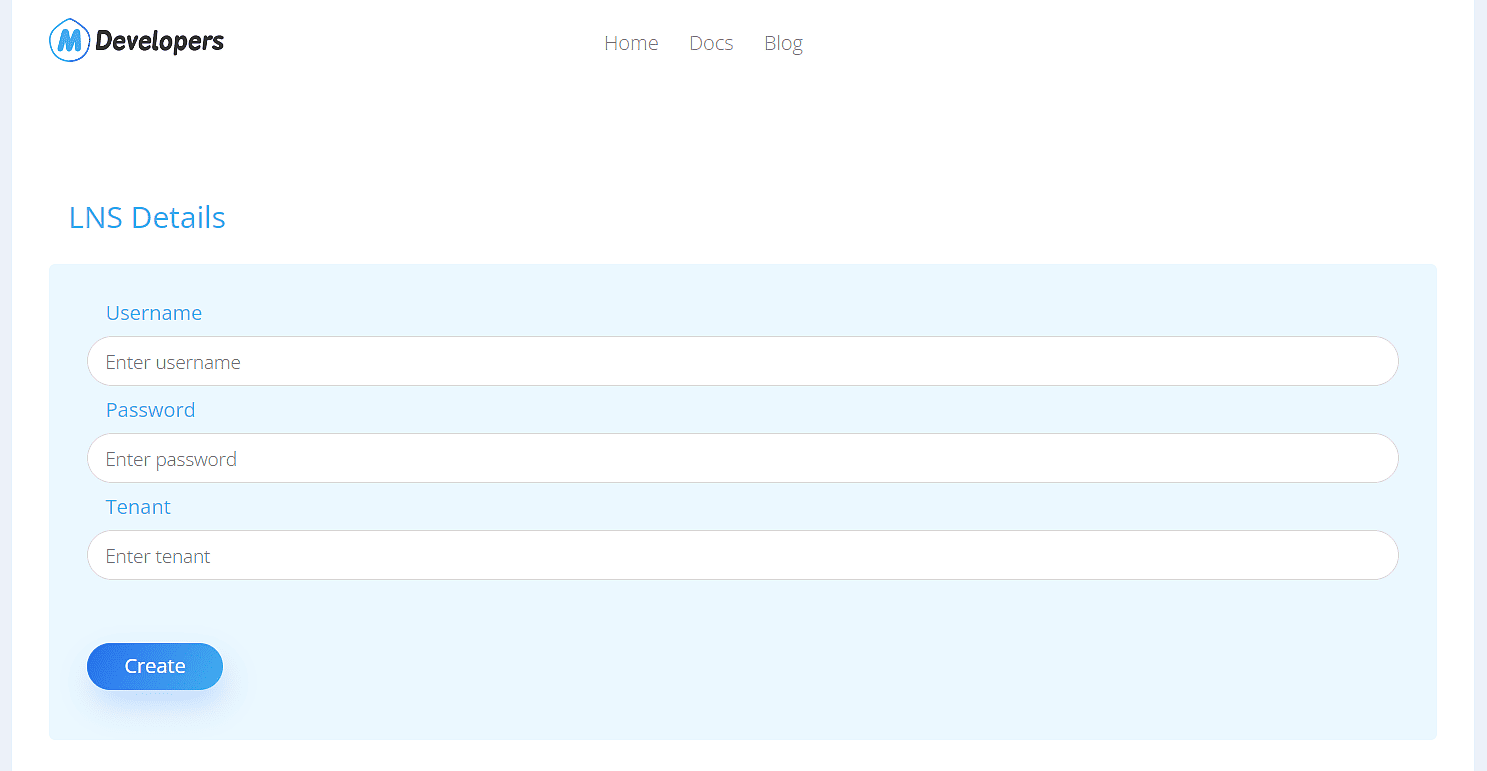
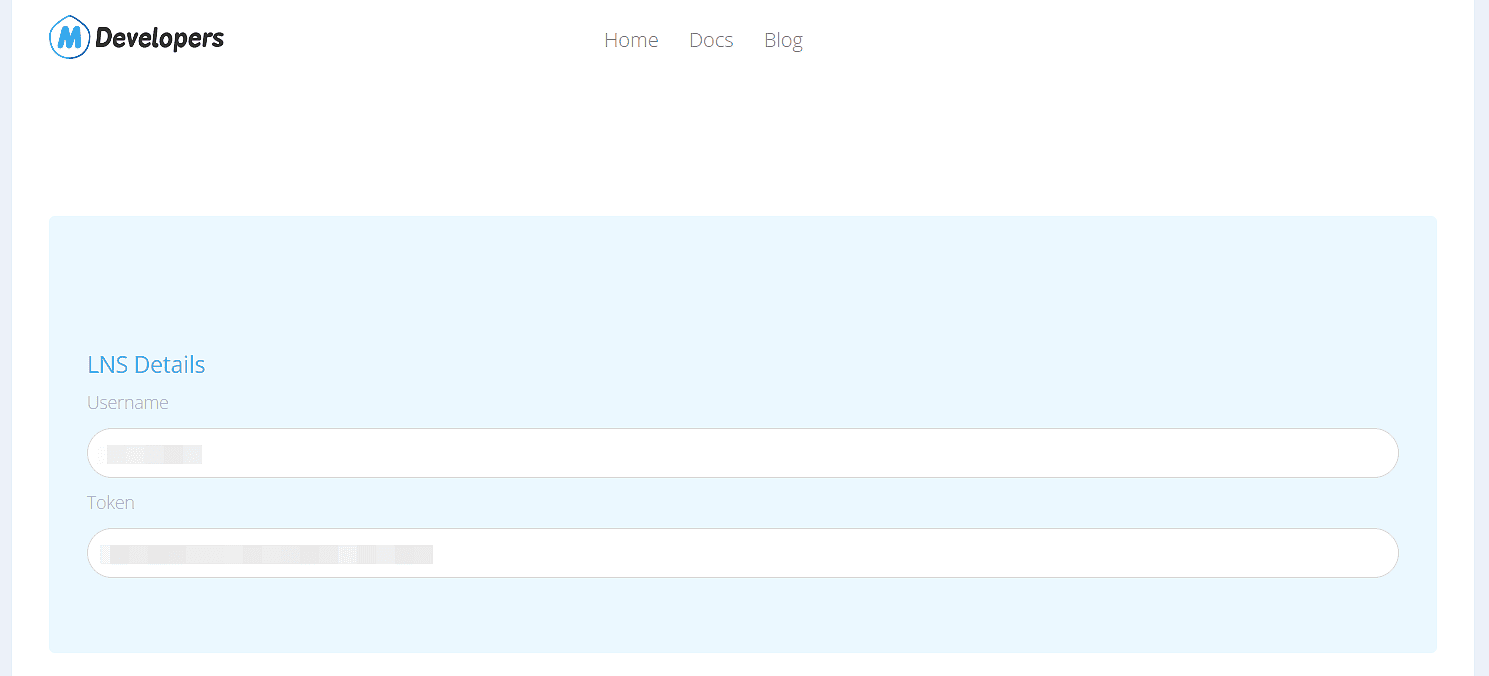
3. Log in to https://developers.mclimate.eu/ with your MClimate account details and then create a second token for sending downlinks from the MClimate app to the ZENNER Datahub at https://developers.mclimate.eu/b-one-token . To do this, you will need the access data for your ZENNER Datahub client. It’s best to copy also this token to the clipboard and save it in a safe place.
4. In the ZENNER Datahub under Management >> Forwardings add a new Forwarding Rule with the two created Tokens:
- URL: https://lorawan-broker.mclimate.eu/up-b-one?m-token={your m-token}
- Token: The second token created via https://developers.mclimate.eu/b-one-token (see 3.)
- Type: HTTP
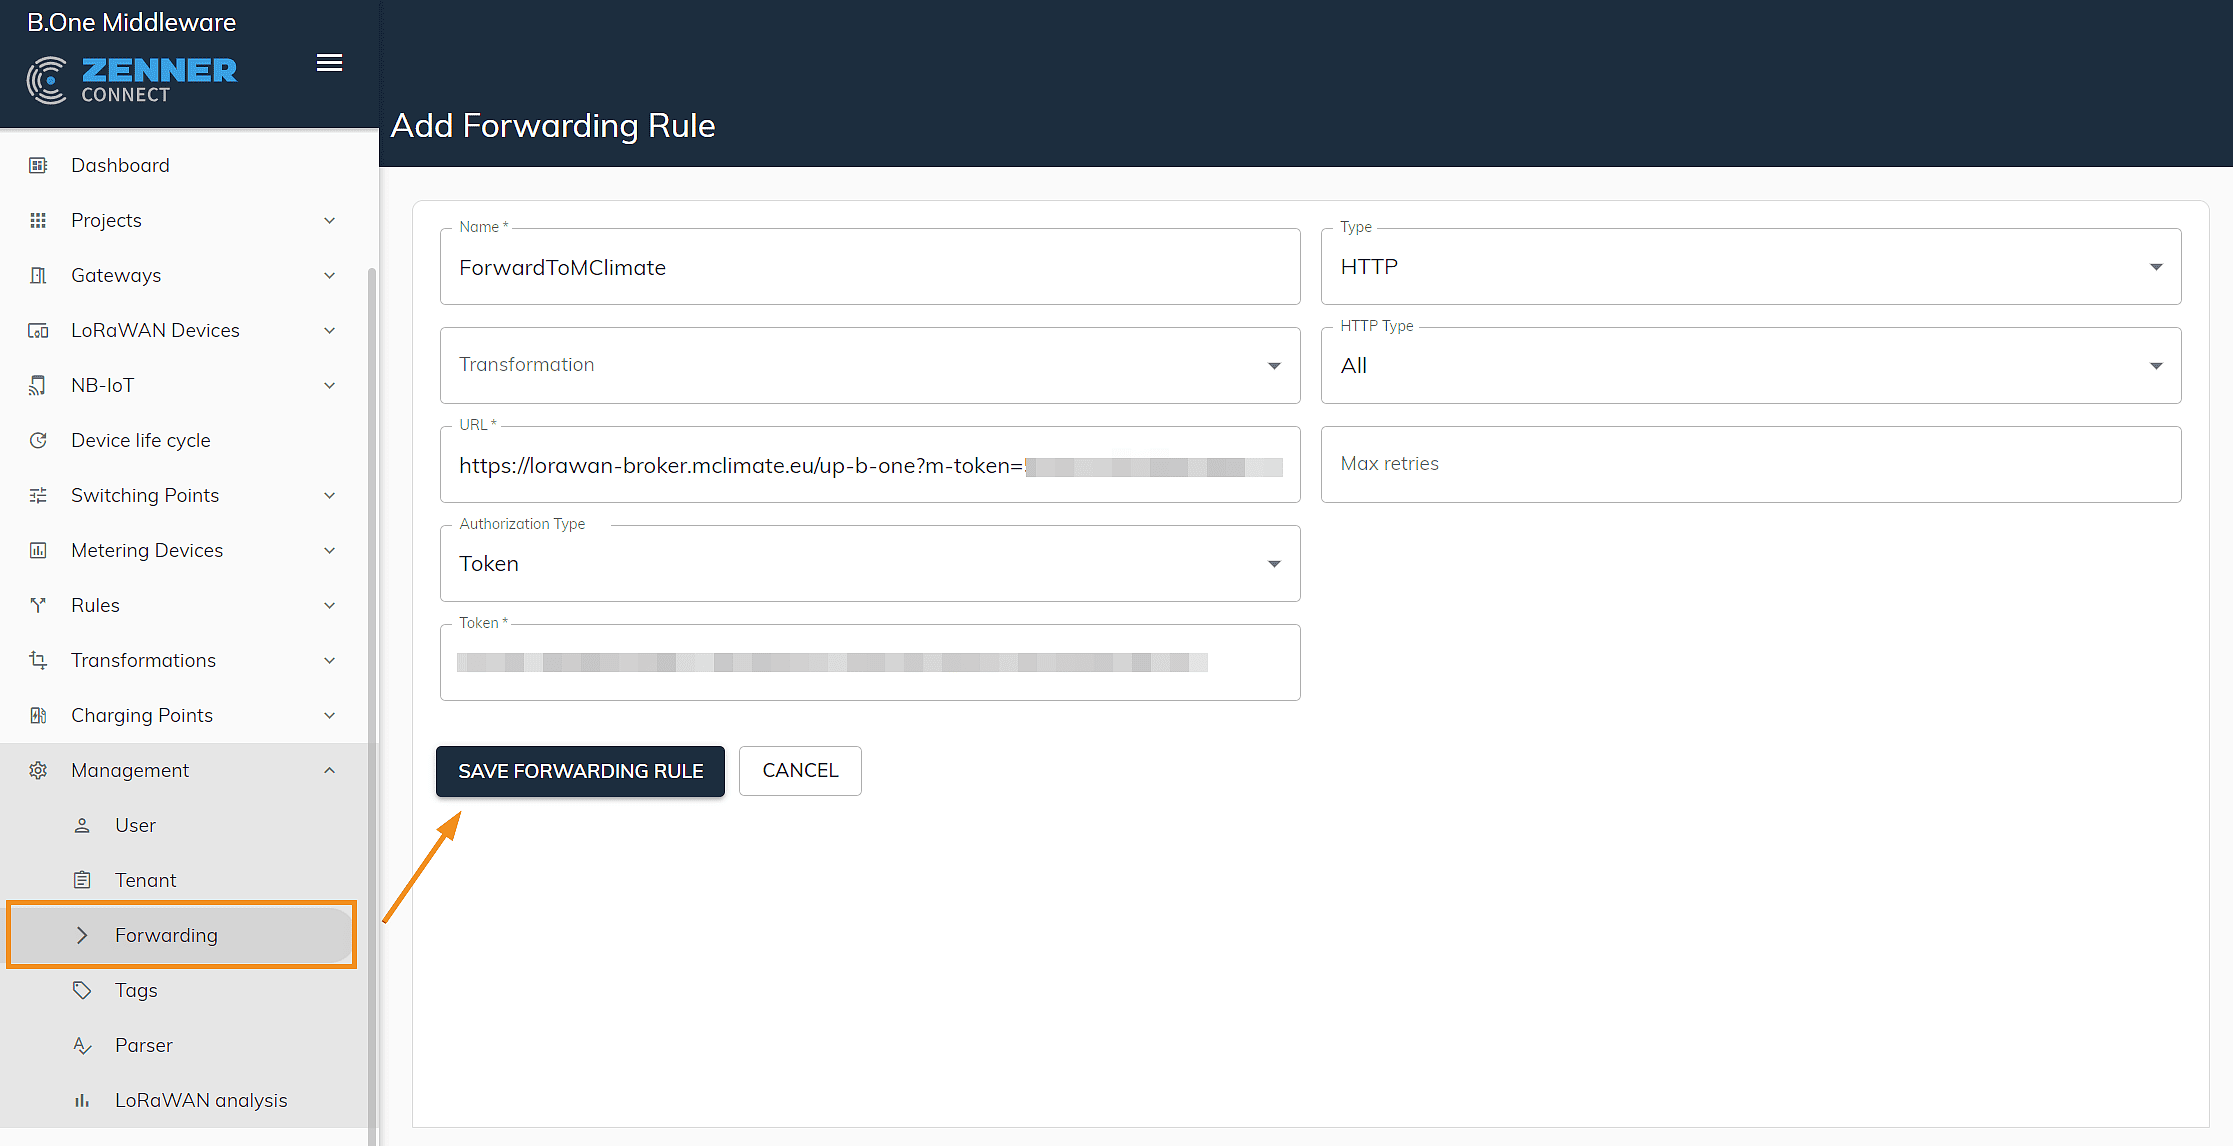
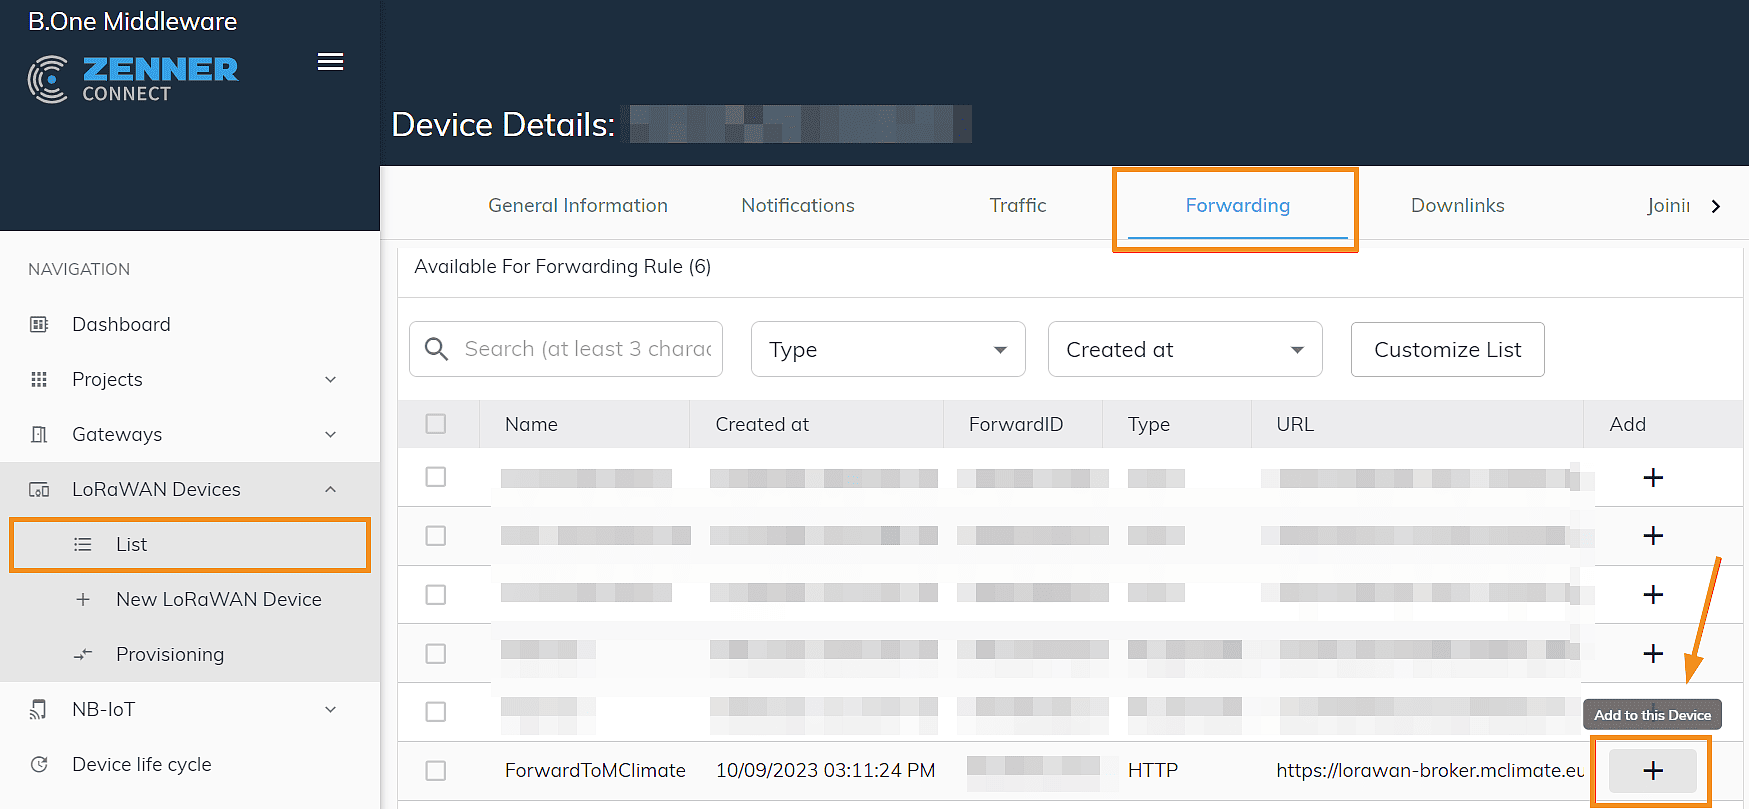
5. Now you have to assign the forwarding rule you created to your VICKI. This is very easy to do: call up your VICKI via the device list in the ZENNER Datahub and click on the plus icon on the right in the “ Forwarding ” tab in the “ Device details ”.
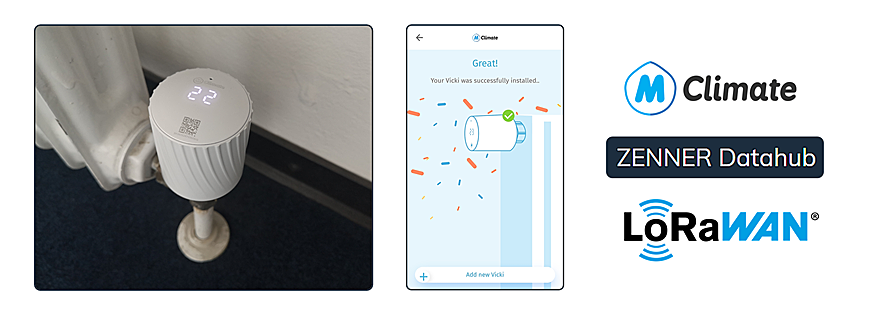
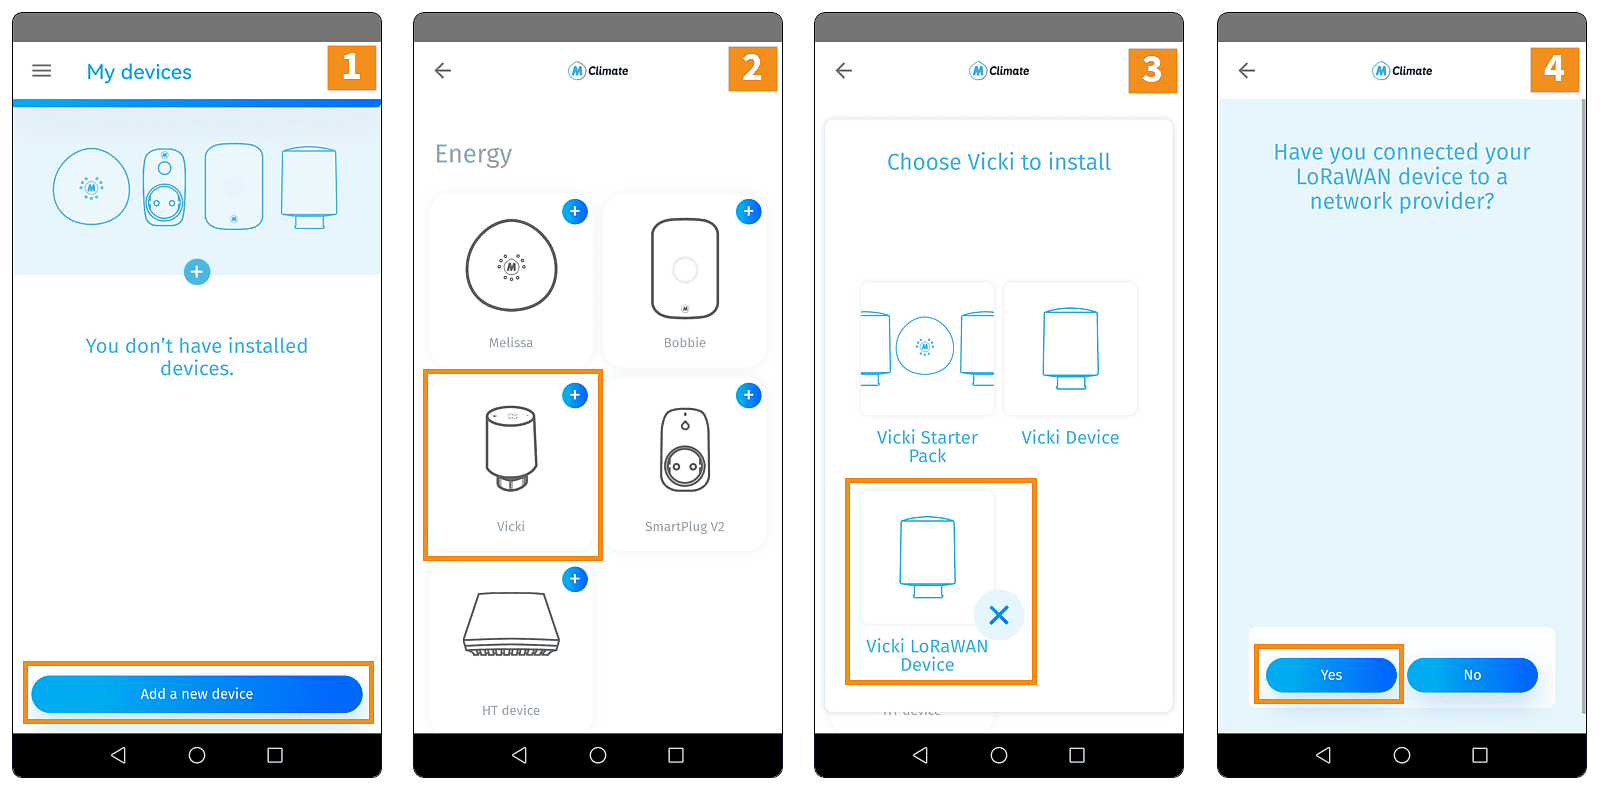
Step 3: Add VICKI in the MClimate App
To add your VICKI in the MClimate App, simply follow the wizard provided there. Here is a short screencast of it:
And here the whole thing again in pictures:
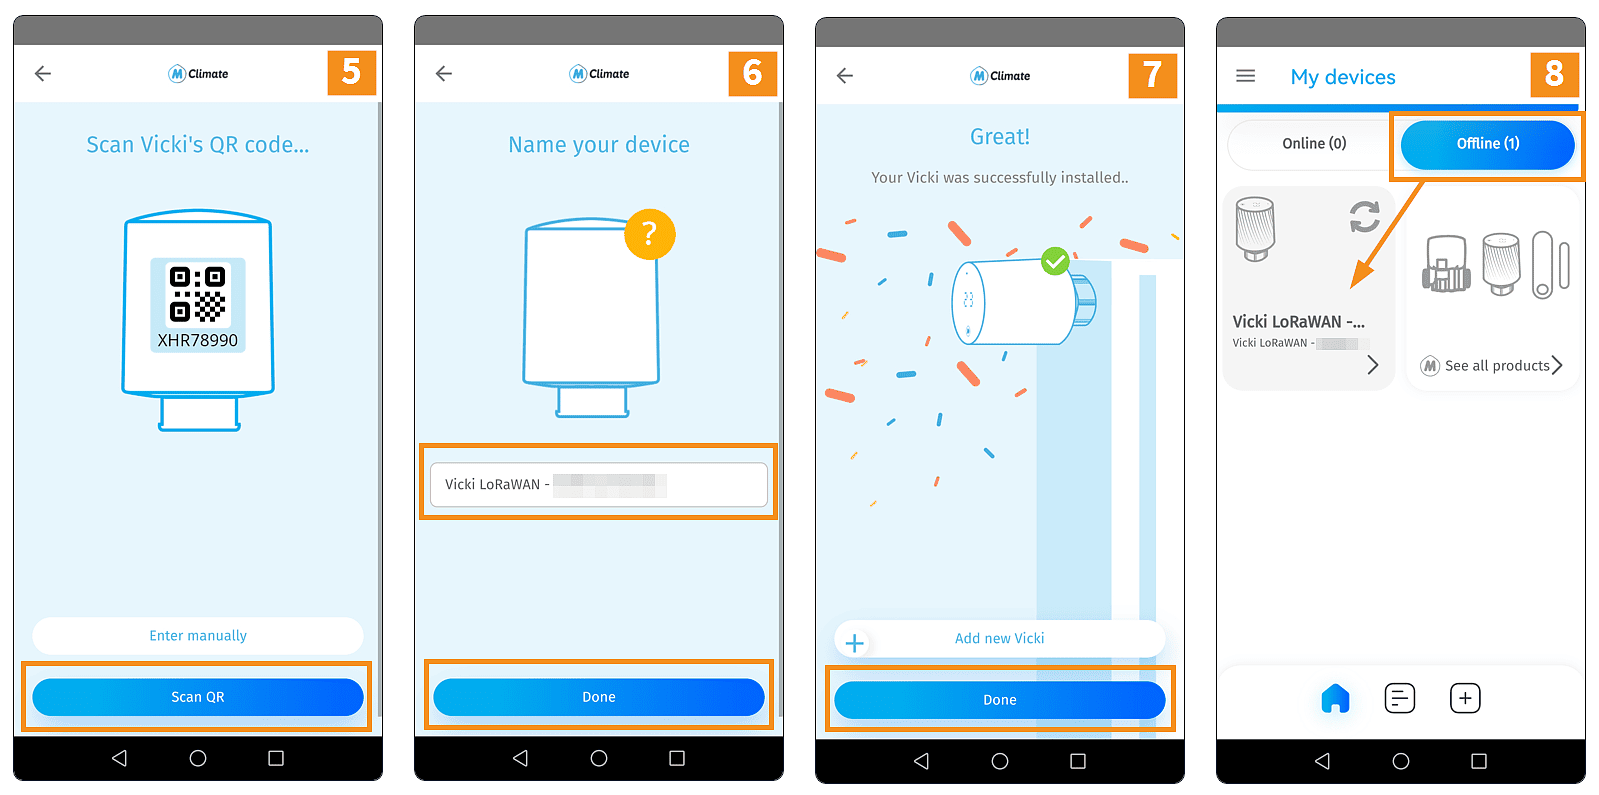
Note: At this point, the added VICKI is still displayed as offline, since the actual commissioning has not yet taken place. So don’t let that confuse you.
Step 4: Installation on the Radiator and Commissioning
Now we come to the actual installation on the radiator and the commissioning. Basically, you can easily install the VICKI thermostat yourself if you proceed as described and follow the correct order. But BE CAREFUL: If your heating system does not yet have a (conventional) thermostatic valve, you should leave the installation to a specialist, as water may leak out.
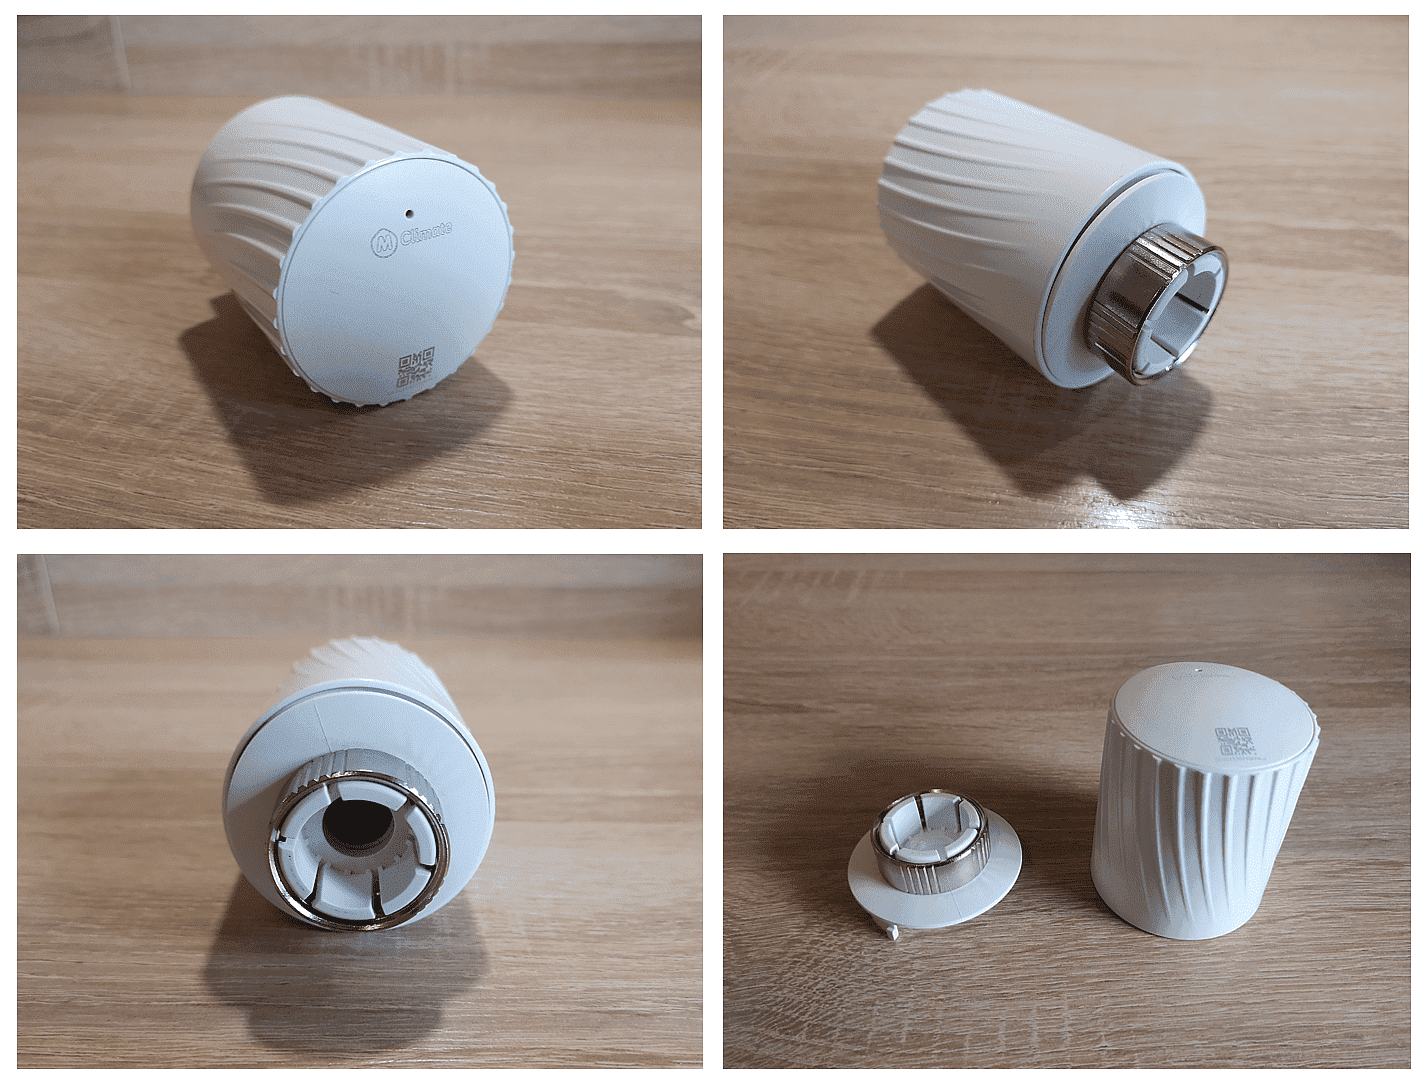
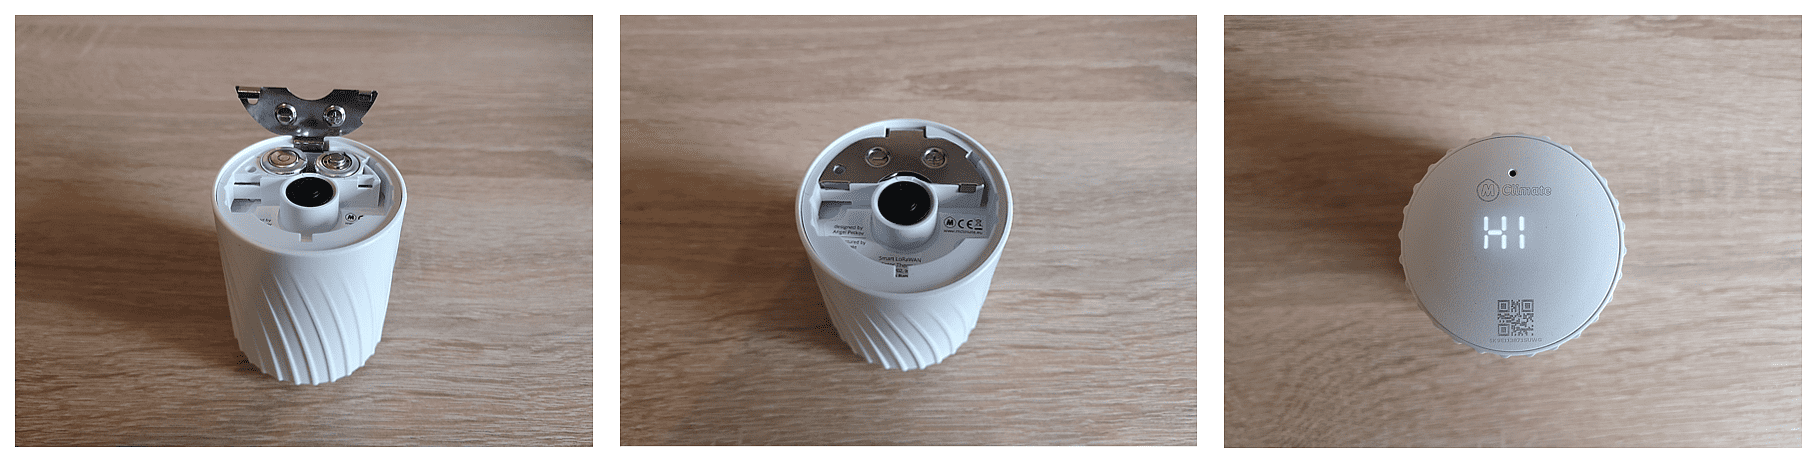
1. Insert Batteries
Normally the VICKI is delivered with the batteries already inserted. If this is the case, all you need to do is remove the protective film in the battery compartment. If the batteries are not yet installed, first remove the back plate of the VICKI and then carefully open the metal cover of the battery compartment with two fingers. If the batteries are inserted correctly and the cover is closed again, a “Hi” will appear on the display.
2. Mounting on the Radiator
To install the thermostat on the radiator, simply proceed as described in the instructions:
- Turn the old thermostat valve to the highest setting, e.g. 5
- Unscrew the locking ring and remove the thermostat
- Place the back plate of the VICKI on the thermostatic valve and screw the locking ring tight (simply by hand, no special tools required, DO NOT overtighten!)
- Place VICKI on the back plate and turn clockwise with moderate pressure on the display to fix the thermostat
Here’s the whole thing in a short video from the manufacturer: https://www.youtube.com/watch?v=4z_WnS4CDCY .
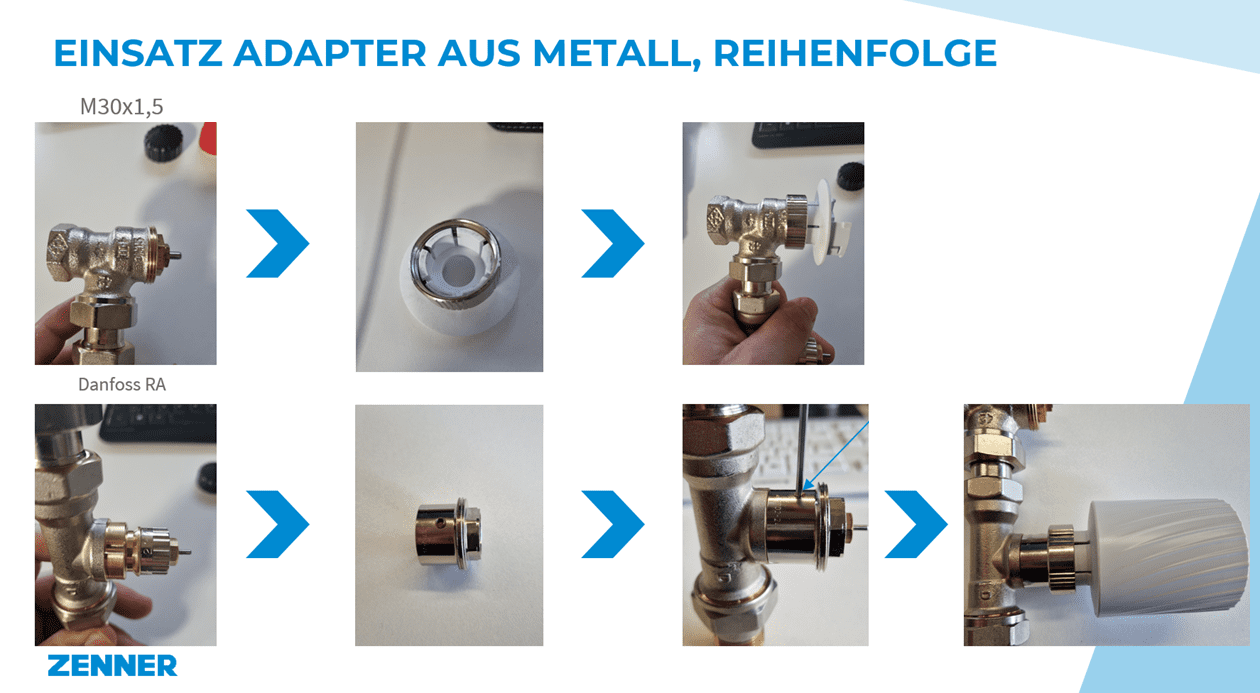
If additional adapters are required for connection, the following order must be observed:
Matching valve adapters for the VICKI radiator thermostat are also available in the ZENNERShop (no claim to completeness):
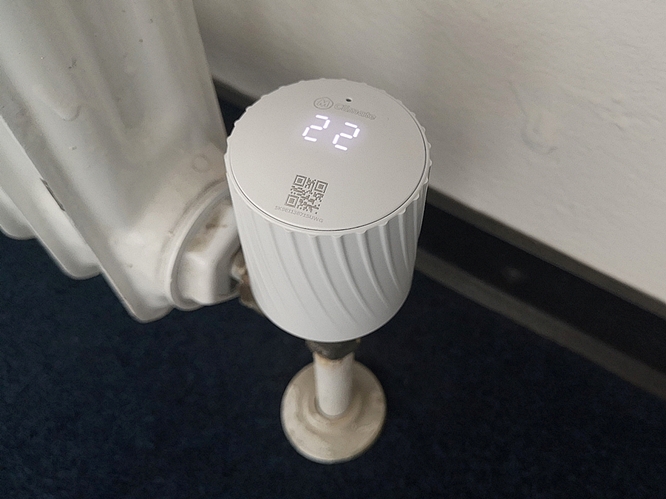
As can be seen in the video above, after successful installation, the display first shows an animation of the calibration and then the currently set target temperature when the VICKI is turned.
Here is another example of a fully assembled thermostat:
During calibration, the device also automatically starts the “Join” process , where it connects to the LoRaWAN® network. Unfortunately, whether the whole thing was successful is not shown directly on the display. You can recognize this because your VICKI is now displayed in the app as online and by clicking on it you can access further detailed views including the slider for changing the target temperature. In addition, in the ZENNER Datahub in the detailed view of the device under “ Joining ” or “Connection setup” you should now see a “Join Request” on the left and a “ Join Accept ” on the right. See also “ Howto: Install LoRaWAN® sensors correctly and avoid missing data ”.
“Lessons Learned” from Customer Projects
At this point we would like to pass on a few “Lessons Learned” regarding assembly from realized customer projects:
- In some cases, as already described above, so-called valve adapters are required for assembly. Here, it has been shown that metal adapters (as shown in the graphic above) are more durable and also more stable in system operation.
- Preparation for work is everything: Before installation – especially for larger quantities – it should be clarified which radiators are located where in the building. It is advisable to use unique identification numbers here.
- When installing, you should proceed like you would when changing a meter and always move clockwise through the building, rooms and areas.
- The assembly order is crucial: the adapter and the back plate must always be assembled first (see above). Only then can the thermostat be screwed on!
- For larger quantities, it is recommended to use a field service / workforce management tool to digitize assembly orders and documentation. It may also be worth looking at a solution like ZENNER BuildingLink.
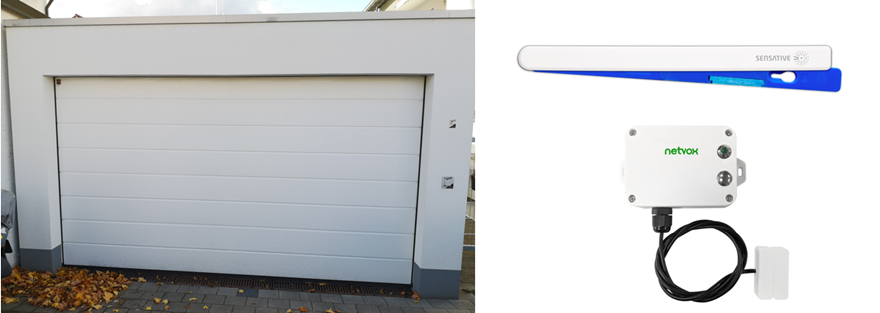
- Depending on requirements and installation situation/location, it may be useful to add additional accessories , such as theft protection or vandalism protection (see below).
Useful accessories for VICKI radiator thermostat
As mentioned above, depending on the installation situation or location, it is advisable to invest in additional accessories for the VICKI radiator thermostat , which you can also find in the ZENNERShop :
And in case the battery runs out after a few years, here are the replacement batteries : 2x batteries AA 1.5V 3Ah Lithium
Outlook for Part 2
You have now learned more about the intelligent radiator thermostat MClimate VICKI and seen how you can integrate it into a LoRaWAN® network and link it to the MClimate Home app using an IoT platform such as the ZENNER Datahub . In the second part we will take a closer look at controlling the VICKI via downlinks or the MClimate Home app.


Responses