Howto: Install LoRaWAN® Sensors correctly and avoid missing Data

Last modified on 19th January, 2025
Do you want to install LoRaWAN® devices and sensors yourself and ensure that everything works smoothly? Then in this article you will find out how best to proceed when installing and commissioning new sensors and what you need to pay attention to in order to avoid annoying errors. Even if you have already installed sensors but the desired data is not yet arriving in your platform such as the ZENNER Datahub, the following points are the things you can always check yourself first to find the cause. These are:
1. Add the sensor to the LoRaWAN® Network
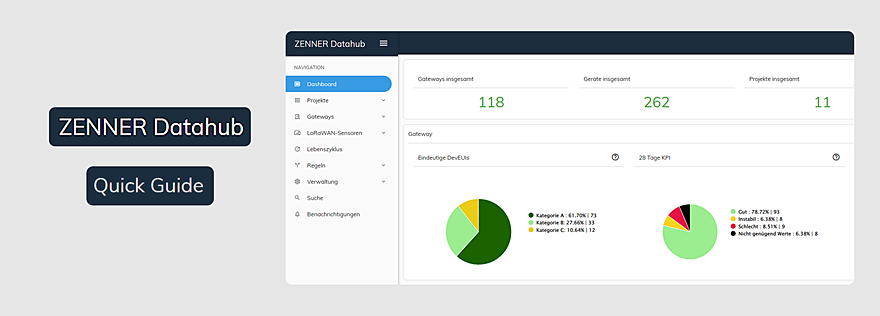
Before you install and activate a sensor, you should always make sure that the device has been added to the LoRaWAN® network you are using. In the case of the ZENNER Connect network, this is done by storing or adding your device to the ZENNER Datahub. Simply proceed as follows:
- In the left menu under “LoRaWAN® Devices” click on “+New LoRaWAN® Device”.
- Enter the required data. The device keys are always mandatory. For the most common device type “OTAA”, the “DevEUI”, the “JoinEUI” and the “AppKey” are always required. For the device type “ABP”, in addition to the “DevEUI”, the “Dev Address”, the “NwkSKey” and the “AppSKey”. All other information is optional (more on this in the Quick Guide – ZENNER Datahub and in the forum discussion “Creating new devices in the ZENNER Datahub)
- Click on “Save Device” at the bottom
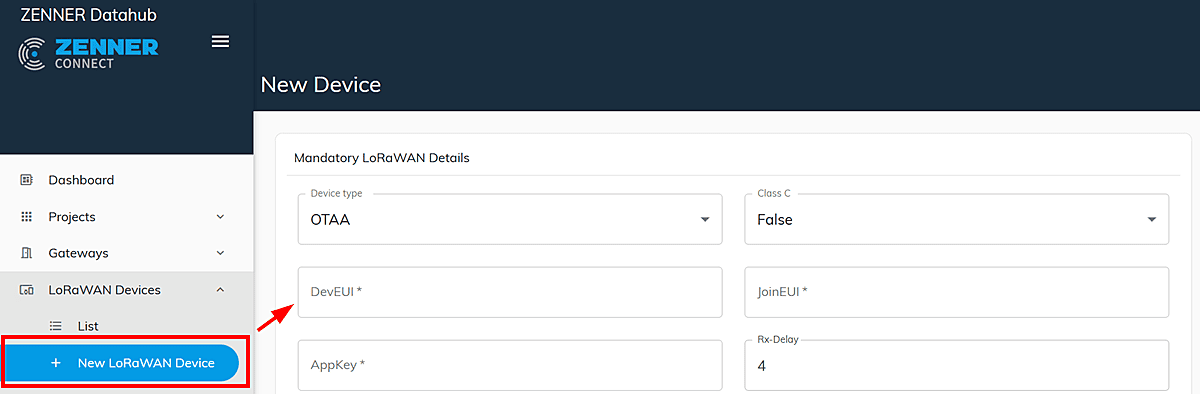
If the device has been added successfully, a corresponding success message appears and it can now be found in the “list” of all LoRaWAN® sensors.
2. Place and mount the Sensor correctly
Next you need to make sure that the sensor is placed in the right place and mounted properly. Remember to read the manufacturer’s instructions and do everything according to plan. A simple example: If a door/magnet sensor does not detect an opening movement, this may be because the magnet is simply too far away from the sensor when the door is closed to trigger an uplink. Or vice versa, if the opening is not recognized, both have been placed too close to each other. You should also make sure that no obstacles such as trees or buildings influence the sensor performance, even if these can be overcome better with LoRaWAN® than with most other transmission technologies. Placement is also crucial when installing in a building. If possible, this should not be done behind thick steel doors and concrete walls.
3. Check the Sending Interval
Many sensors do not always send their data immediately, but at certain intervals. It is therefore best to check before commissioning which transmission interval is stored for the respective sensor and whether this transmission interval meets your needs. After all, you want to make sure that you get the data when you need it. So if no data arrives after installing and activating your sensors, it may simply take a while until the next or first data packet is sent. Alternatively, depending on the sensor, you can also trigger the sending of a data packet manually.
4. Check and monitor the Battery Status
Battery life is an important point. Therefore, check the battery status regularly and replace the batteries in good time before they are empty. This way, unexpected failures can be avoided. When you install a new sensor for the first time, you should always check first whether and which batteries are required for it and whether they have sufficient voltage.
5. Check the LoRaWAN® Connection
Make sure there are enough LoRaWAN® gateways near your sensors to receive the sent data. If the signal is weak or there are no gateways nearby, data may be lost. Before you permanently install the sensor, you should check where you have the best LoRaWAN® reception or whether there is sufficient reception at the intended installation location. If this is not the case, another gateway may need to be installed first. To check the LoRaWAN® connection/reception quality, it is possible to use for example an Adeunis field tester, as mentioned in the article “Ideal Mounting Location for IoT Gateway using the Example of the ZENNER GatewayPLUS SMART”.
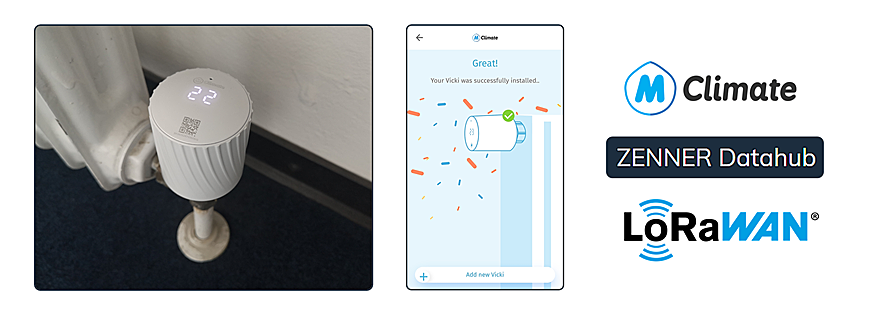
6. Switch on the Sensor and configure it correctly
Make sure the sensor is activated, i.e. switched on, and configured correctly. All information about this can usually be found in the manufacturer’s operating instructions. Also observe the readings on the sensor, if present, to ensure that everything is OK with the sensor.
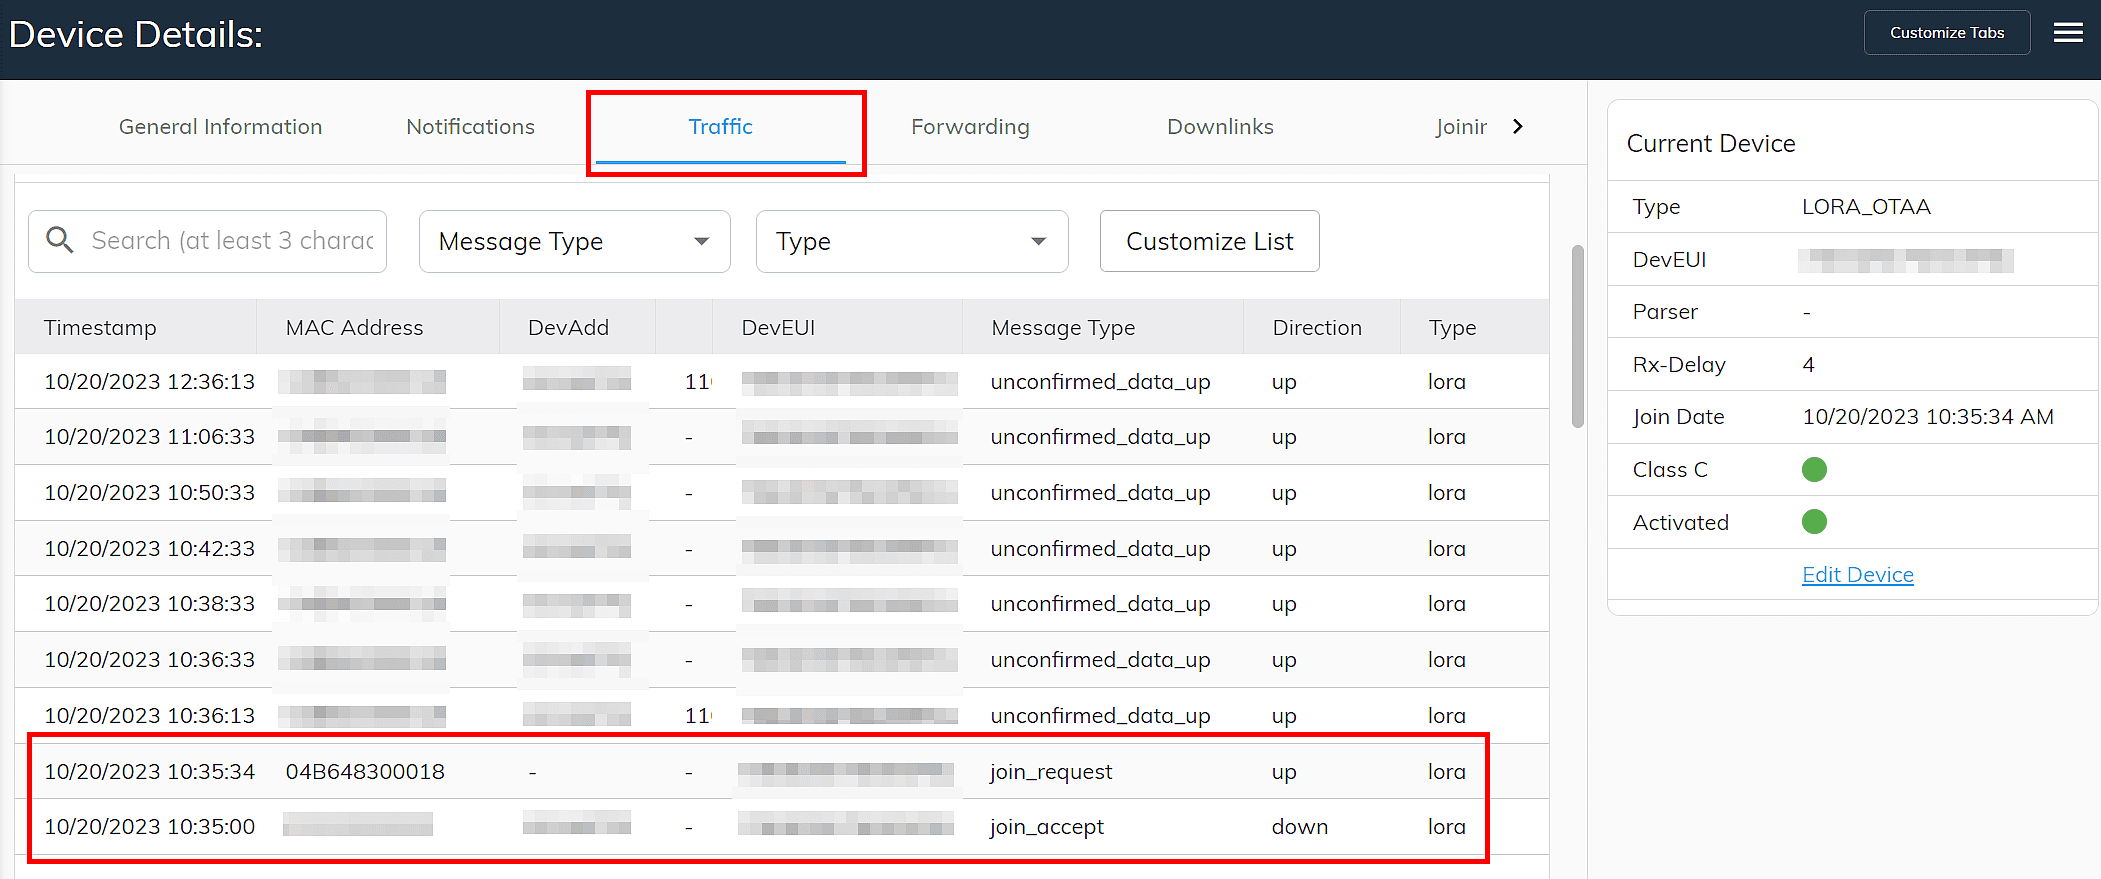
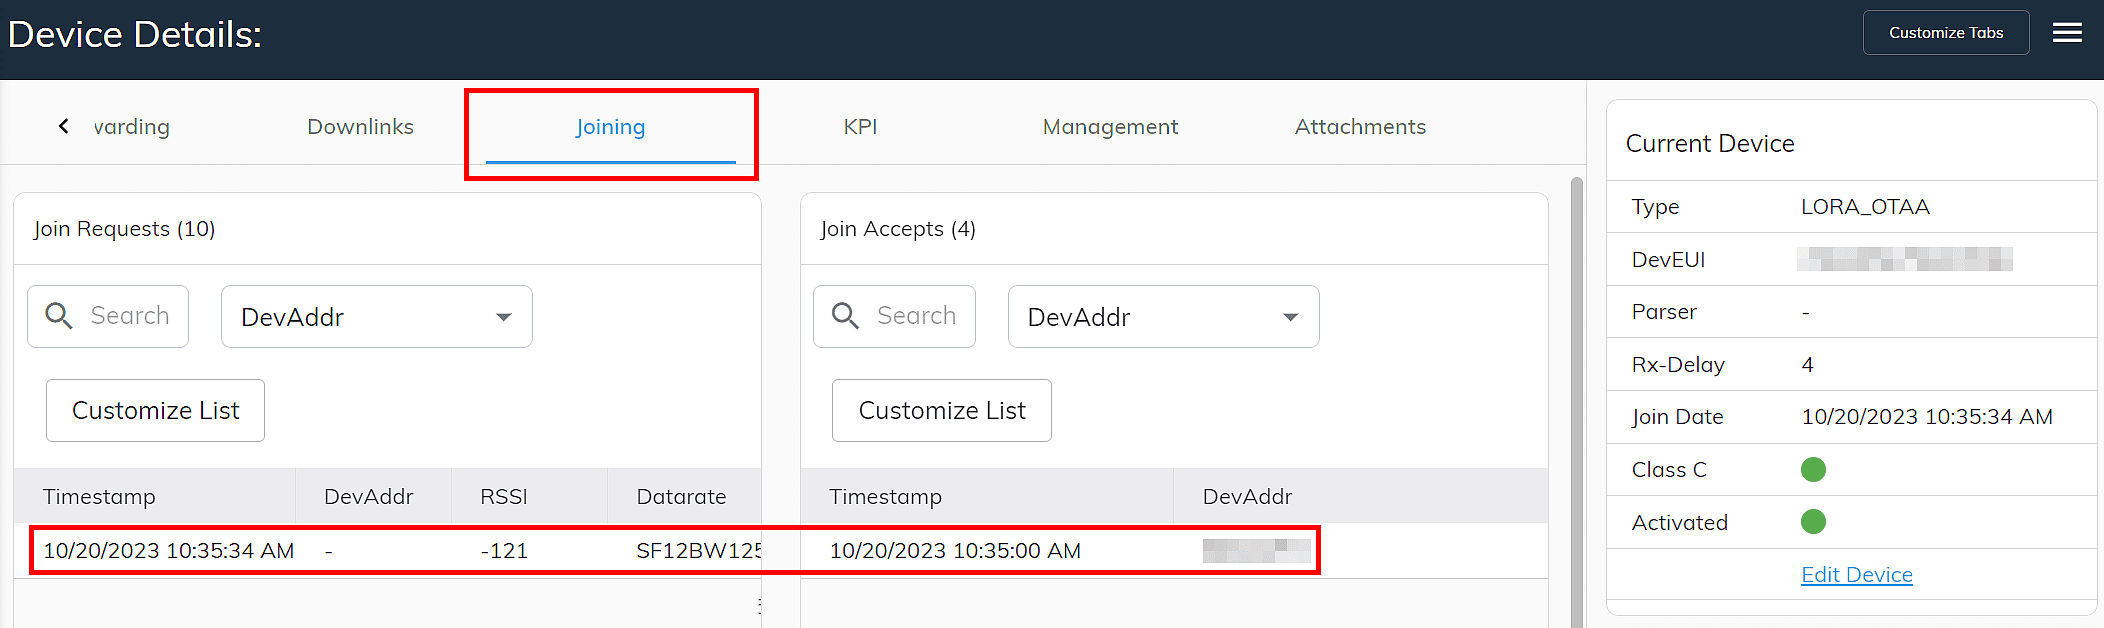
7. Complete the Join Process successfully
The join process is crucial for integrating a sensor into the LoRaWAN® network. Therefore, check carefully whether this process was completed successfully. All required information, such as the device key (see point 1 above), must have been entered correctly. On some sensors, you can see whether the join process was successful using an LED on the device. Otherwise, simply go to the “Traffic” tab or the “Joining” tab in the Datahub on your device. You should find “join-request” and “join_accept” there.
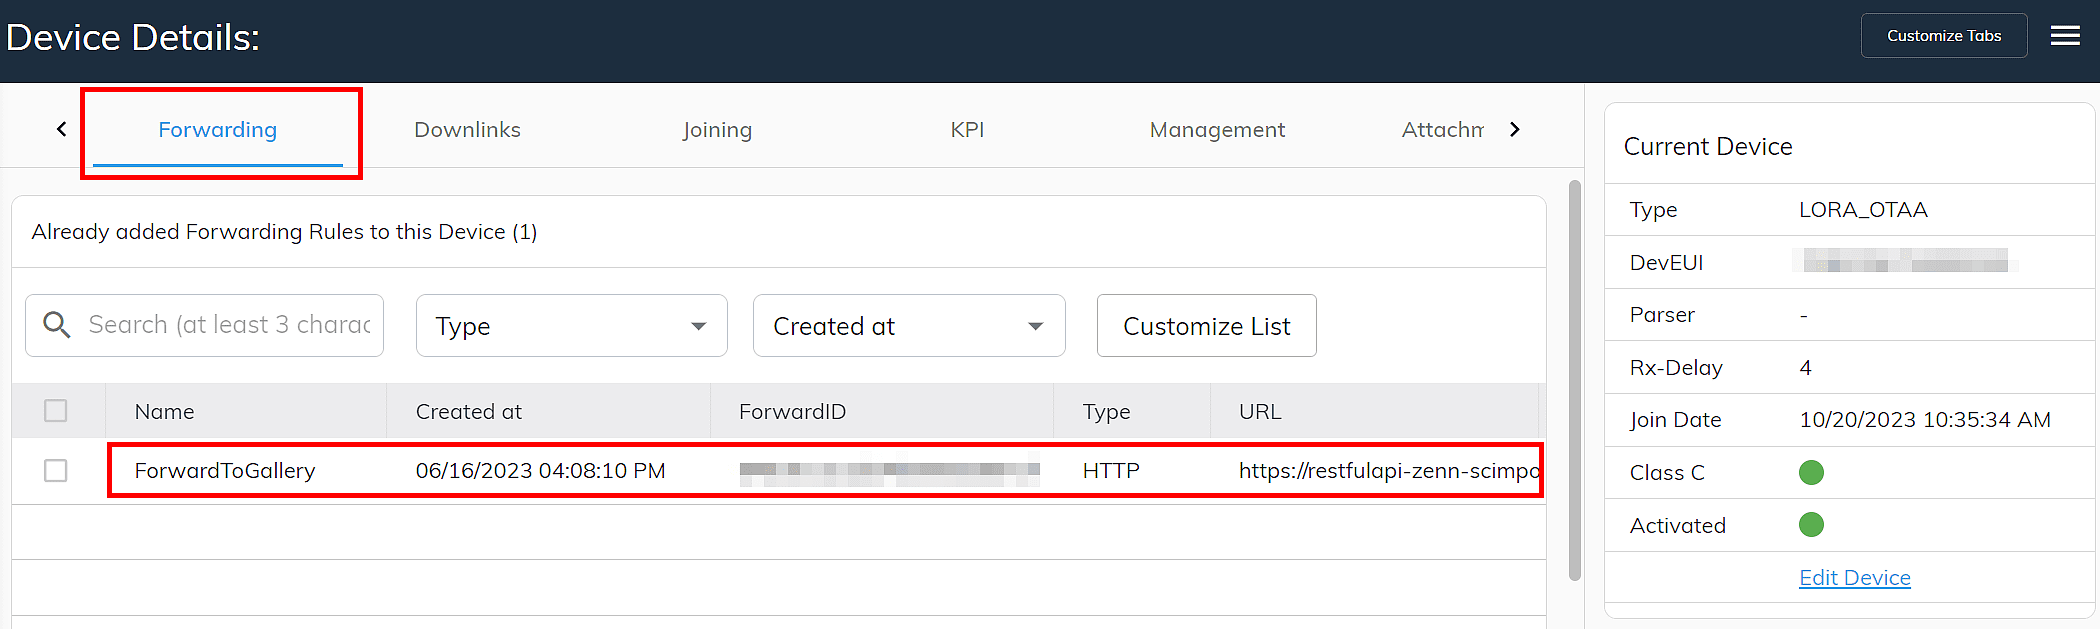
8. Optional: Set up Forwarding to a Third-party System
If you use another third-party system in addition to the ZENNER Datahub , such as the B.One Gallery , your sensor must be set up to forward data to it so that the recorded data also arrives there. If this is not the case, check whether no data is arriving in the data hub or whether you still need to set up the corresponding forwarding and assign it to the sensor. If you have purchased your devices via the above-mentioned booking service as part of ZENNER IoT PLUG&PLAY, this point of course does not apply. In this case, the necessary forwarding has already been set up for you.
Here is an example of a sensor with a forwarding set up:
Conclusion
If you follow the tips above and proceed in the right order, you will avoid mistakes when installing LoRaWAN® devices and sensors and ensure that you end up with the data you need for your particular IoT use case. You haven’t installed any sensors yet? Then let’s get started and good luck! Do you have any questions or perhaps additions from your own experience? Then, as always, just use the comment function below or write in the Forum 🙂


Responses