Save Energy Costs with the VICKI LoRaWAN® Radiator Thermostat – Part 2
Last modified on 15th April, 2024
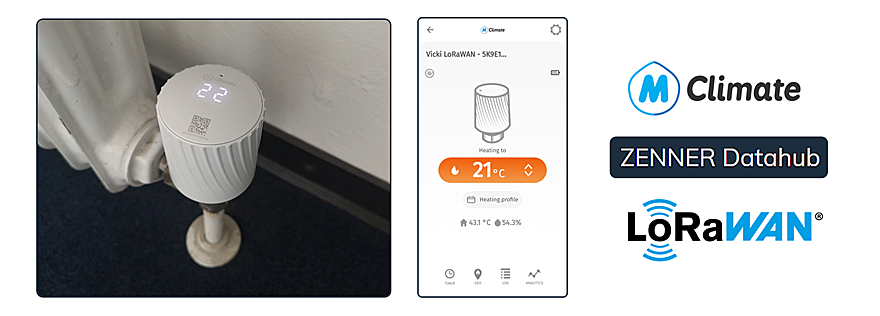
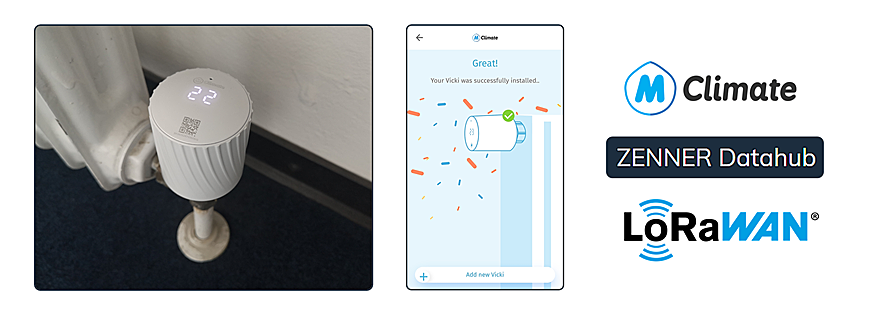
In the first part of this series of articles, we showed the advantages of a LoRaWAN® radiator thermostat, what kind of device the MClimate VICKI is, how it is mounted on the radiator and commissioned in the ZENNER Connect network, and the “lessons learned” from implemented customer projects. In this second part, as promised, we will look in more detail at the control and configuration options of the smart VICKI thermostat when it is used in the ZENNER Connect network.
There are basically four options that are available to you in this case:
Controling the VICKI via MClimate Home App
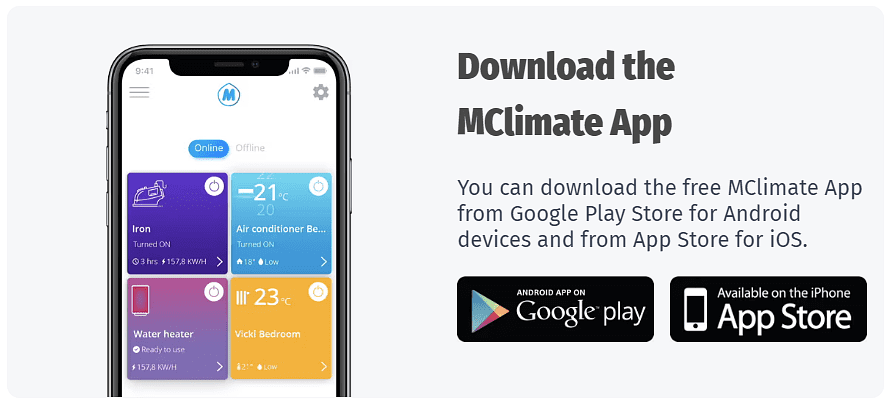
The easiest and most convenient way to control your VICKI radiator thermostat is with the MClimate Home App mentioned in the first part. This is available for both Android and iOS in the respective app stores.
In the following, we present what we currently consider to be the most important functions of the app for controlling your VICKI.
Changing the Device Settings
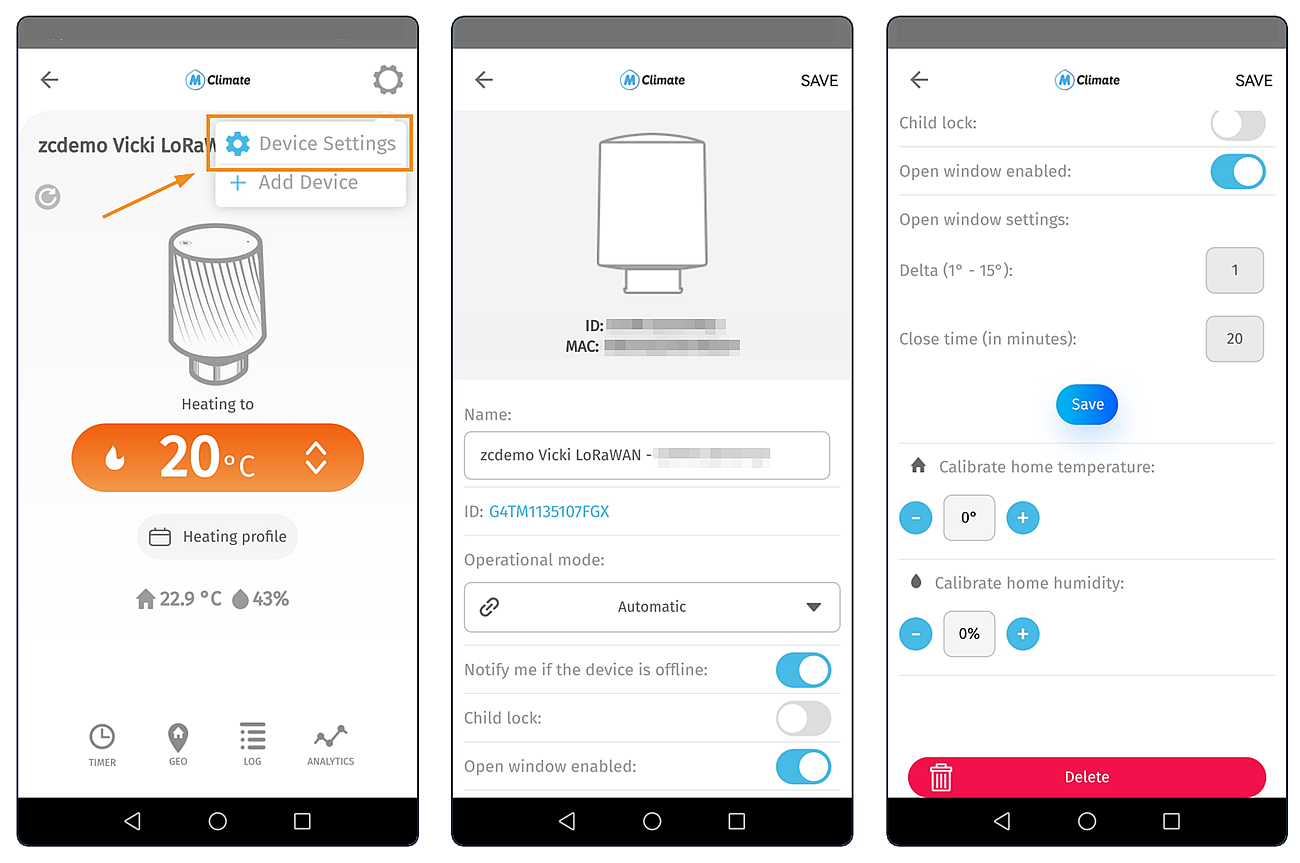
After you have added your VICKI in the MClimate app , the first thing you should do is check the general device settings and adjust them if necessary. This can be found by selecting the appropriate VICKI behind the small gear icon at the top right. The setting options include, among others:
- Name of the device
- Notification when device offline: Yes/No
- Open window detection: Yes/No + additional settings if activated
- Parental controls: Yes/No
Changing the Target Temperature
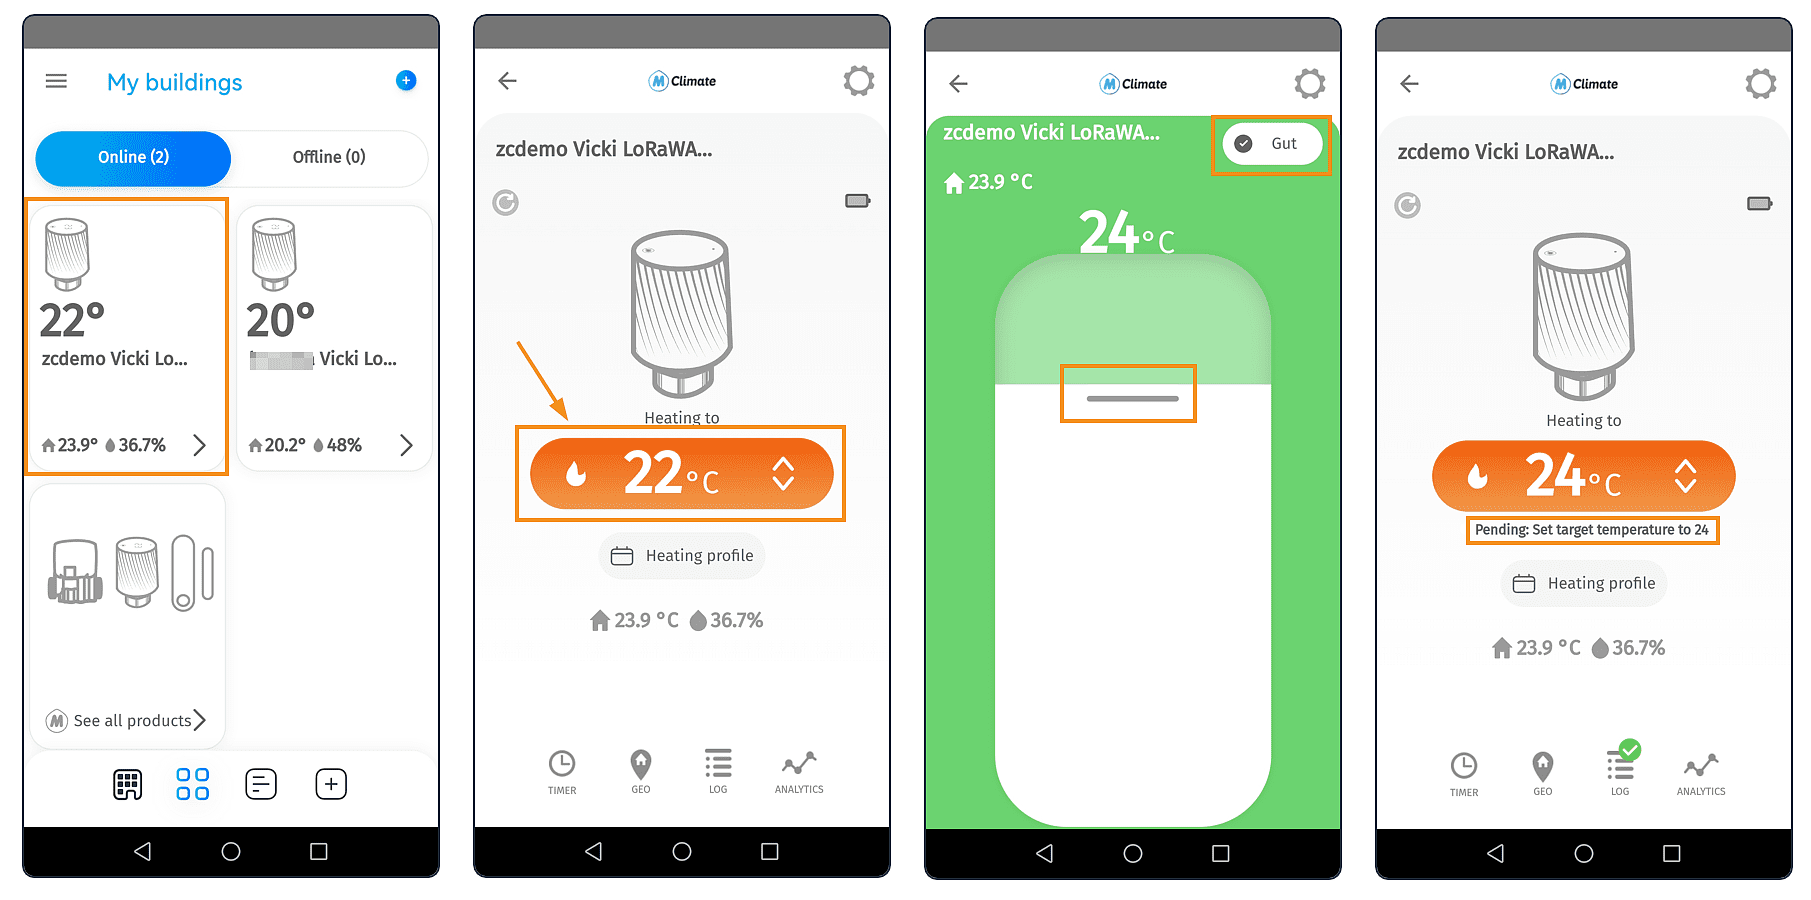
Changing the target temperature via the app is very easy. IWhen you access the desired VICKI via your building (if you have created one) or via the device overview, you will see the display of the currently set target temperature in the middle. To change it, simply click on it, use the slider to set the new target temperature and click “Done”. You will then see the new value in the target temperature display and, just below it, the message that the device is currently heating to the new set temperature.
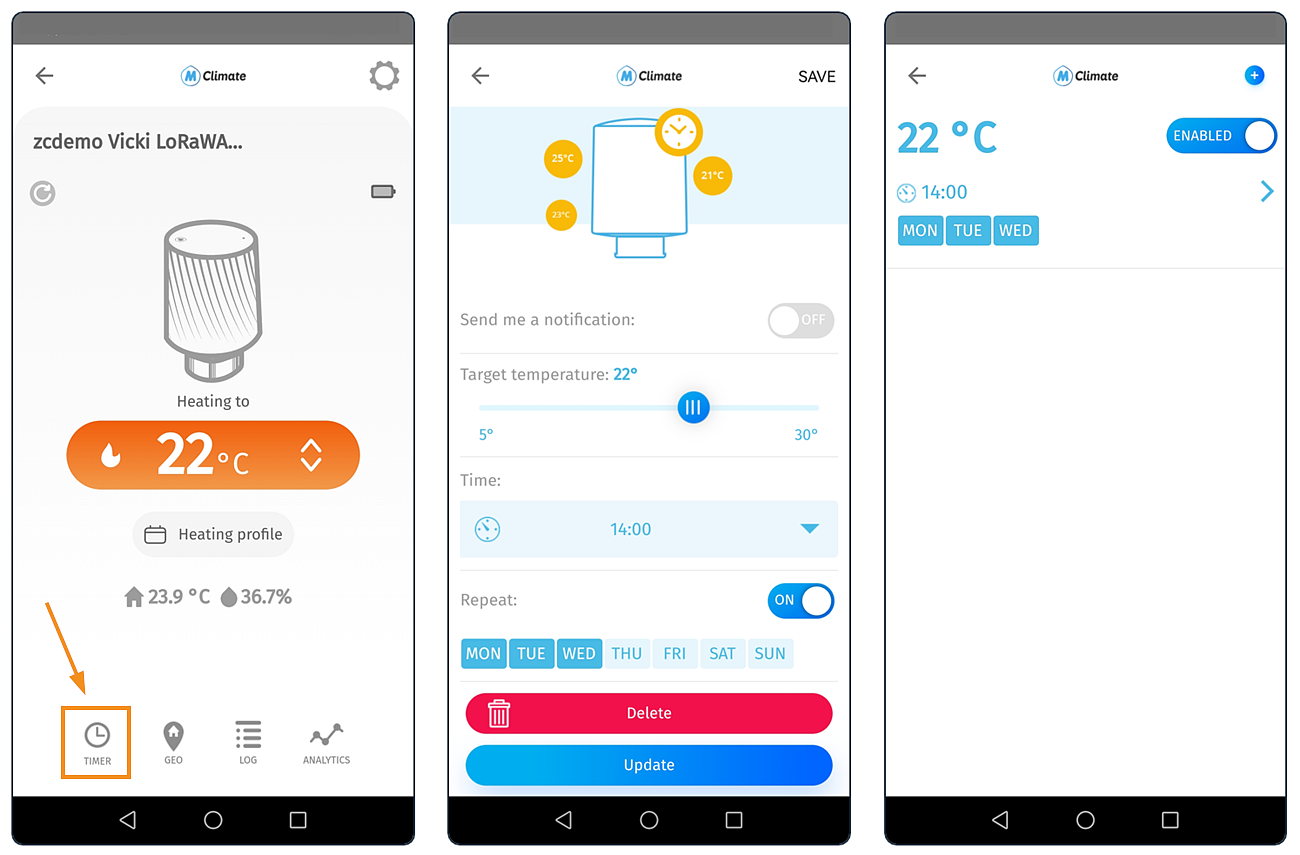
Creating Timers
By creating timers, you can automatically change the target temperature of your VICKI at specific times. The following settings can be made for each timer:
- Notification: On/Off
- Target temperature: 5-30 °C
- Time
- Repeat: On/Off (if On, weekday selection)
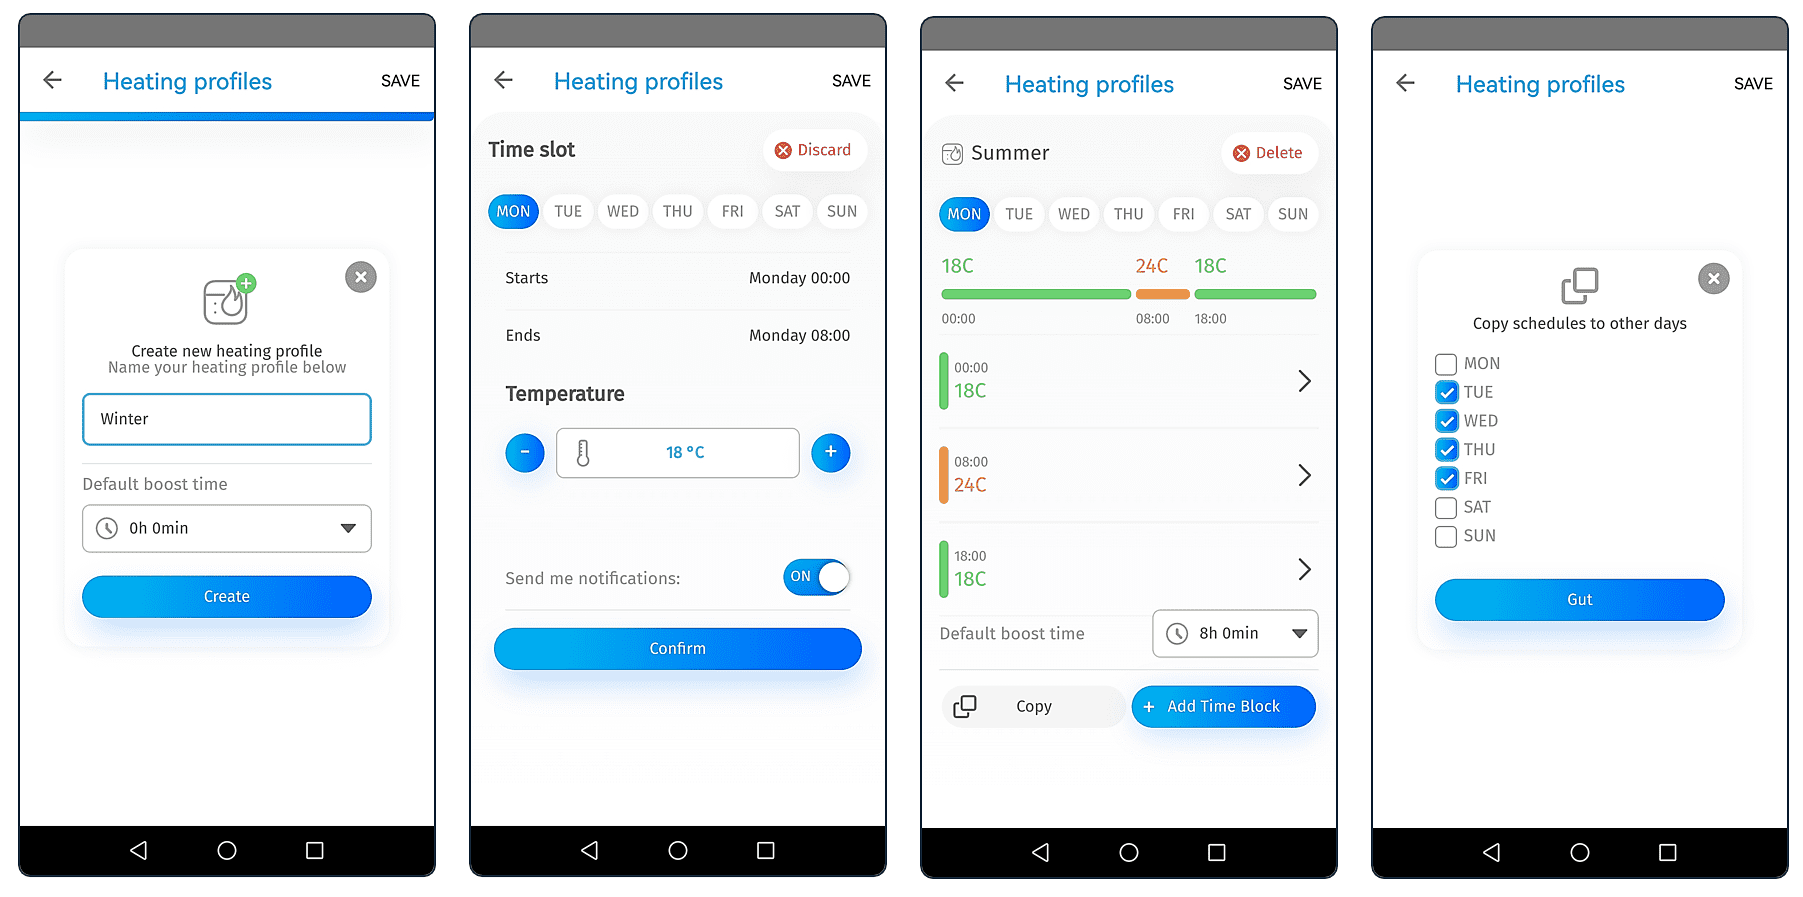
Creating Heating Profiles
Creating heating profiles is a step further than creating timers. This allows you to plan the behaviour of your VICKI for a whole week and to set not only individual times for changing the target temperature, but also entire blocks of time. The following setting options are available:
- Daily time blocks with desired target temperature for each day of the week
- Enable/disable notifications per time block
- “Default boost time” = default time for rapid, short-term heating of the radiator by opening the valve
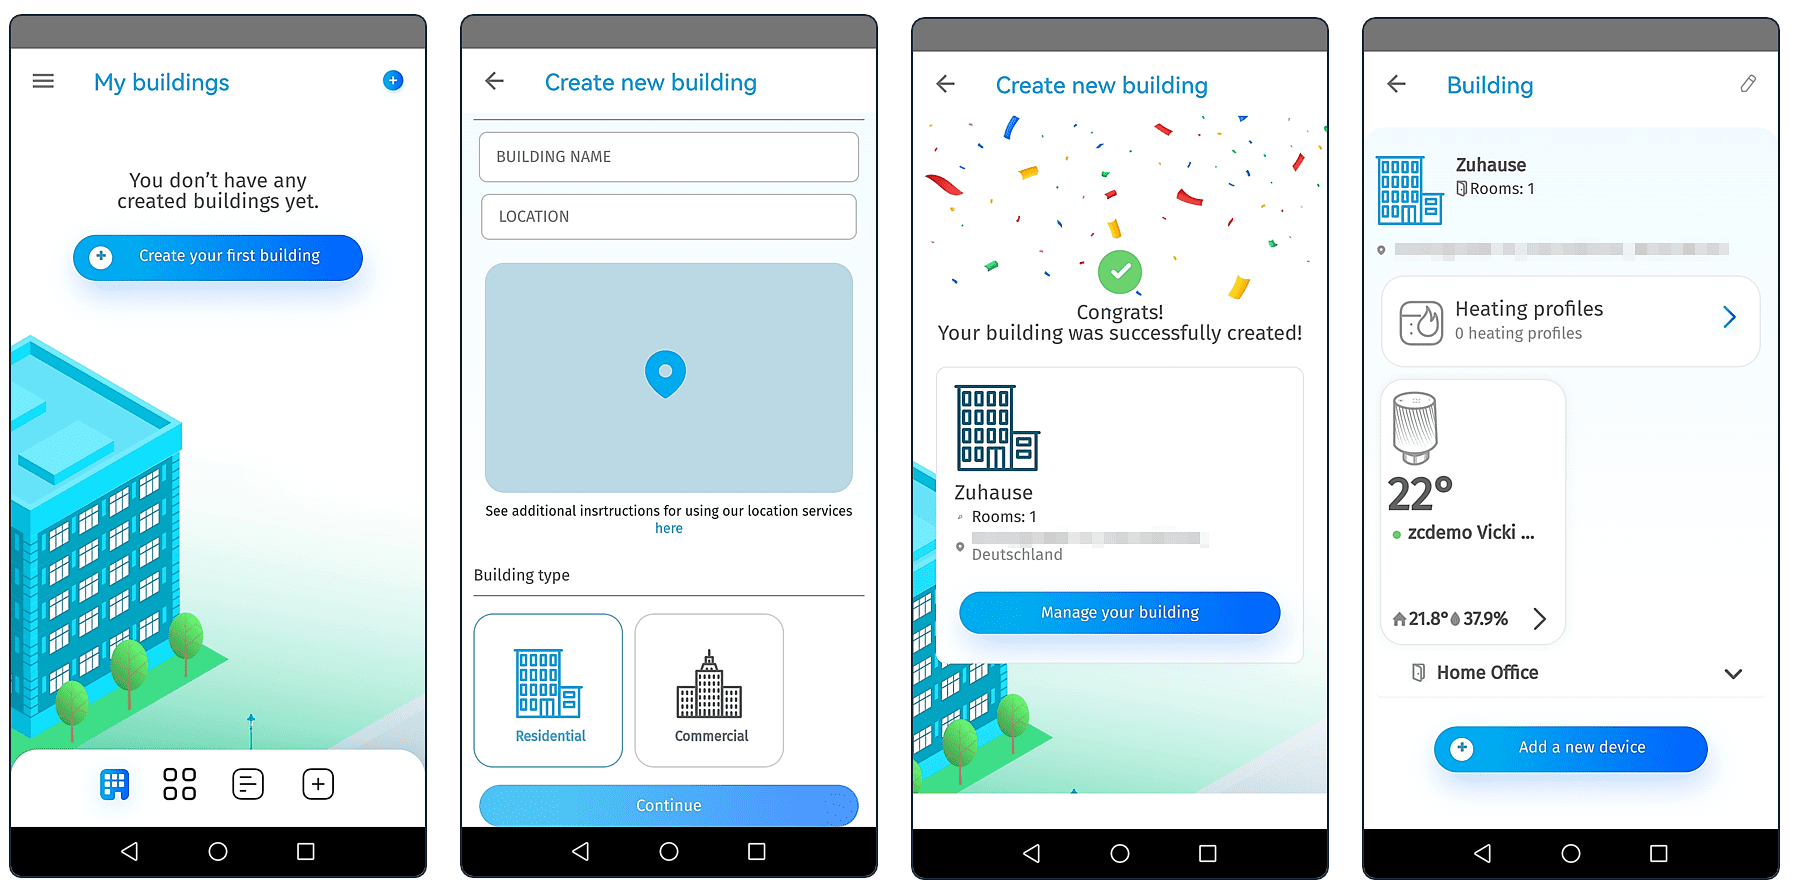
And to create a new heating profile , do the following:
1. Create a new building in the “Buildings” tab, if not already done, and add device(s) (prerequisite for creating heating profiles).
2. Create and configure a new heating profile by clicking on “Heating profiles” and then on “Create a new profile”. Tip: If you want to use the same time block on several days of the week, you can simply copy it using the “Copy” button and assign it to the appropriate days. This saves a lot of time.
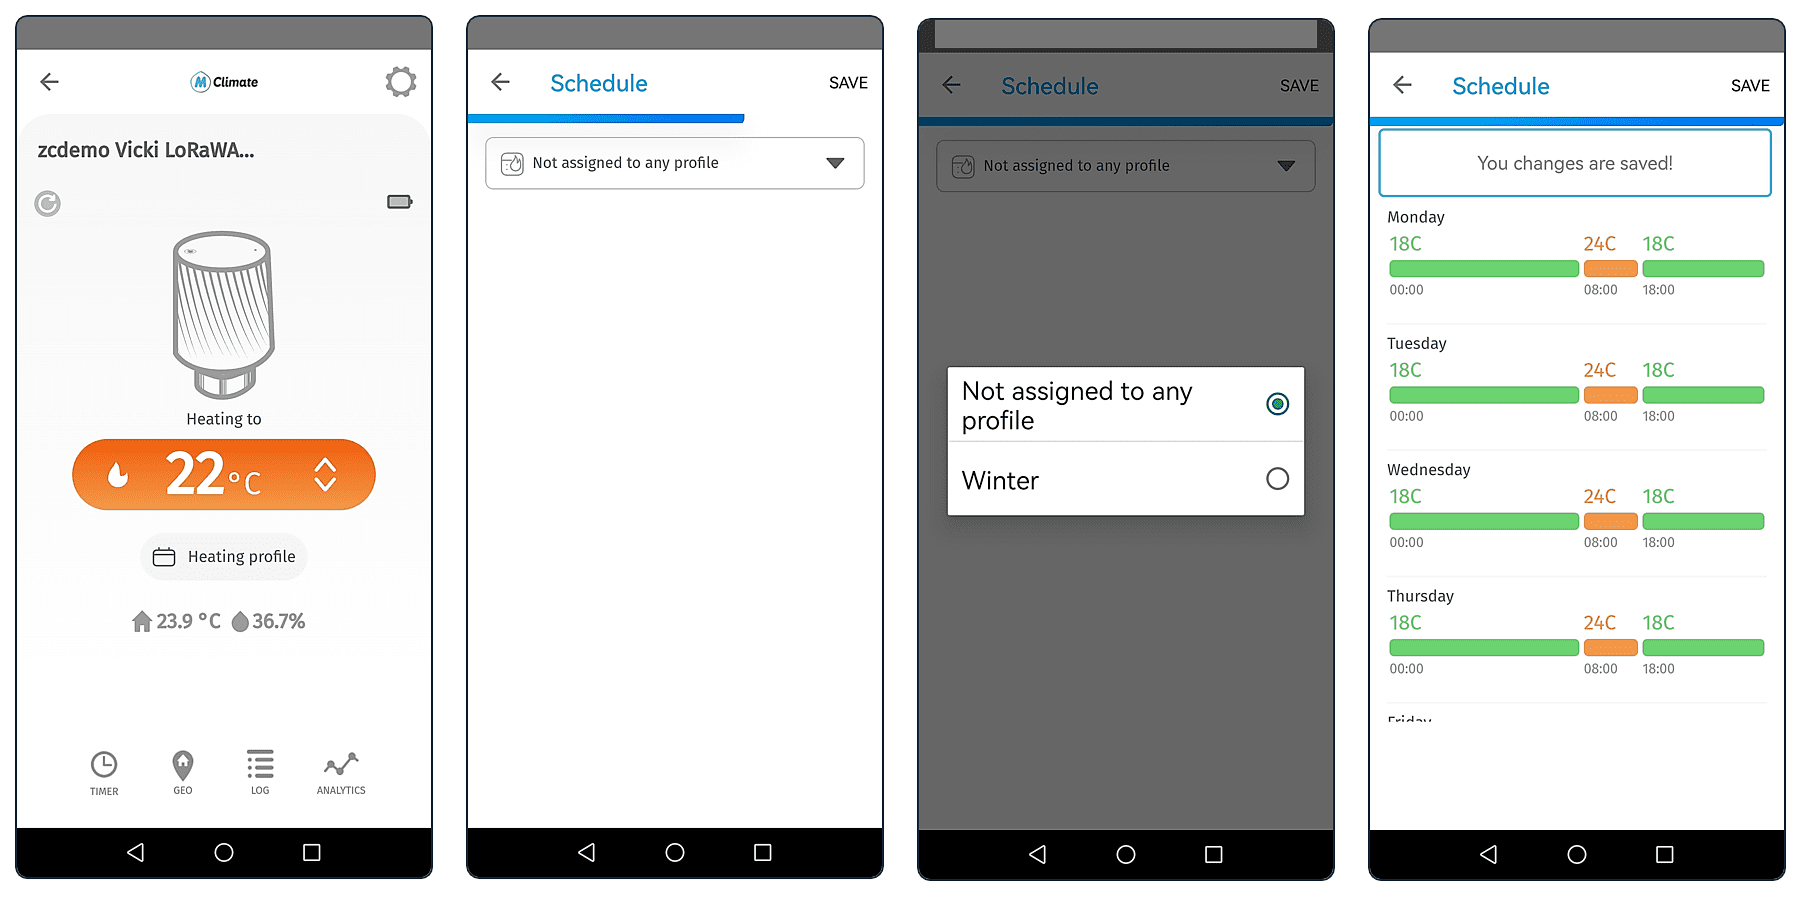
3. Go to the desired device , click on “Heating profile”, select the correct heating profile from the drop down list and click “Save”.
Location-based control
Another feature is the automatic control of your VICKI based on your location. The settings for this can be found in the “Geo” tab. Here you can set the following:
- Radius: 1-10 km
- Action on entering the defined radius:
- On/Off
- Action Triggered Notification: On/Off
- Target temperature
- Action on leaving the defined radius:
- Analogous to the options when entering the radius (see above)
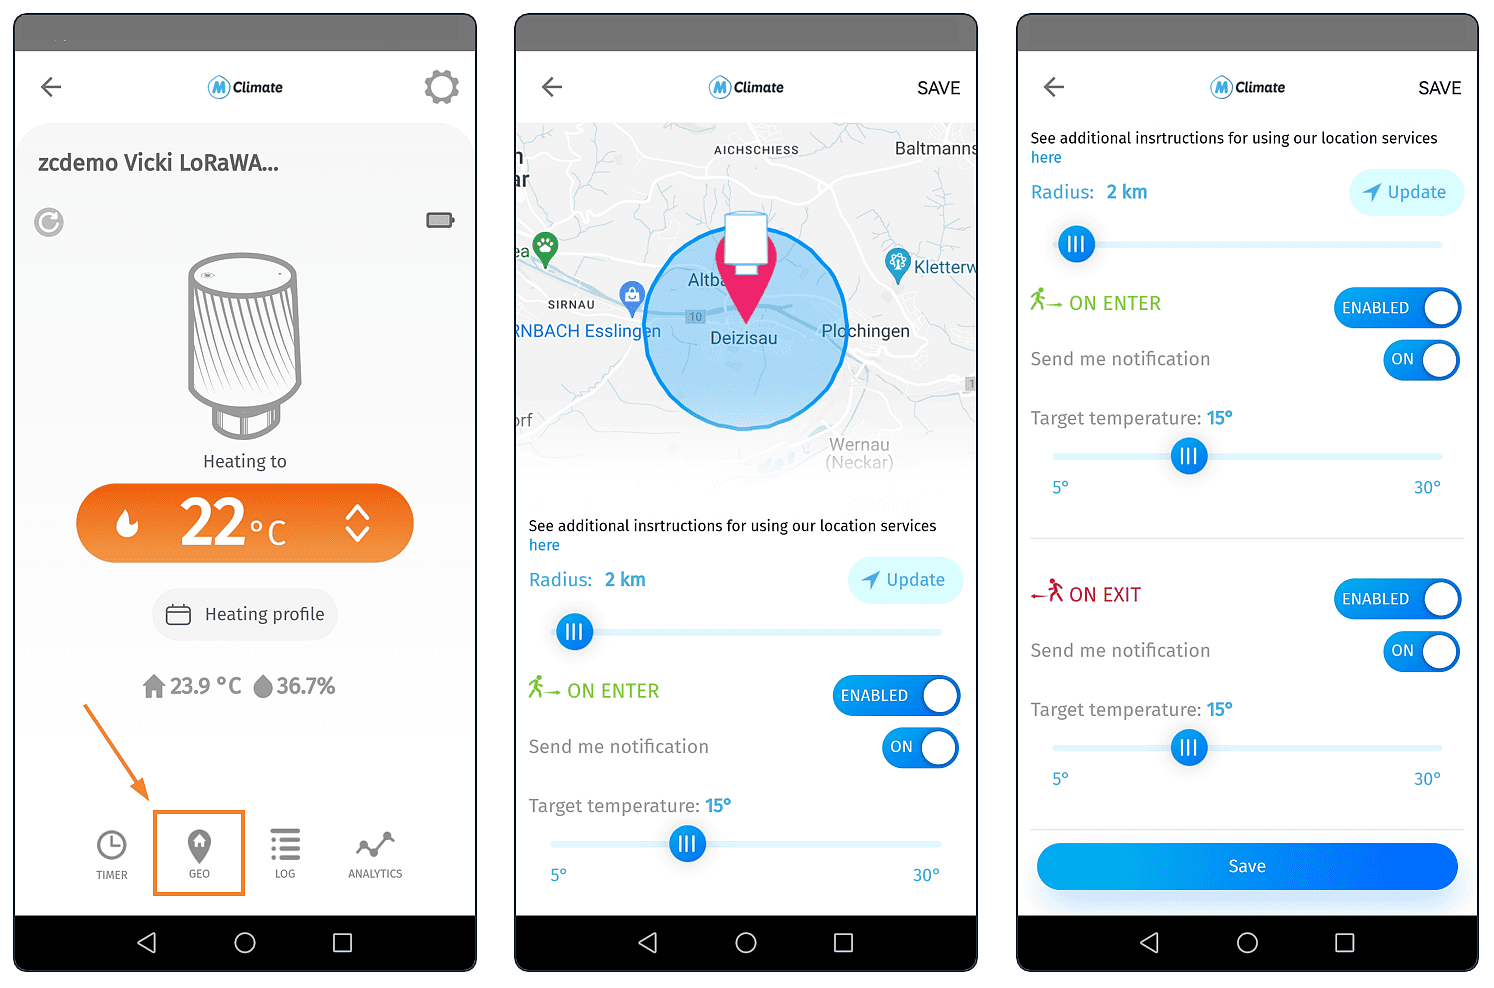
However, the prerequisite for this is that you give the MClimate app permanent access rights to your location. If you deactivate them in the meantime, or if they are only available when you use the app, the whole thing will of course no longer work properly. For more information about this, visit https://support.mclimate.eu/hc/en-us/articles/360018946580.
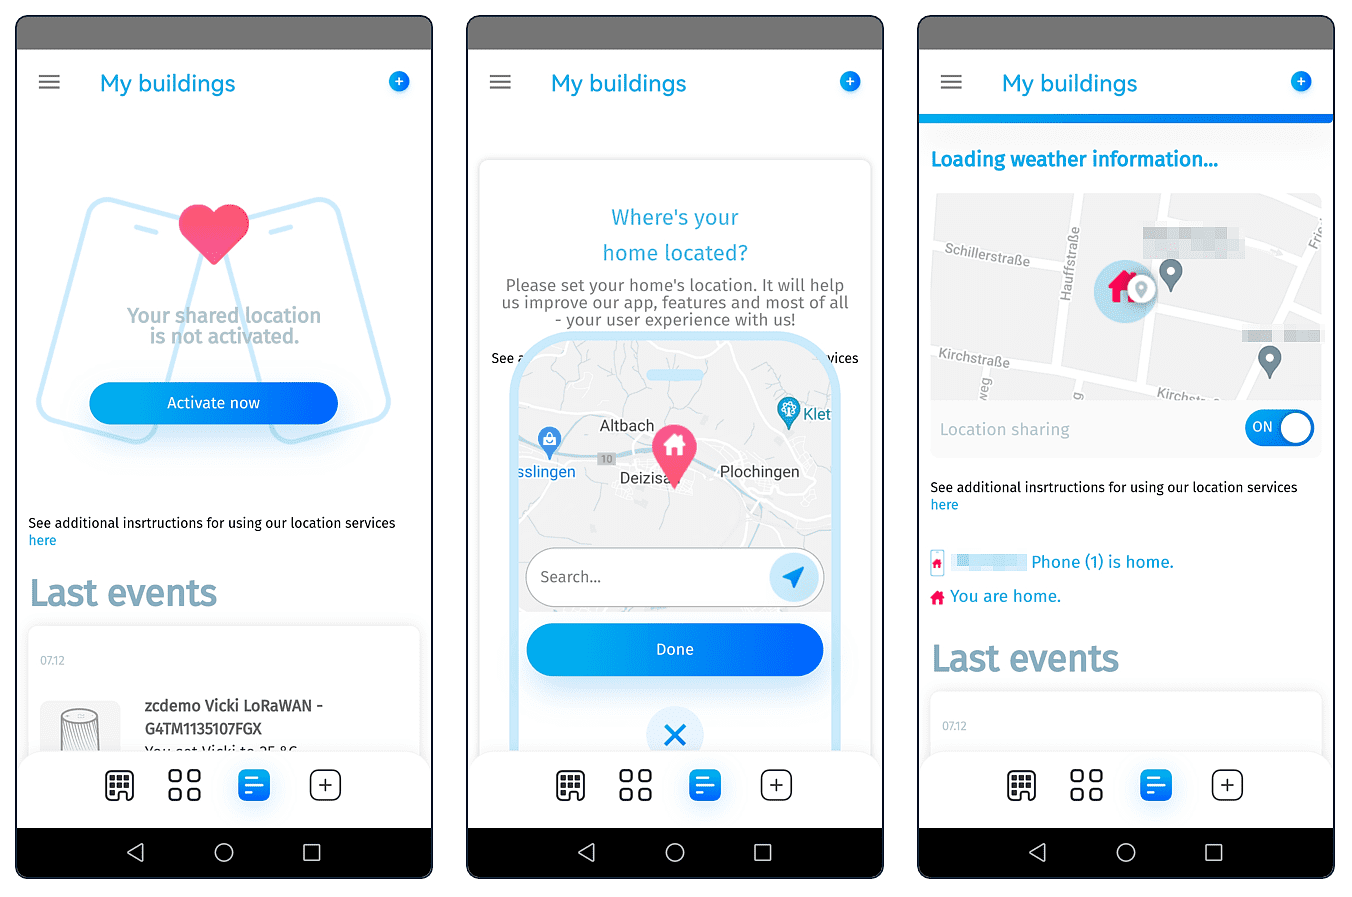
Location Sharing with Shared Accounts
In addition to location-based switching on and off, you may also be interested in the “Shared Accounts” or “Location Sharing” option. This allows you to give other people who live with you or who share an office, for example, access to your VICKI. Once activated, you can then see who is currently at your “home location”.
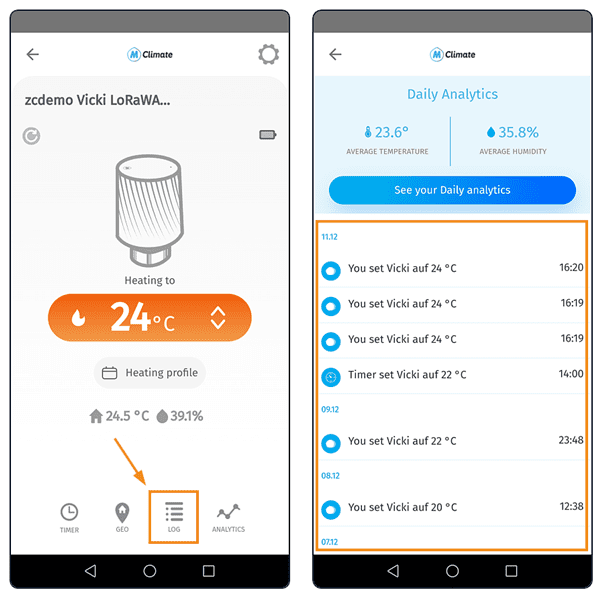
Change History in the Activity Log
In the “Activity Log” you will find a list of all recorded changes, sorted from new to old. Here are two examples:
- “You set VICKI to 25 °C” = the target temperature has been changed to 25 °C via the app to 25 °C
- “Vicki updated target temperature to 25 °C” = Target temperature was changed to 25 °C by downlink via ZENNER Datahub or B.One Gallery or manually on the device.
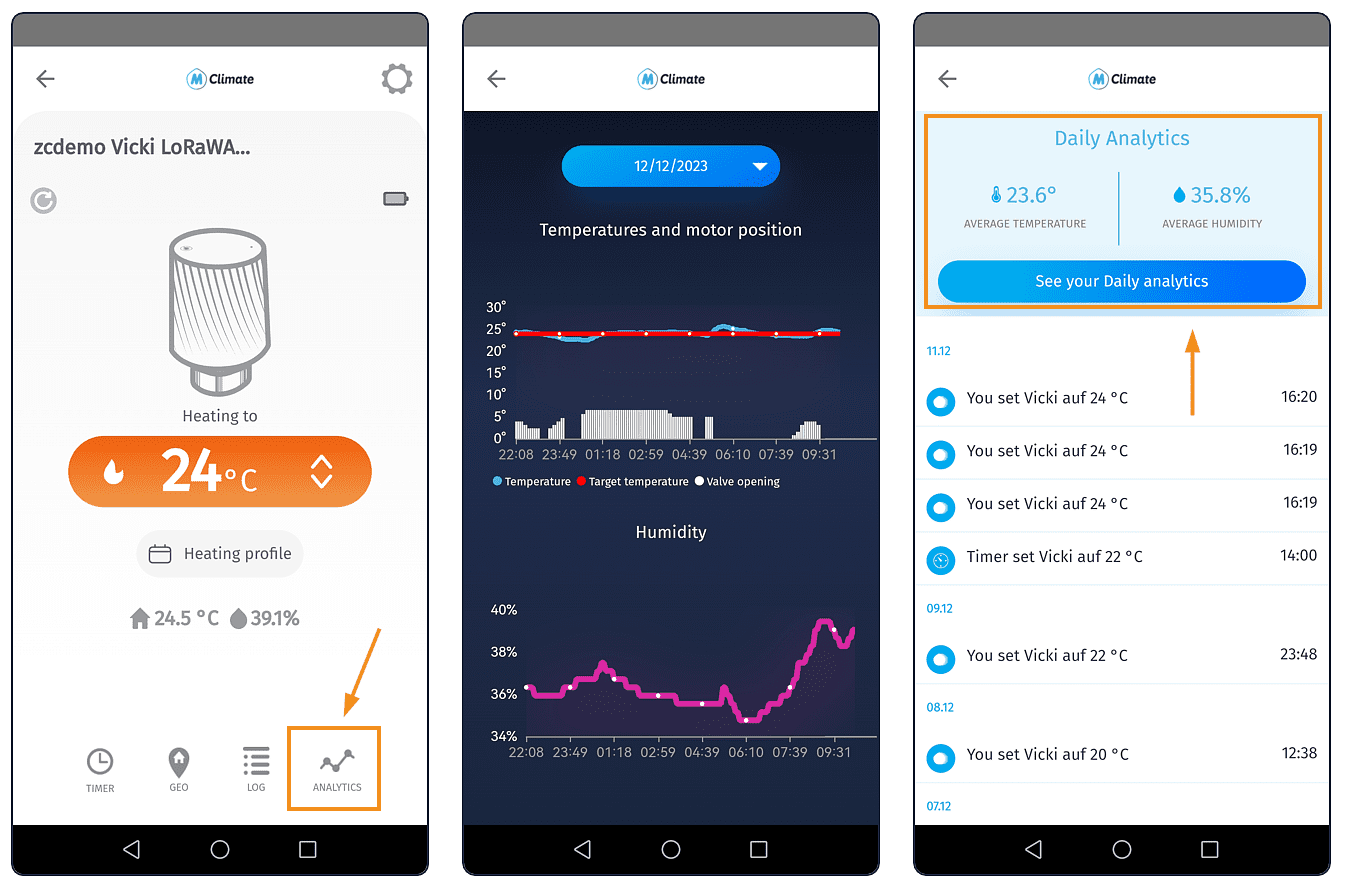
Progression Graphs for Temperature and Humidity
No actual control function, but helpful for analyzing the recorded temperature and humidity values of your VICKI are the progression graphs in the “Analytics”. Here you can see the evolution of the following parameters over time:
- Actual and target temperature
- Valve openings
- Relative humidity
In addition, the “Activity Log” mentioned above also shows you the average temperature and humidity readings for the current day.
Notifications on the Smartphone
The last practical feature of the app that we will discuss here is the push notifications. When enabled, you will receive useful notifications about events such as for example an open window, directly to your smartphone.
Controling the VICKI via Downlinks
Controlling the VICKI by “manually” sending downlinks via the ZENNER Datahub or the B.One Gallery is of course much less convenient than via the app. However, this can be an option if, for example, you rarely change the target temperature, you do not need to create heating profiles, you want to make a change that is not yet covered by the app or you do not have access to it at the moment .
To make a change to the device via downlink, you must first generate the appropriate payload and then send it to the device.
Generating Downlink with MClimate Payload Helper
The quickest way to generate the payload for the downlink to be sent is to use the handy MClimate Payload Helper. Here you simply select the parameter(s) you wish to change using the downlink generator and the correct hexadecimal payload will be spat out below, which you can then copy to the clipboard.
Here is an example payload for changing the target temperature to 25°C:
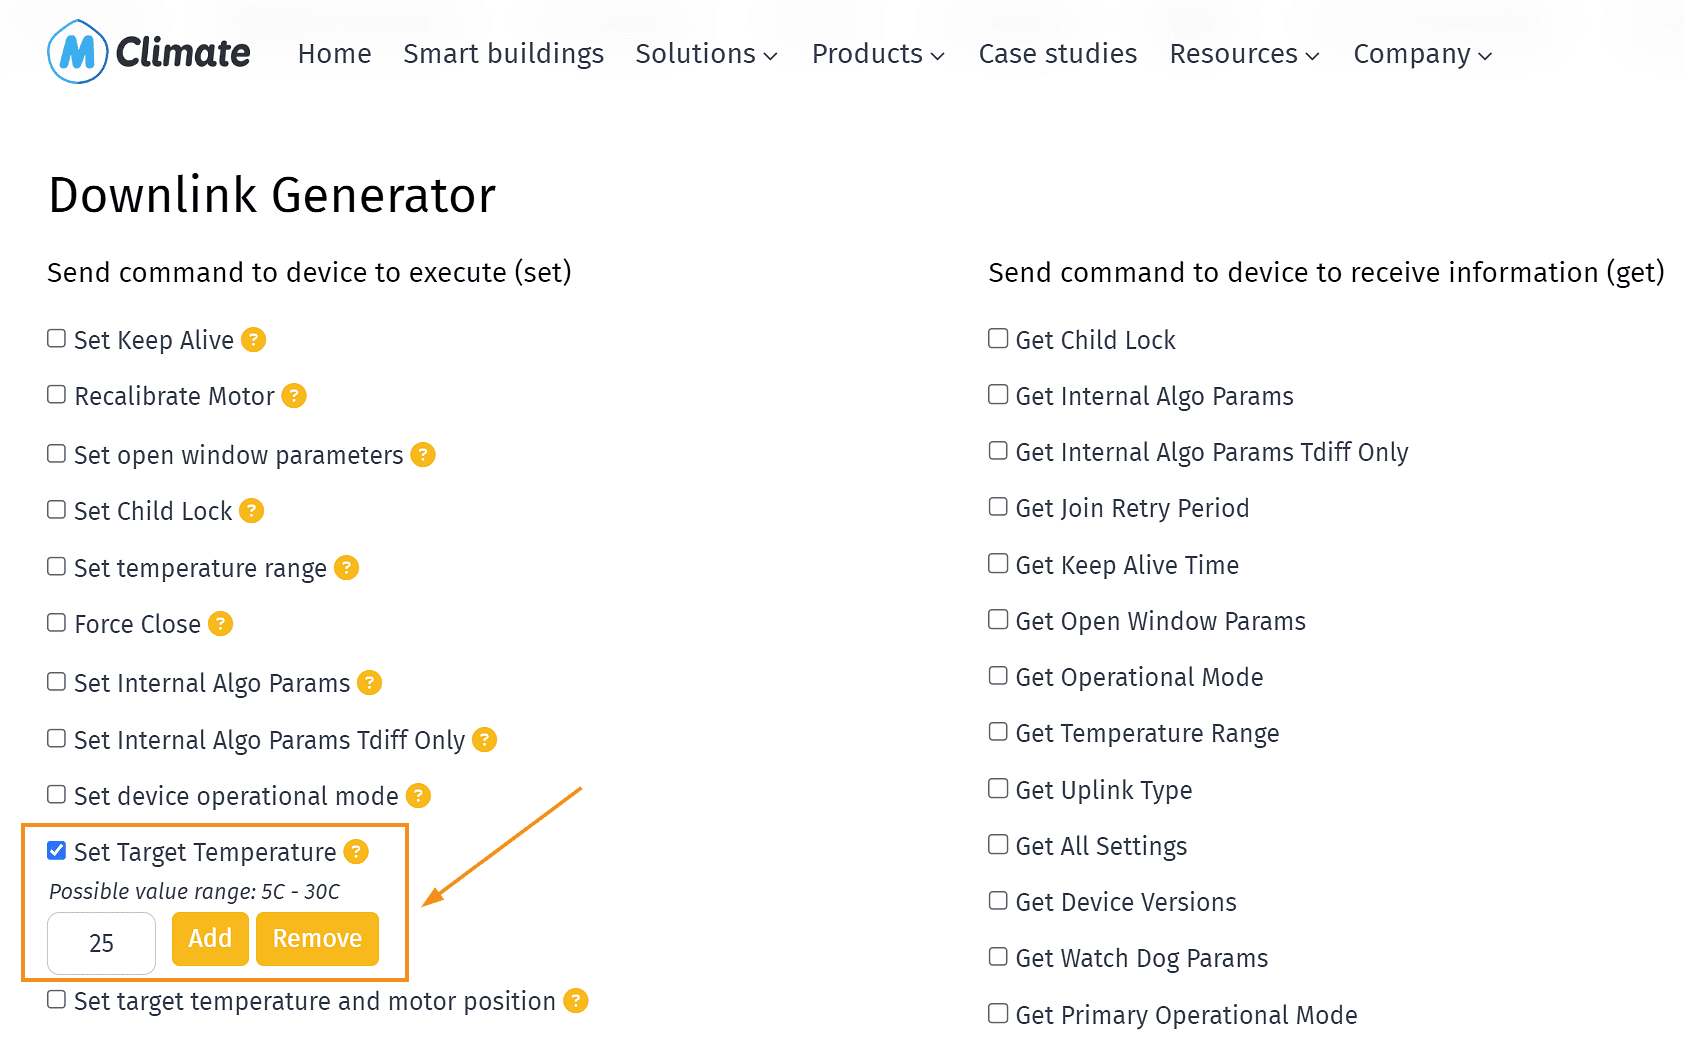
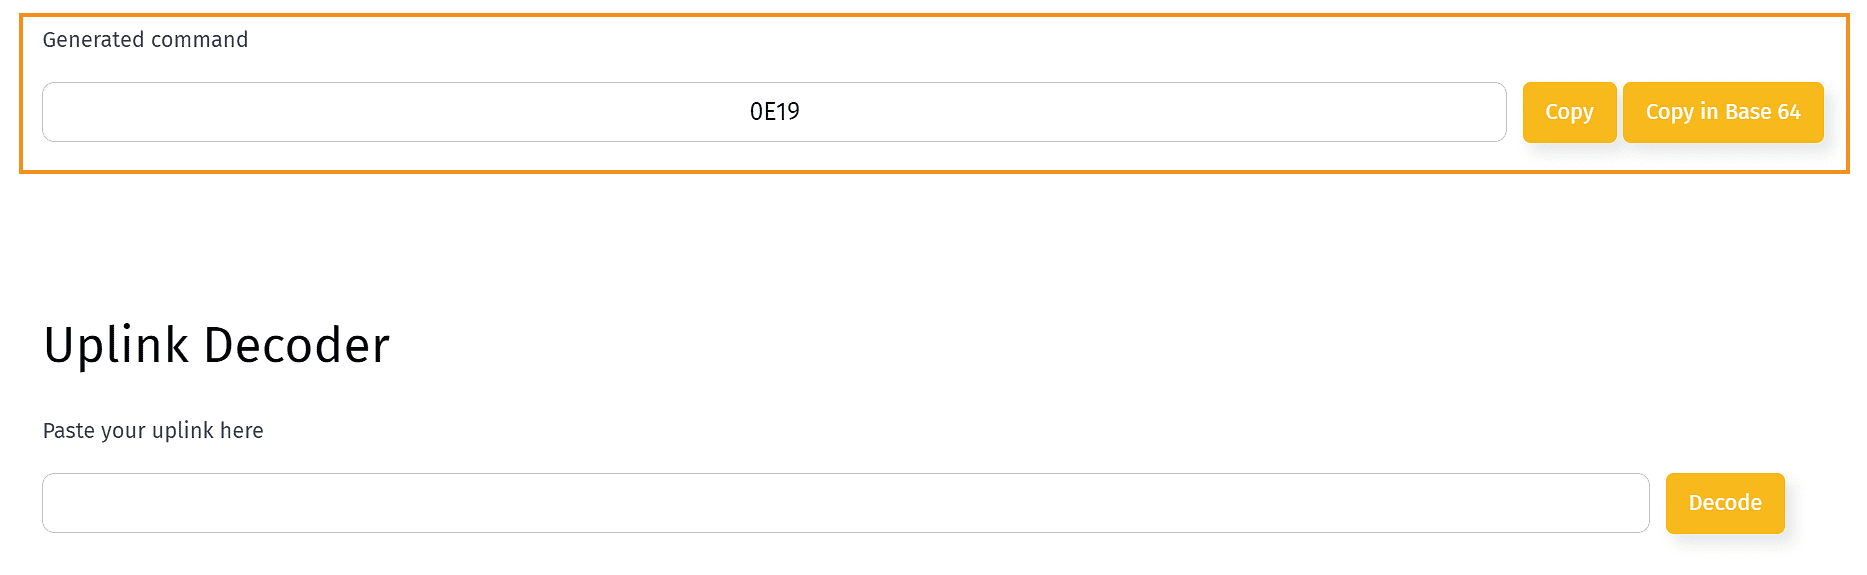
Tip: As you can see in the previous screenshots, you can use the Payload Helper to send not only downlinks that trigger a configuration change (left list/page), but also those that can be used to read the current configuration (right list/page). In addition, there is also a handy uplink decoder underneath the downlink generator.
Sending Downlinks to the Device
Once you have generated the required payload, you will need to send it as downlink to your device. Either as mentioned above via the ZENNER Datahub or the B.One Gallery.
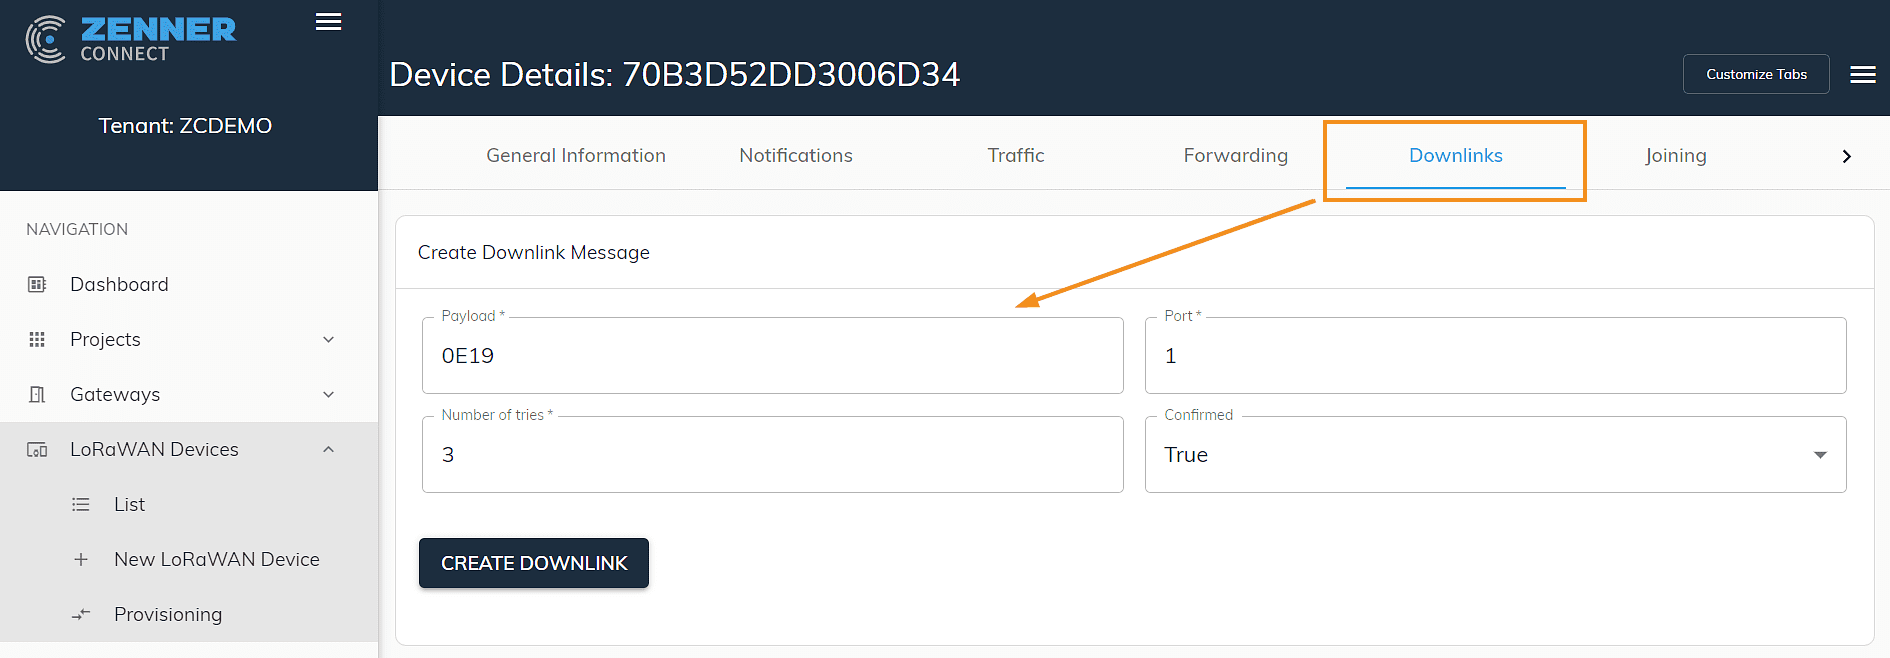
Sending downlinks via ZENNER Datahub
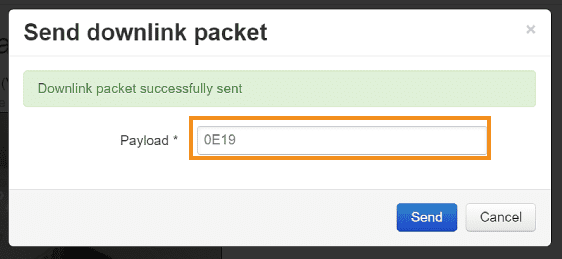
To send downlinks to your VICKI via the ZENNER Datahub, call up the corresponding device via the “List of LoRaWAN® Devices” and go to the “Downlinks” tab. There you simply enter the previously created hexadecimal payload, port 1 , the desired number of retries if sending fails and click on “Create Downlink”. The next uplink packet should then send the downlink to the VICKI. You can check if this is the case in the “Traffic” tab or simply in the app.
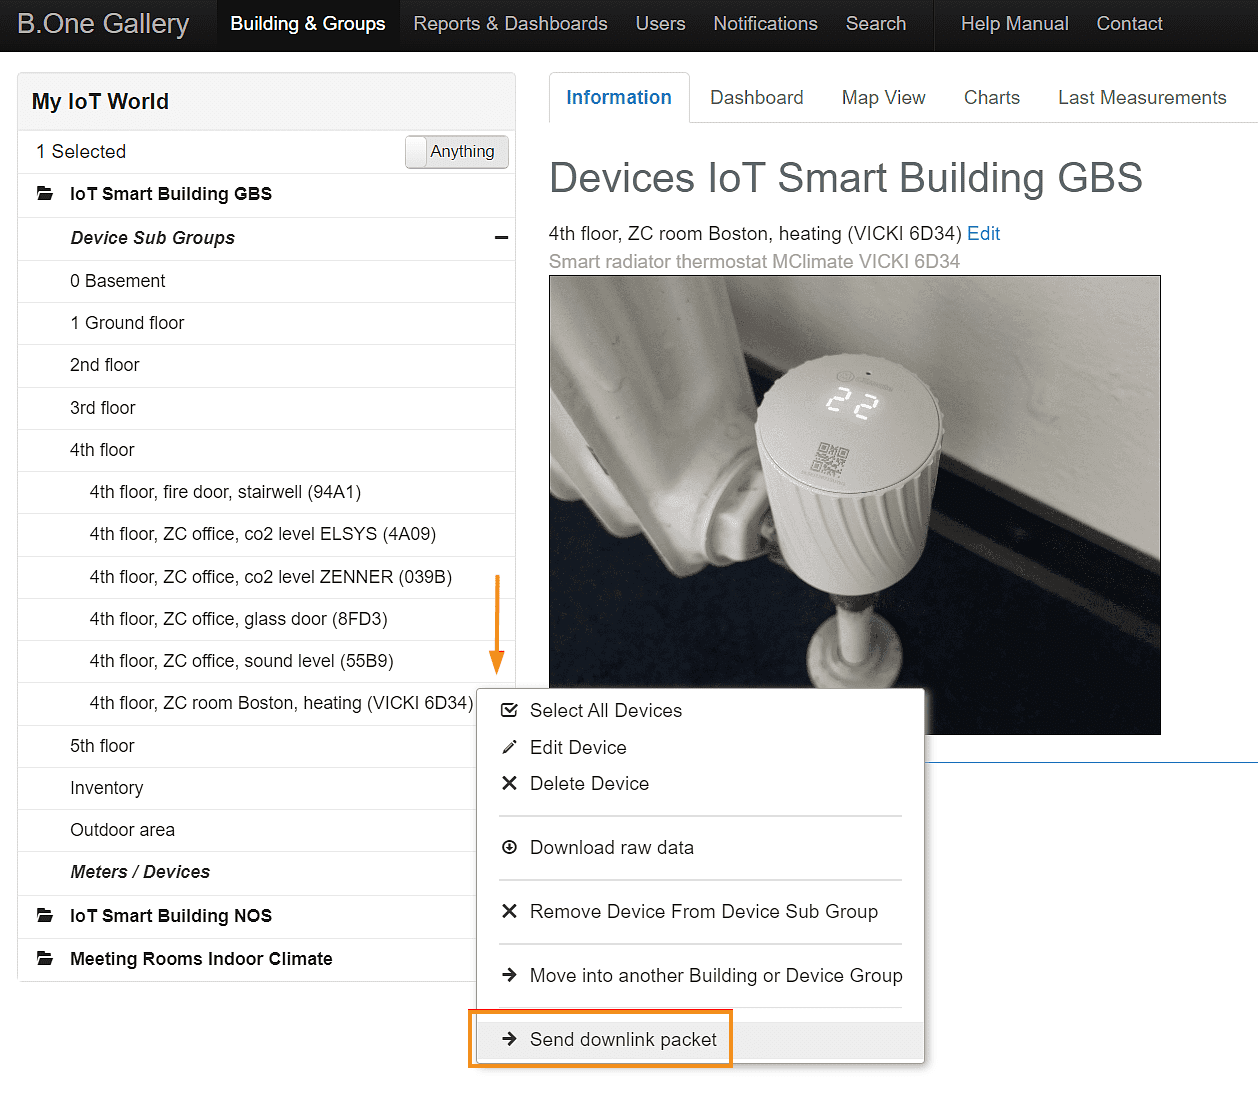
Sending Downlinks via B.One Gallery
If you use the B.One Gallery to visualize your data, you can also send downlinks directly from there to your VICKI. To do this, go to “ Buildings & Groups”, click on the small gear icon for the relevant device, and then on “Send data package” at the bottom. Simply enter the payload in the field that appears and click on “Send”.
Manuel Control the VICKI on the Device
If there is no LoRaWAN® connection or the app is not available at the time of a planned change, such as the target temperature, you can of course also control your VICKI manually, as shown in the manufacturer’s video linked in Part 1. Simply turn the thermostat until the temperature shown on the display matches your desired target temperature. Another tip: If you want to check the last set target temperature on the device beforehand, turn it gently until the temperature display appears on the display.
Alternative for Large Projects: ZENNER BuildingLink
Now you know the basic options for controlling your VICKI thermostat in the ZENNER Connect LoRaWAN® network together with the ZENNER Datahub. Finally, we would like to point out the alternative option of implementing the whole thing using the ZENNER BuildingLink solution. For example, you can control entire districts, not just buildings. For more information, visit https://zenner-iot.com/zenner-buildinglink-mclimate-vicki/.
Do you have any questions about this or have you already had your own experience with the MClimate VICKI radiator thermostat? As always, feel free to share them in the comments or send us a message via the Community Admin 🙂


Responses