Sensative Strips Payload Configuration Part 2: Manual Adjustment

Last modified on 11th April, 2024
I recently showed you how you can easily configure your strips (LoRaWAN) sensors yourself using the “Strips Configuration Application”. Unfortunately, as in my case, there are not predefined profiles that are 100% suitable for all applications. Then only a manual adjustment of the payload helps. How this works and how a payload is actually structured, I will show you today using my Strips Multi-Sensor +Drip as an example.
My Use Case:
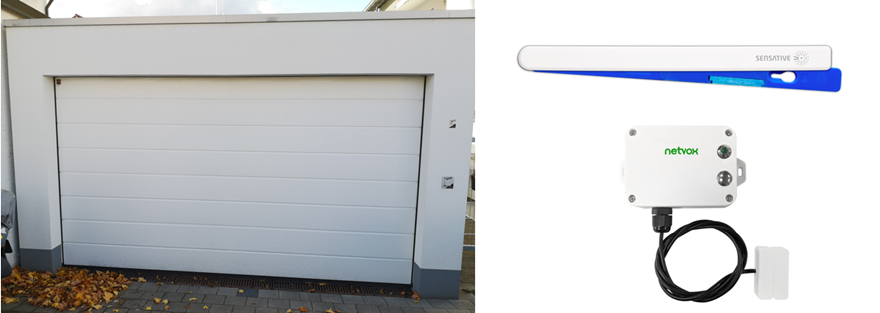
Monitor the sink cabinet in the kitchen with an alarm in the event of a leak and/or the door that has been open for too long. Why? On the one hand, I have had a leak in the sink in my new kitchen several times, which is why the sink cabinet threatened to soften, and on the other hand, my cat likes to climb in there if the cabinet door is open for too long. Since this can be implemented with just a single +Drip thanks to the integrated capacitance sensor (for leak detection) and magnetic sensor (for opening status detection), I wanted to configure it accordingly. Other example use cases, both in the private and business sectors, for which such a combination of sensors would be relevant, are the monitoring of living rooms, basement rooms, sanitary areas or offices.
Step 1: Create a “base” Payload with the Strips Configuration App
To make your life easier, the first step is to simply create a “base” payload using the Strips Configuration Application, as I already described in Part 1 of this series of posts. Only then does it go to the manual adjustment.

Step 2: Manual Adjustment of “base” Payload with Excel Spreadsheet
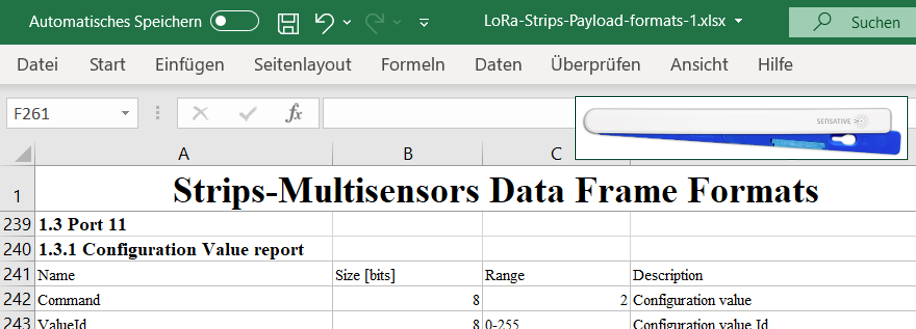
To manually adjust your “base” payload, you need an Excel spreadsheet called “LoRa-Strips-Payload-formats-1.xlsx” provided by Sensative, which you can download directly here. The various possible bit BitValues contained in the payload and their meaning are listed there. Before we get to the actual customization, I would first like to use my own “base” payload to explain how it is actually composed. This example will show you how exactly you have to read the Excel spreadsheet. Basically, a payload usually always consists of a hexadecimal character string. The use of the hexadecimal system is typical in data processing, since it is a convenient way of managing the binary system. This system is very well suited for representing bit sequences. Four digits in a bit sequence always correspond to one digit in the hexadecimal system.
To decrypt the payload, you now need the Excel spreadsheet mentioned above. Central information is in line 239 under point 1.3.1, namely that the so-called “Configuration Value Report” for setting/importing a configuration is always sent to the sensor via port 11 (analogous to the note in the configuration app) and that the content of a command always consists of 8 bits, which in turn corresponds to 2 digits or characters in the decimal system. As can be seen below, each payload begins with such a command.

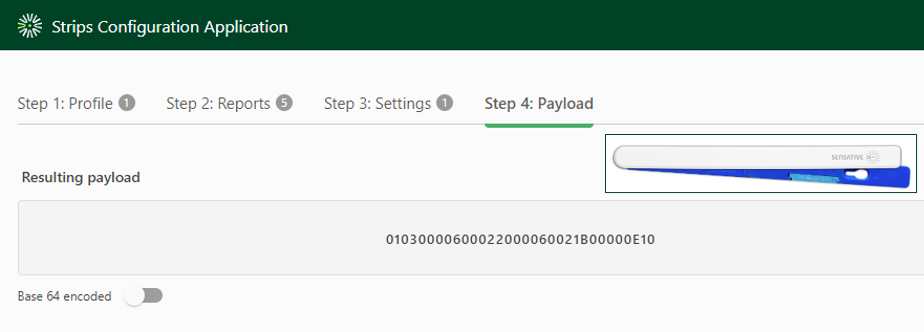
My “base” payload: 01 03 00006000 22 00006002 1B 00000E10
(Please note: The spaces contained here were only added to make the character blocks that belong together easier to read)
01 => The first two characters of my payload are the command just mentioned, which tells the sensor what kind of payload it is. As can be seen from the table, the 1 stands for “Set configuration values” (see line 304 point 2.3.1). The sensor thus knows that a configuration is to be carried out. The character blocks with the information required for the actual configuration follow. These in turn always consist of “ValueID” and “BitValue”. The 2-digit ValueID (corresponds to 8 bits) always specifies which value or which parameter is to be configured and the subsequent 8-digit BitValue (corresponds to 32 bits) then contains the actual value in each case.

03 00006000 => The second block of characters in the payload begins with ValueID 03, which according to the table stands for “Enabled sensors bitfield” (see line 319/320 point 2.3.2.1). The sensor thus knows that the following 8 characters (i.e. 32 bits) specify which reports are to be activated. In this case, the BitValue 00006000 follows, which in turn can only be formed by adding the BitValues of the “FloodReport” and the “FloodAlarm”, i.e. 00002000 + 00004000 = 00006000 (see line 433/434 point 2.3.2.2). The sensor thus knows that these two reports should be activated. The FloodAlarm ensures that the sensor sends a telegram as soon as it detects a leak. The FloodReport ensures that the sensor transmits the current status (leakage vs. no leakage) at regular intervals (depending on the stored value).


A little digression at this point: You might be wondering why there isn’t a 0x03 in the payload like in the table? Quite simply because the 0x only signals that this is a hexadecimal number. The actual value for the conversion always comes after the 0x and always consists of at least 2 characters.
22 00006002 => The third block of characters begins with the ValueID 22, which according to the table stands for “Combined sensors 1” (see line 318/382 point 2.3.2.1), i.e. the report group 1 (RG1) I previously created via the Configuration App (see Part 1 of this series of articles). The next 8 digits 00006002 then provide information about which reports are to be combined in this group. Since the last of these 8 digits is a 2, you know from the table that this is the “BatteryReport” (see line 421 point 2.3.2.2). The second value 6 can then be formed from the addition of “FloodReport” and “FloodAlarm” (see above).

1B00000E10 => The last character block begins with the ValueID 1B, which according to the table stands for “Flood report interval” (see line 367/368 point 2.3.2.1), i.e. the interval in which the sensor transmits the current status (leakage vs. no leakage). The following 8 characters then tell the sensor to which value the interval should be set. In this case to 0x0E10, which corresponds to 3,600 seconds in the decimal system.

The “base” payload is now decrypted. But how can the still inactive magnetic sensor be activated? For this you have to take a look at the table again. This shows which values correspond to the reports available for the magnetic sensor. You basically have the option here, e.g. set only the “DoorAlarm”, only the “DoorReport” or both. You’re wondering what the difference is? The DoorAlarm ensures that the sensor only sends when a door, window or gate is/was opened. The DoorReport, on the other hand, ensures that the current status is regularly transmitted at a defined interval, regardless of whether it is open or closed. In my case, I decided on both, which is why I had to add the values of the two together in the same way as above, which resulted in a bit value of 00000600. This value must now be inserted in the payload from above. However, in order not to deactivate the other reports again, the value 00000600 must not simply be inserted into the payload, but added back to the current value. In this case, the character block 22 00006002 becomes the block 22 00006 6 02.
In my case, the final payload that must now be sent to the sensor as a downlink to change the configuration is: 0103 00006000 22 00006602 1B 00000E10.
How exactly you can send such a downlink to your sensor is shown in the blog post “ ZENNER Datahub Howto: Sending Downlinks”.
Do you have any questions or suggestions on this topic? Then please leave a comment!
Recommend0 recommendationsPublished in Operating Aids, Sensors


Responses