ZENNER Datahub Howto: Automated Processes with the RuleEngine

Last modified on 15th April, 2024
Do you need automated processes for your IoT use case when certain states occur? With the ZENNER Datahub RuleEngine you can implement this quickly and easily.
What is the ZENNER Datahub RuleEngine?
The RuleEngine is a central component of the ZENNER Datahub and allows you to define complex rules and logic that are automatically executed when certain events or conditions occur. How exactly you can set up such rules, we will show you step by step below.
How can new Rules be created?
Step 1: Navigating to the RuleEngine
After logging in to your ZENNER Datahub client, click on the “Rules” item in the left sidebar.
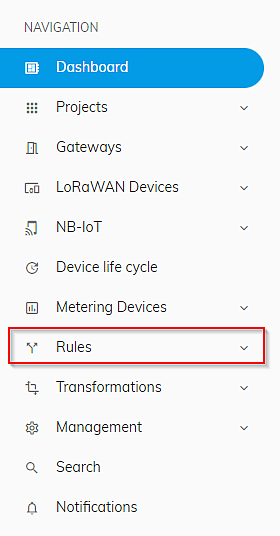
Here you can view and edit all the rules that have already been created in the “List” and create new rules.
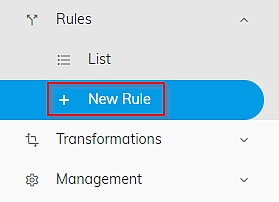
Step 2: Creating and setting up the Rule
We will now show you how to create and set up a new rule using a concrete example. In this case, the goal was to control a signal light connected to a smart radio-controlled socket via the opening status of a monitored door. As soon as the door sensor signals that the door has been opened, a downlink should go to the radio socket via the ZENNER Datahub in order to switch it on. Conversely, another downlink when the door is closed again.
To create a new rule, simply click on “New Rule” on the left.
In the first step, you assign a meaningful name in the “General Information” tab. This is used for better differentiation and clear assignment. As soon as you click “Save“, the ID and the forward rule are generated automatically, so you don’t have to fill in these fields manually.
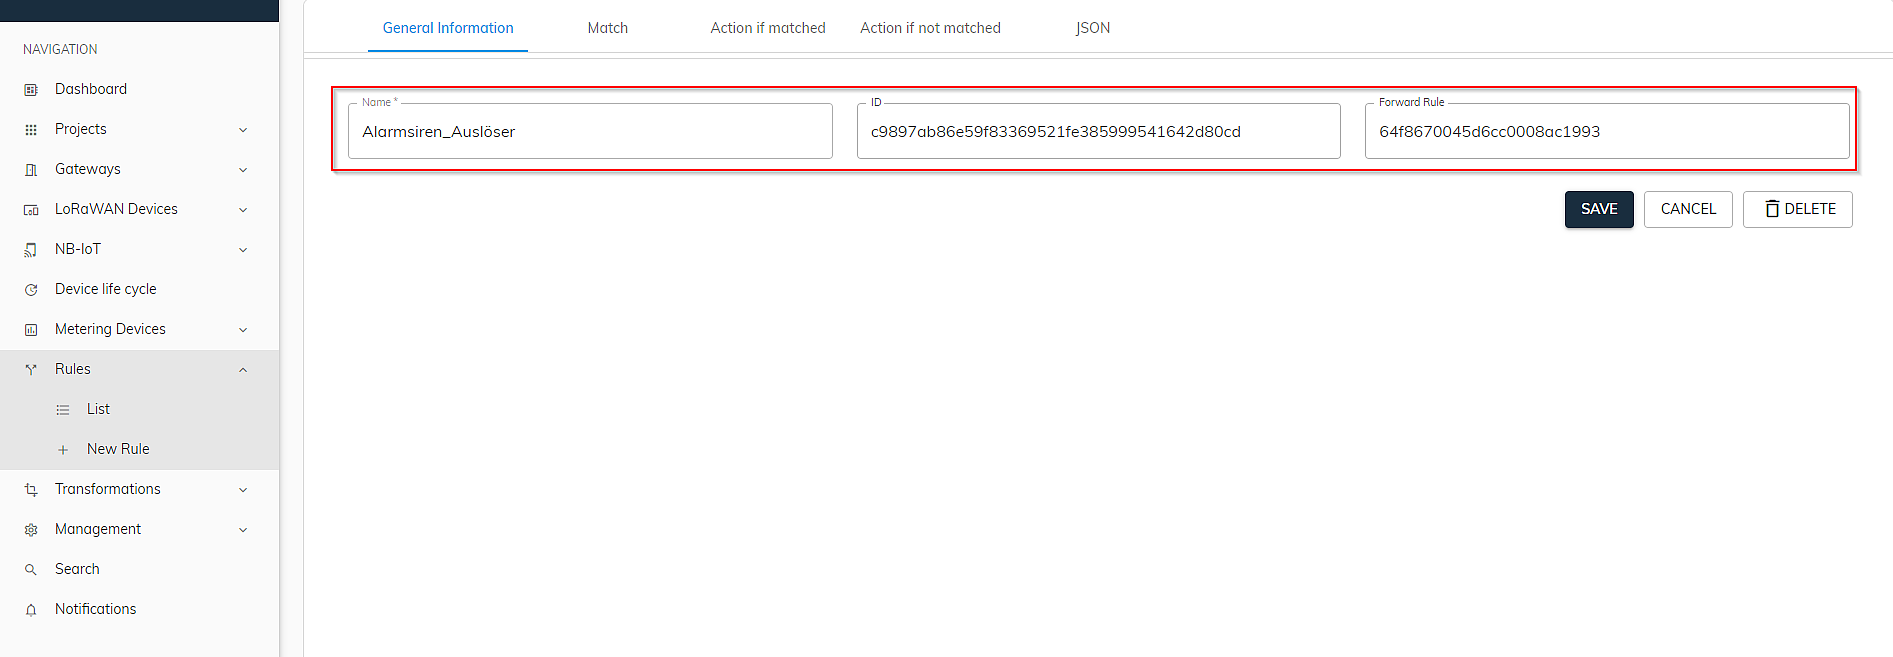
After successfully creating the new rule, it is now time to fill it with life and configure it accordingly. This is done via the additional tabs “Match”, “Action if matched”, “Action if not matched” and “JSON”.
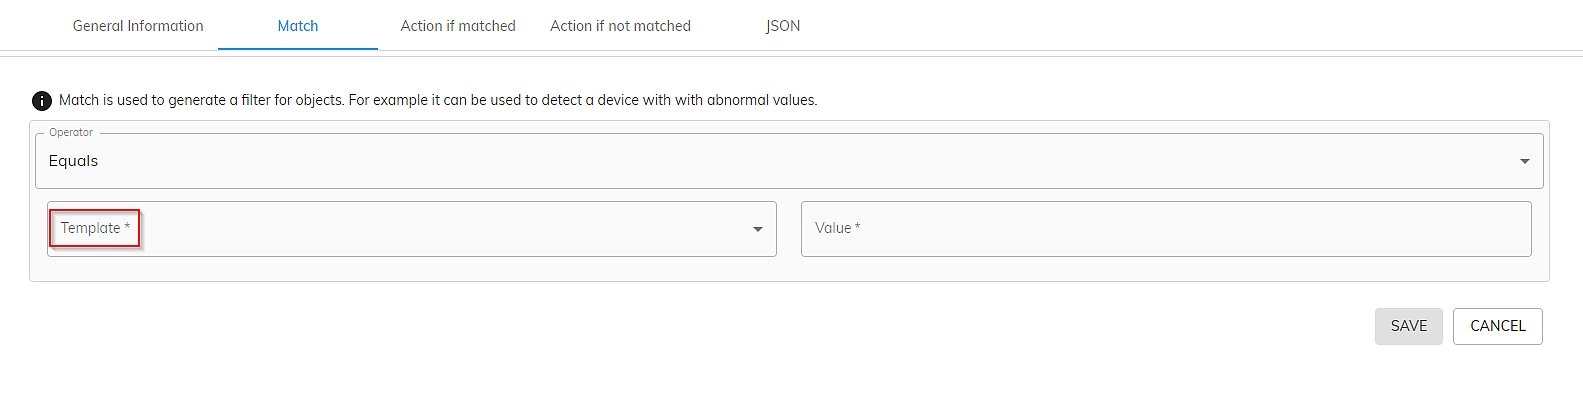
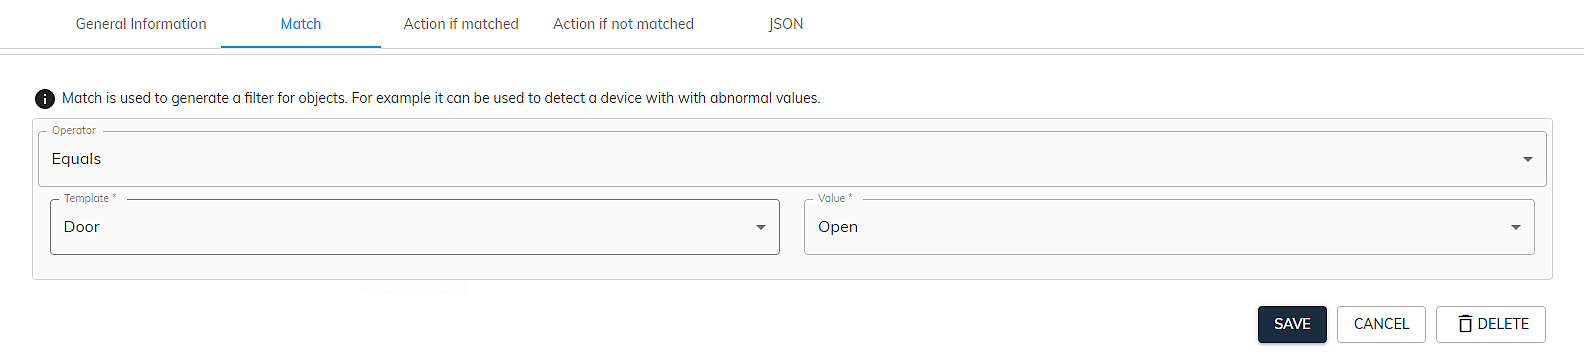
Step 2.1: Set a Match
Next, you define the so-called “match”, i.e. which condition is to be checked or fulfilled.
In this case, it should be specified that a downlink is sent to the socket when the door is opened.
Operator:
To do this, you first select the appropriate operator. You can currently choose from the following:
- AND
- OR
- Less than
- More than
- Equals
- Exists
In this case, the Equals operator was selected, i.e. a comparison as to whether the sensor has a certain value (is equal to x).
Templates:
Here you select what or which field the operator should check. There are currently a few predefined templates available for this. In this case, the “Door” template could simply be used.
If there is no suitable template for your own use case, you can also use “Custom” here. You then manually specify the path for which field is to be checked. You can find the correct path in the JSON file of a transmitted data packet.
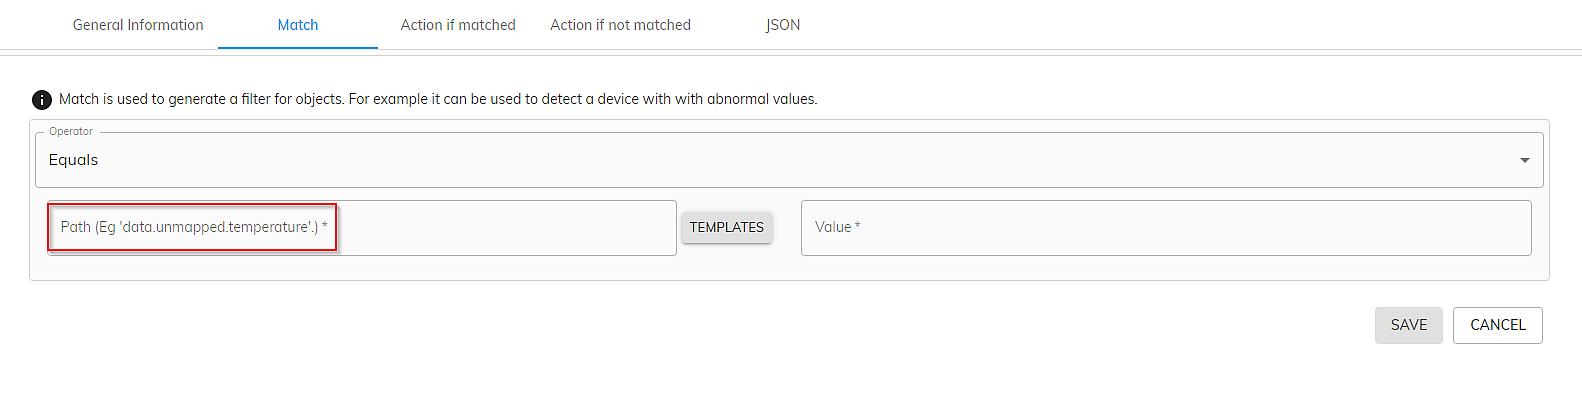
Value:
Here you set the value that must be given for the rule to be triggered. In this case, the value Open was stored.
In this case the whole thing then looks like this:
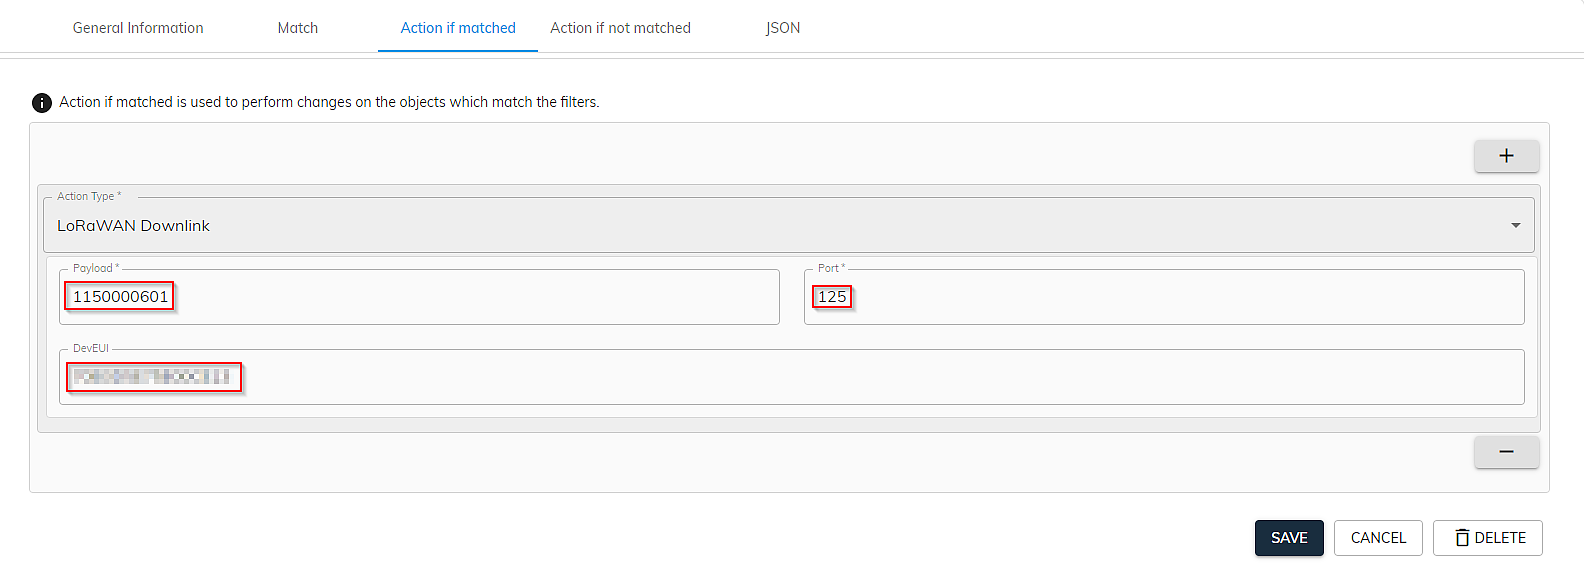
Step 2.2: Set Action if matched
In the “Action if matched” tab, it is now a matter of determining which action should be carried out if the query is successful, i.e. there is a match. In this case, when the door is open or opened.
To create a new command, you must first click on the + icon on the right, since theoretically several actions/commands are possible at the same time.
You then select the appropriate action type. In this case LoRaWAN downlink, since such a link should be sent to the radio-controlled socket (smart plug) when the door is opened.
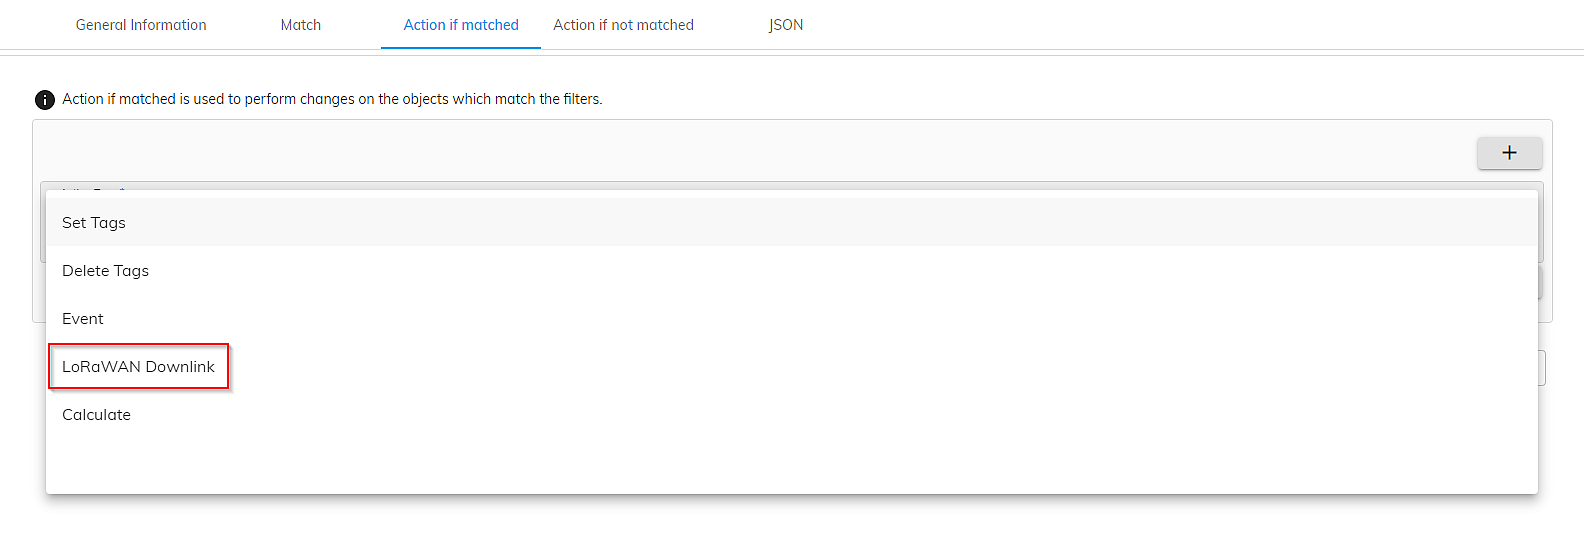
A new mask will now open in which the following fields must be filled:
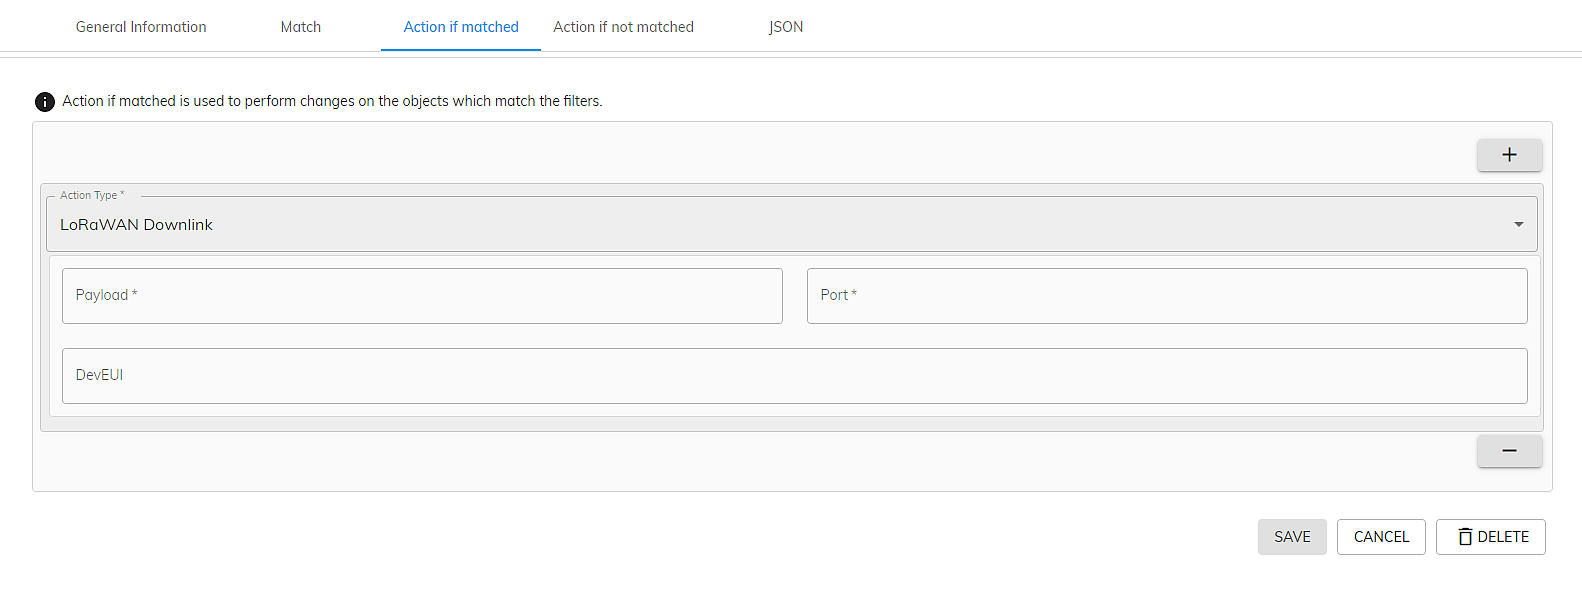
Payload:
The payload is the code for the action you want the sensor to perform.
Since the payload differs depending on the device and is unreadable for us in its raw hexadecimal form without further information, you must take this from the payload description, which can be found online or in the manual depending on the device. Some manufacturers also simplify this and provide a corresponding payload/downlink generator for this purpose.
In this case, the correct Payload is: 1150000601, see also https://support.watteco.com/smartplug/ under the point Frame Examples -> Standard Report -> Configuration -> „Power or cut power to the electric device plugged into the SmartPlug“.
Port:
The port differs depending on the device. This must also be researched in advance. In this case, the socket port number is 125.
DevEUI:
The DevEUI is the unique address of the device to be controlled, comparable to the MAC address of a computer or gateway. In this case the wireless socket. Where the DevEUI can be found always depends on the manufacturer or supplier. With this device, it is located directly on the housing.
In summary:
The payload specified what the sensor should do for an activity, with the port and the DevEUI to which device the command should go.
Step 2.3: Set Action if not matched
This is about the action to take if the query is unsuccessful.
The structure of this tab is identical to the previous one. First click the + icon on the right again and then select the desired action type. Here it is also possible to create several actions for one rule. In this case it is again a LoRaWAN downlink.
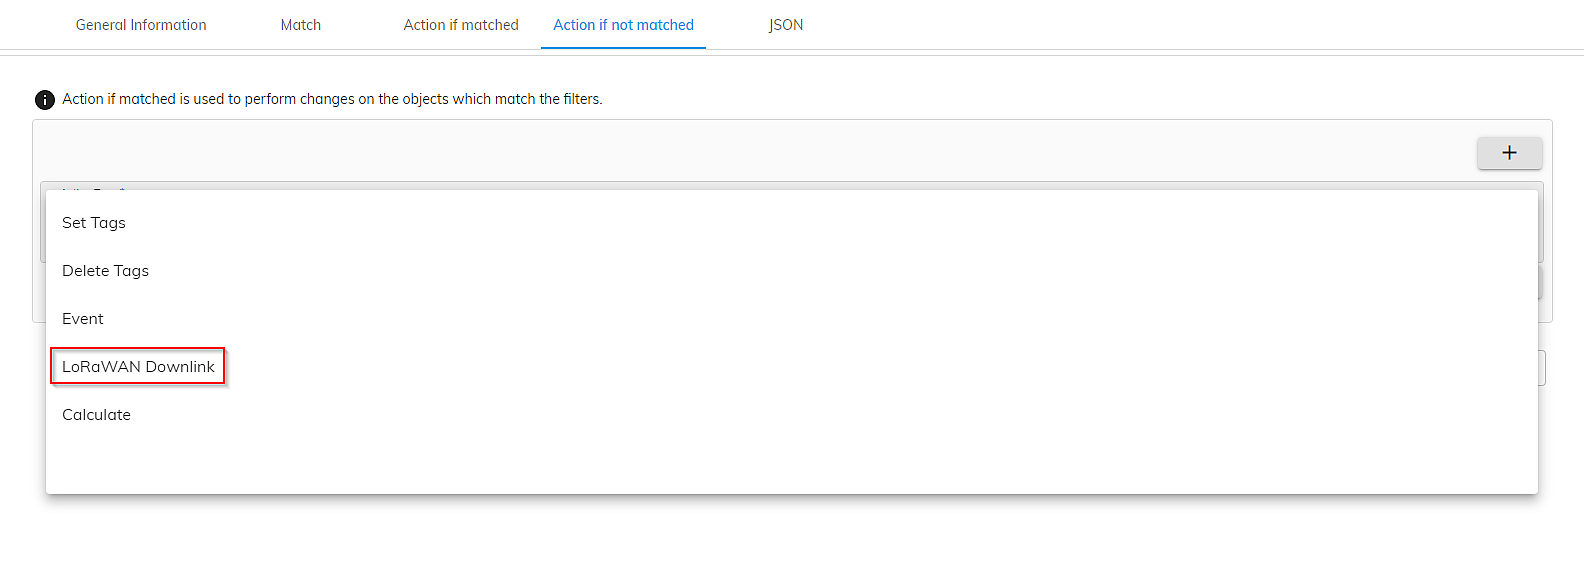
The DevEUI remains the same, the socket should still be controlled.
However, the payload required for this command is different and is: 1150000600 (previously …601)
The port is again the same as before: 125
This time the payload ends at …600 because another command is to be sent to the socket. The payload …600 states that the power of the socket should remain off or should be switched off, so the signal light is not triggered either.
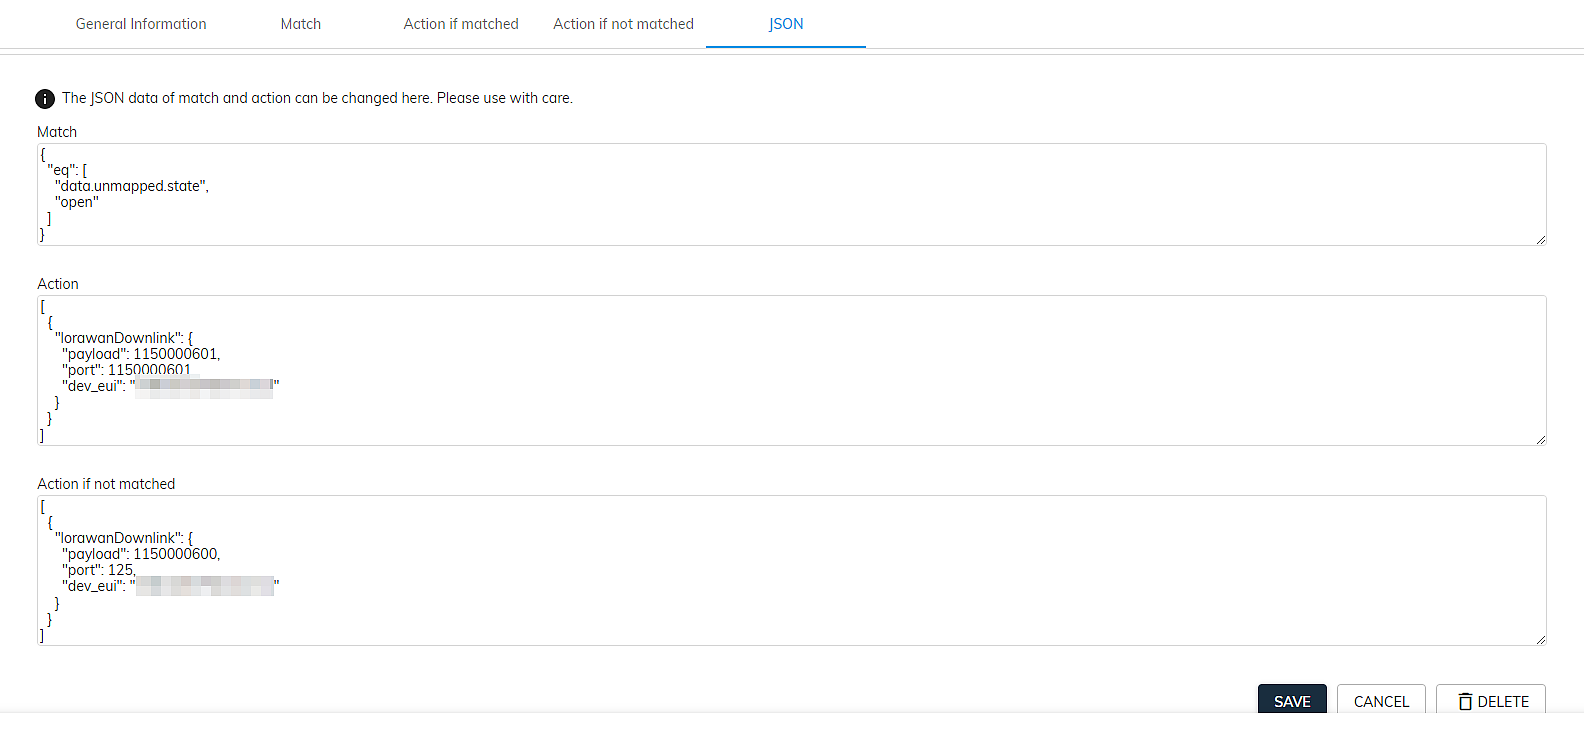
Step 2.4: Check JSON Code
The last step to set up the new rule is done in the “JSON” tab. This shows how the data is forwarded to the devices in JSON format. So you can check your data again here and make any manual improvements.
In this case, the JSON code is a bit more complex and looks like this:
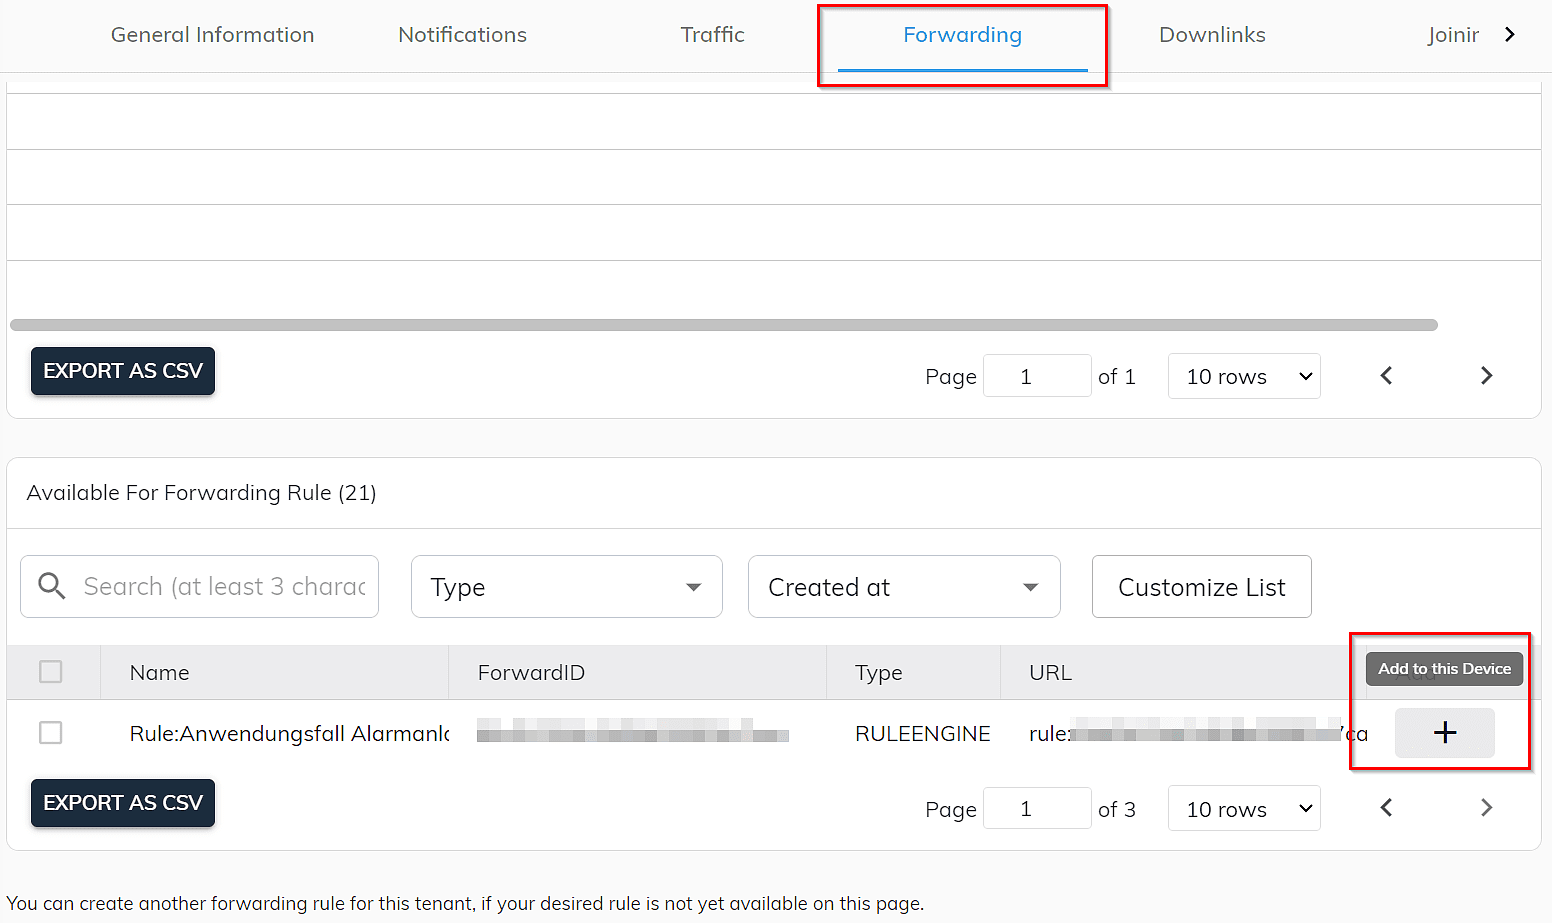
Step 2.5: Assign Rule to triggering Sensor
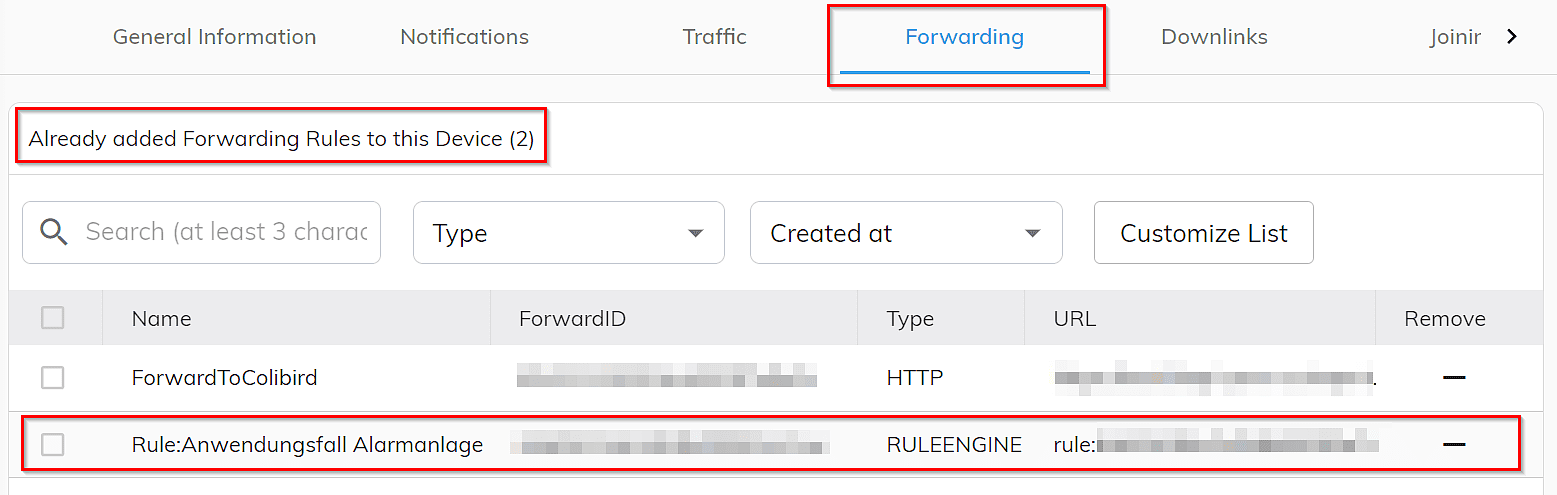
The final step is to assign your rule to the triggering sensor, i.e. the sensor to which the match from step 2.1 should apply. To do this, go to the relevant device via the “Devices List”, switch to the “Forwarding” tab and add the relevant rule using the plus sign at the bottom right. It will then appear at the top of the list of forwarding rules already added to this device.
So you now know how you can create rules for automated processes/actions with the ZENNER Datahub RuleEngine. Do you have any questions or ideas for improvement? Then simply leave a comment below or send us a direct message. The same applies if you want to know how the whole thing also works via API via the inventory/rule endpoint.


Responses