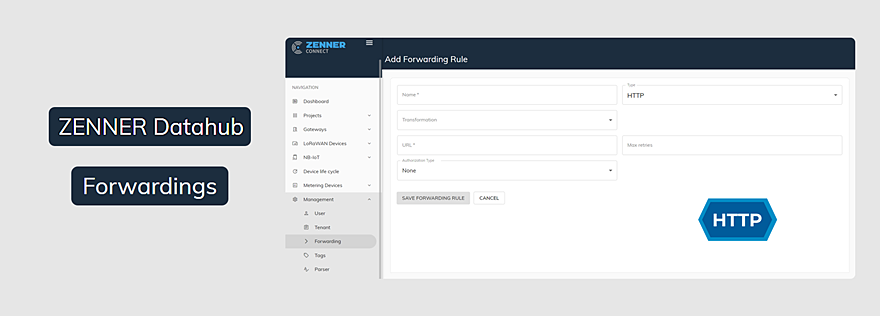
ZENNER Datahub Howto: Setting up Forwardings using HTTP as an example
1. General
The ZENNER Datahub supports various network protocols for forwarding traffic from your end devices, which you can select based on the requirements and architecture of your target system. The following describes how to configure the HTTP and AMQP forwarding methods within the platform and what to consider when using them.
2. Setting up Forwarding
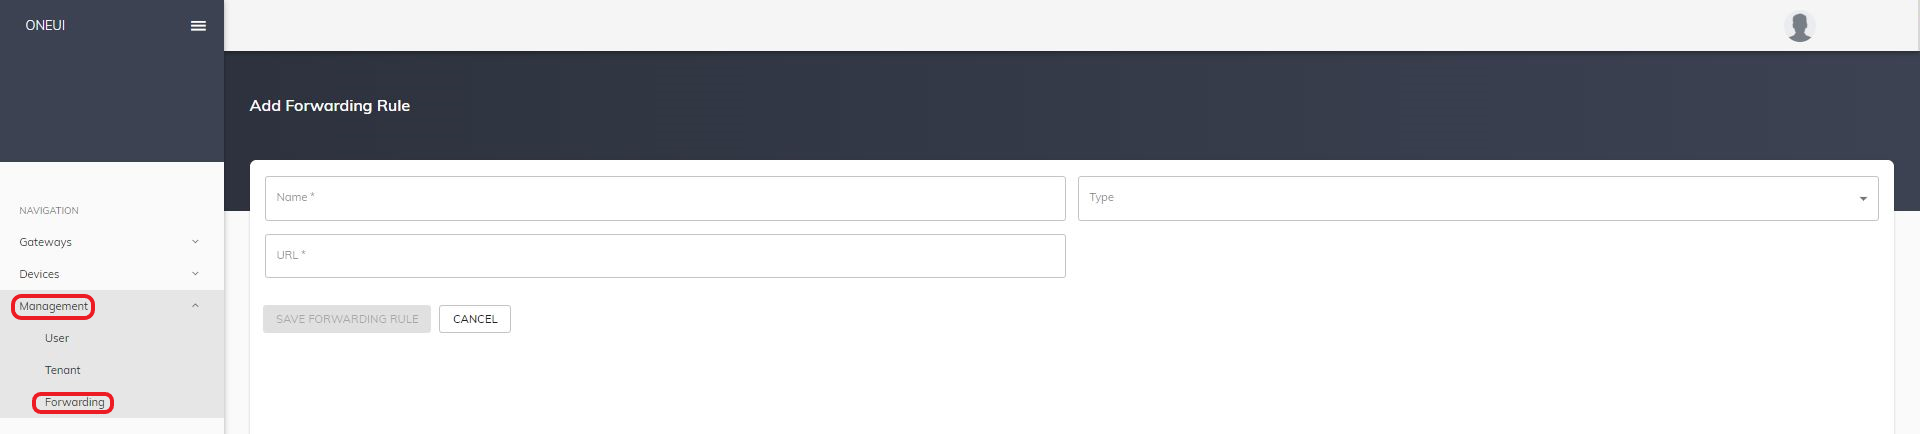
Regardless of the type of forwarding, you must initially set it up once in the menu item “Management” under “Forwarding” by clicking on the button “Add new forward rule” with the access data of the endpoint.
2.1 HTTP Forwarding
2.1.1 General
The prerequisite for using http forwarding is an endpoint accessible from the Internet with a static IP address/URL. If the forwarding rule is active, the platform sends an http POST to the stored URL for every incoming telegram. In the body of this POST there is a json object with the user data and the meta information of the reception. This is structured as follows:

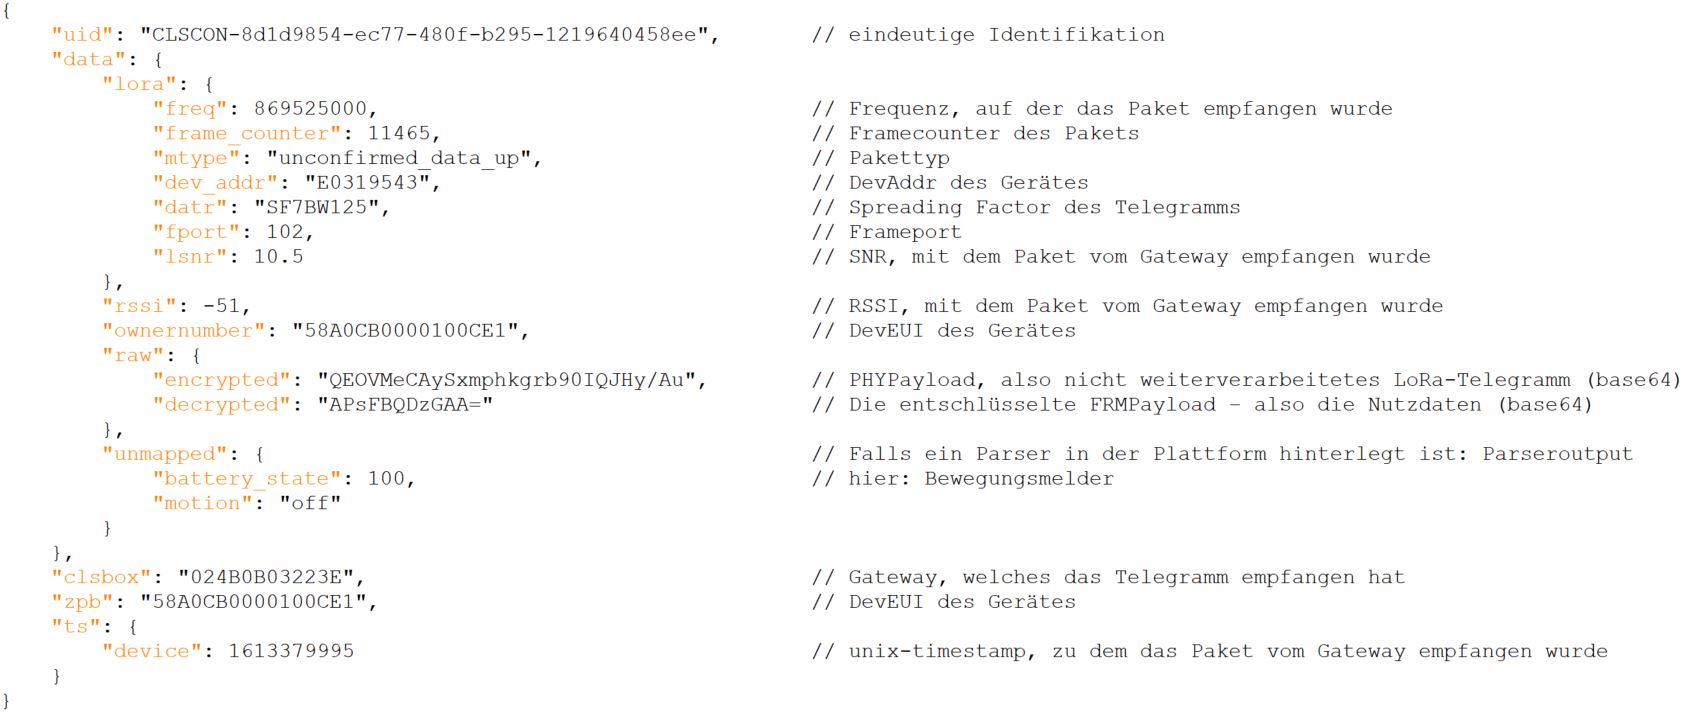
Further, more in-depth meta information has been hidden in the image above for better clarity.
2.1.2 Configuration of the Platform
After clicking on “Add new forward rule” you can freely enter a desired name in the “Name” field in the mask that opens. “HTTP” is selected as the type. You also need to enter the target URL of your own endpoint. This is made up as follows, depending on whether authentication to the endpoint is desired or not:

You then need to assign the forwarding to the desired devices (see section 3: Assigning the forwarding)
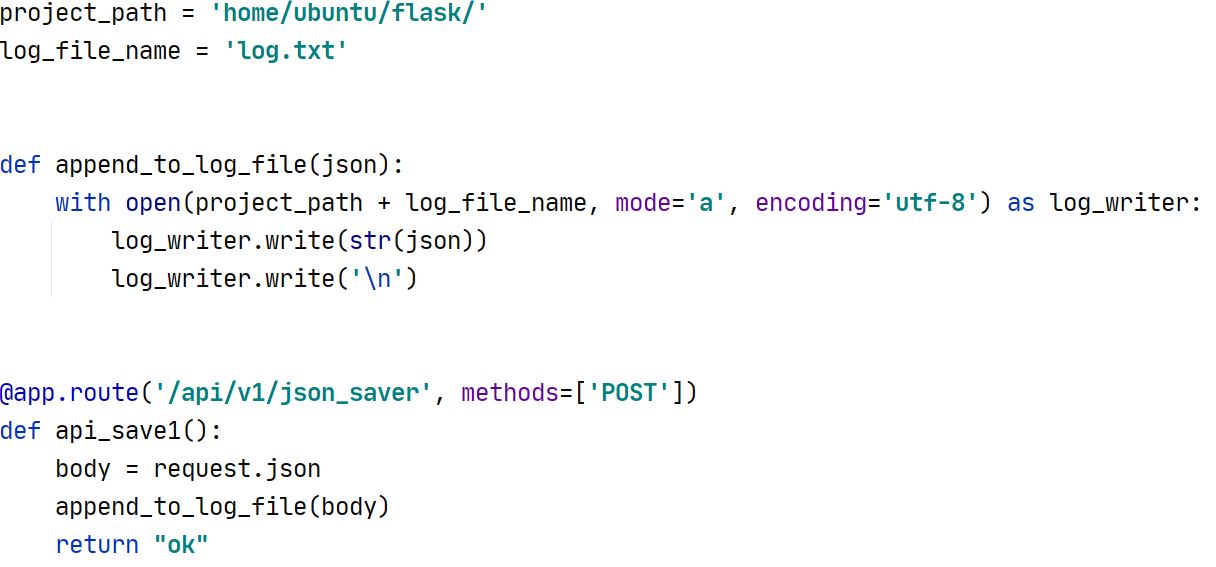
2.1.3 Usage Example with Flask
A simple way to use HTTP redirection is to set up an API endpoint with Flask. With just a few lines of code, you can define a target URL and further process the contents of the POST body in your own Python code. In the Python example shown, each received JSON document is written to a log file.
In principle, however, all options are open to you – from caching, for example, in a MongoDB, to directly triggering an action when a specific telegram arrives.
2.2 AMQP Forwarding
2.2.1 General
If AMQP forwarding is configured, the platform publishes telegrams to a broker provided by the user, such as rabbitMQ. This must be accessible from the Internet and have a static IP address/URL.
The platform always publishes to a previously set up broker exchange. This exchange can in turn be linked to one or more queues. The data from these queues can be subscribed for further processing.
The individual telegrams are published by the platform as a json object. The objects are structured as follows:
Additional meta information has been hidden in this screenshot for clarity.
2.2.2 Configuration of the Platform
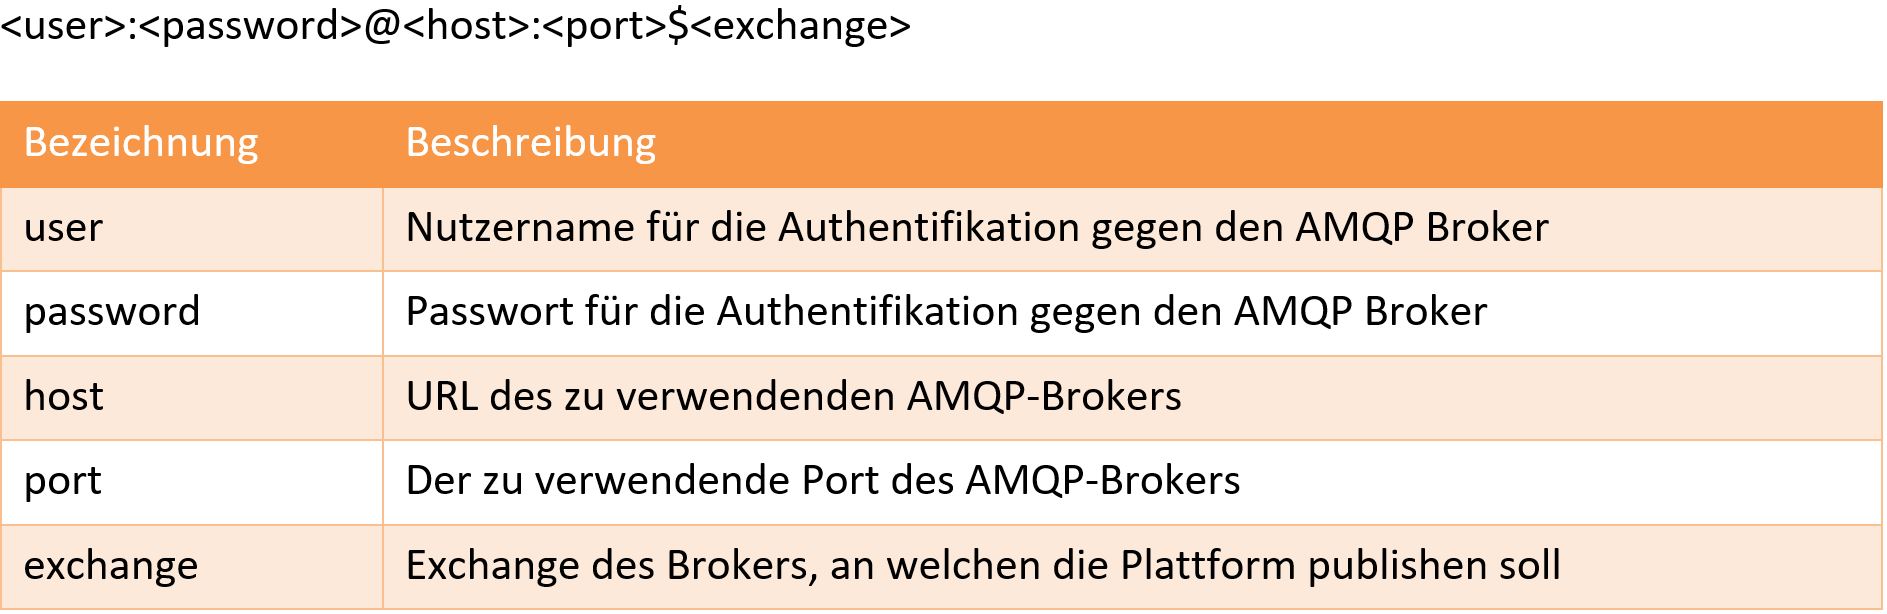
After clicking on “Add new forward rule” you can freely enter a desired name in the “Name” field in the mask that opens. “AMQP” is selected as the type. You must also enter the broker’s target URL. This is made up as follows:
You then need to assign the forwarding to the desired devices (see section 3: Assigning the forwarding)
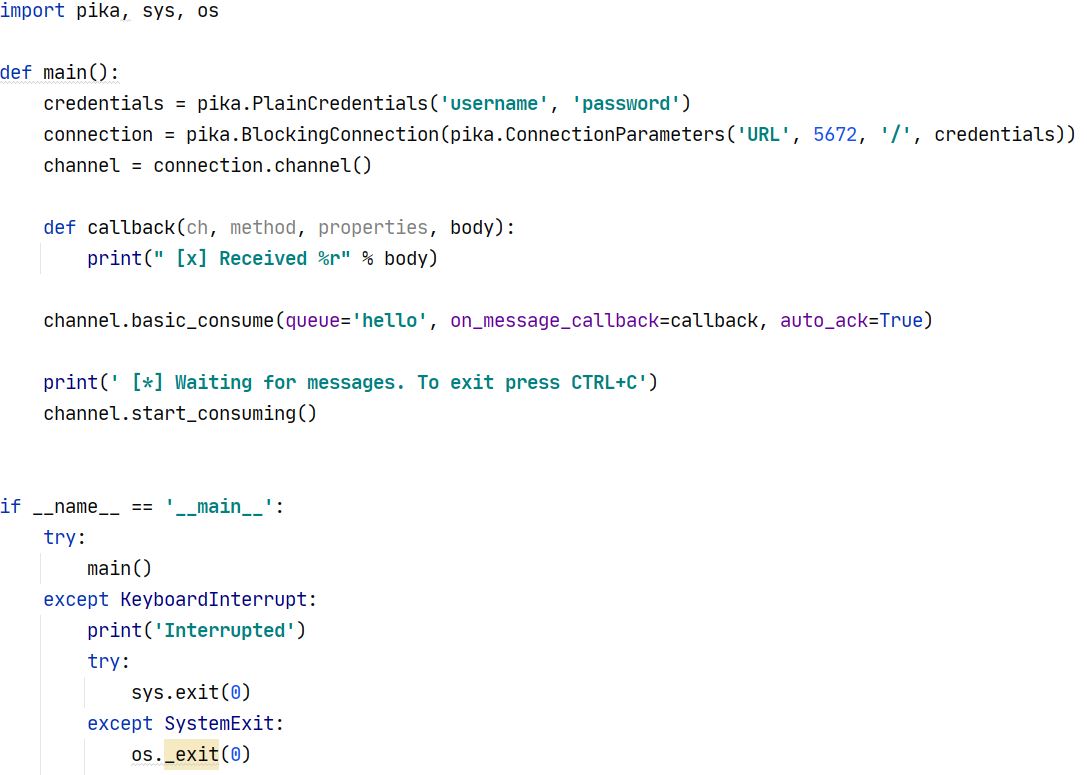
2.2.3 Subscribing to the Broker
A suitable AMQP client is required to be able to receive the messages.
For example, as a client pika can be used. The following sample Python script accepts and acknowledges all messages from the “hello” queue:
3. Assigning the forwarding
There are two different ways to use forwarding or assign it to devices:
3.1 Assignment to all devices of an account/tenant
All incoming telegrams from devices within your account/tenant will be forwarded. To set this up, click “Add” under the “Management/Forwarding” menu item for the rule you created in the previous section.
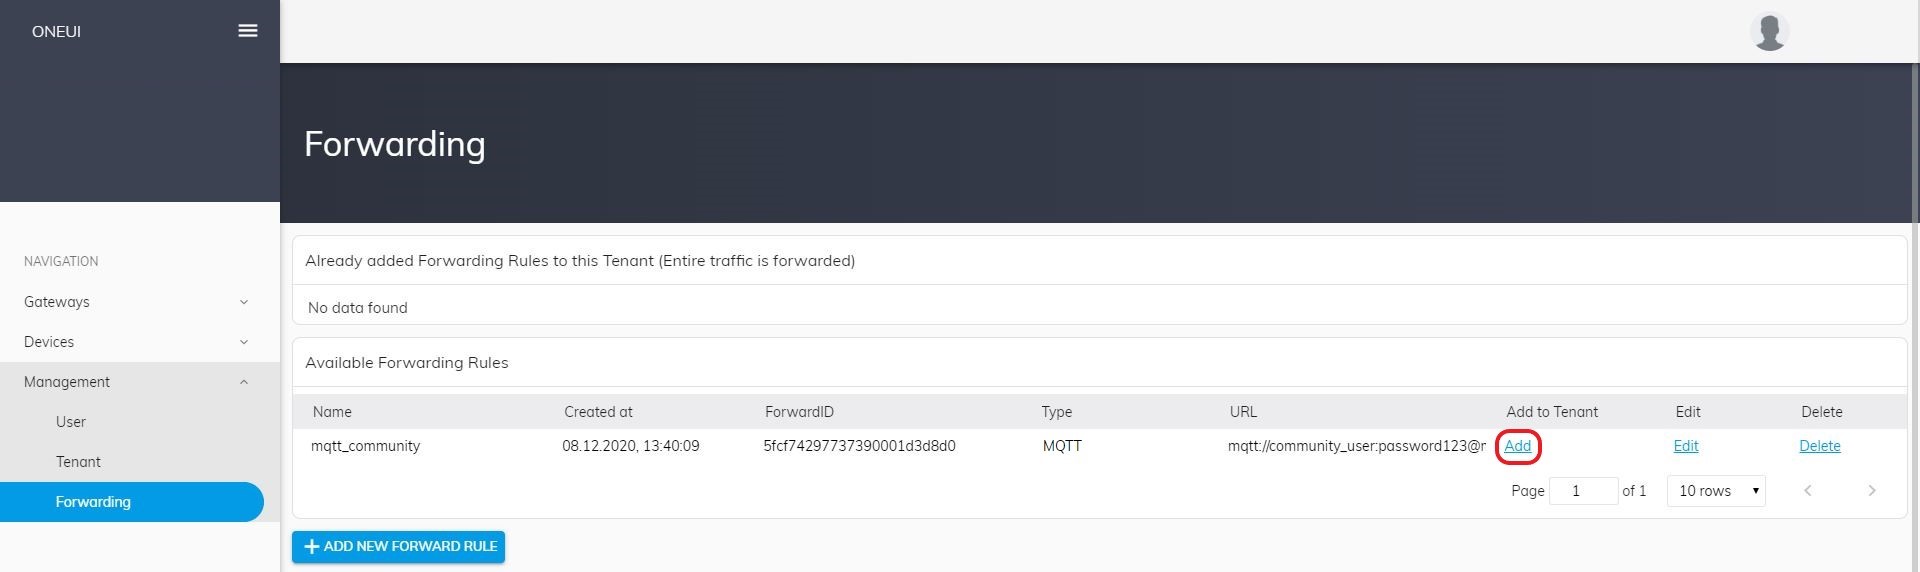
The new rule is then displayed under “Already added Forwarding Rules to this Tenant” and can be deactivated again if necessary via “Delete”.
3.2 Assignment to individual devices of an account/tenant
As an alternative to a global forwarding, you can also assign the forwarding rule to individual devices. To do this, switch from the device list to the detailed view of the desired device. In the “Forwarding” tab, you can then activate the rule for the respective device by clicking the “Add” button.
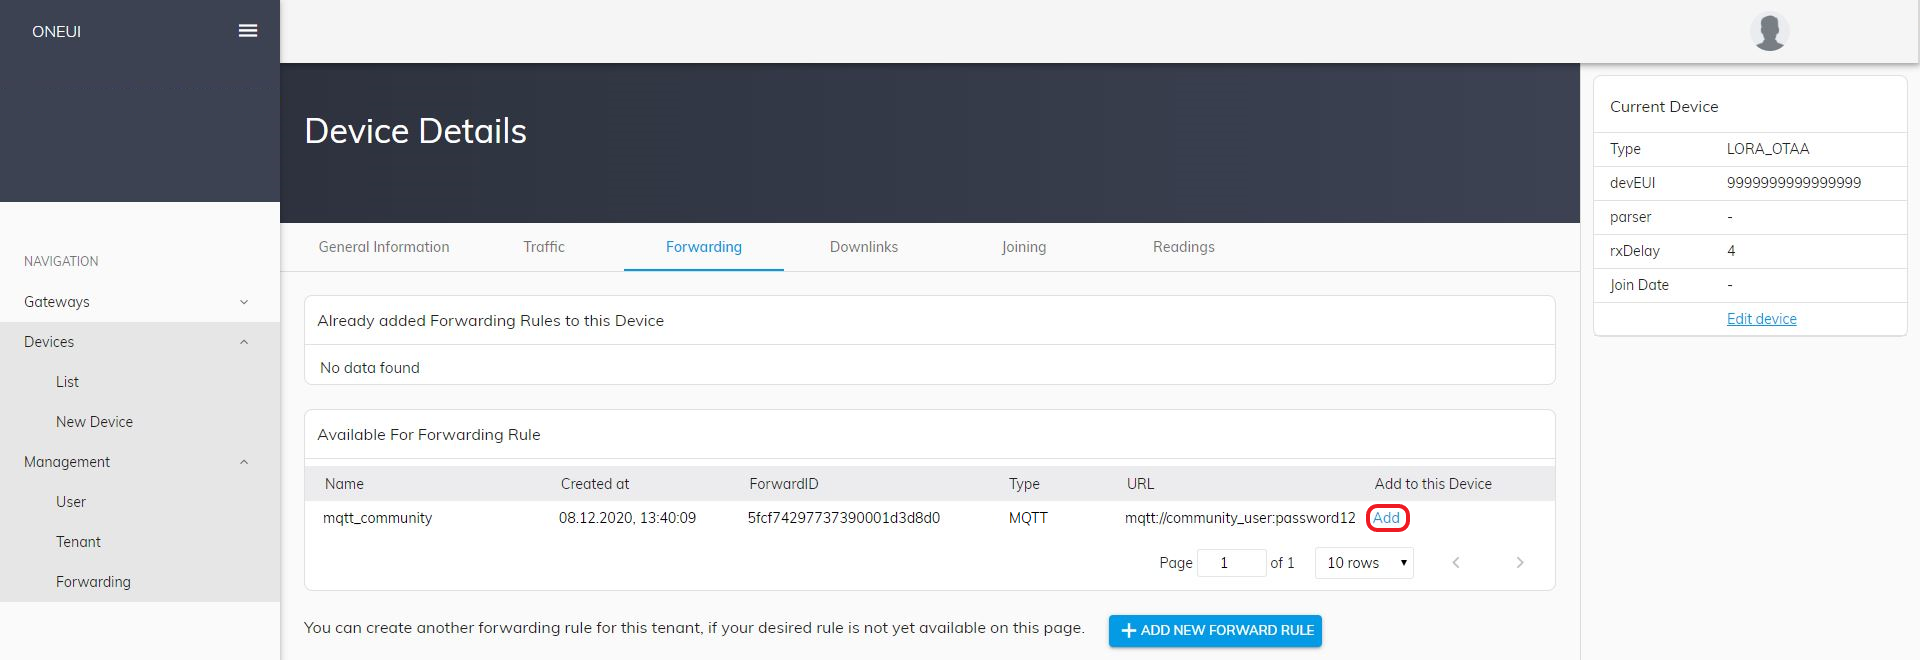
Existing entries are displayed under “Already added Forwarding Rules to this Device” and can be deactivated again via “Delete”.
The platform also supports authentication using “Basic Authentication”. Username and password must be passed in the following notation:
https://<user>:<password>@<host>:<port></basic/topic>


Responses